With Onshape’s Sheet Metal tools, we felt it was necessary to capture not only the engineering information, but also the important manufacturing information that you need to make the sheet metal part. One important element of capturing that manufacturing info is the Sheet Metal Table and Flat View.
The Sheet Metal Table and Flat View allows you to visualize your sheet metal part in three different ways, simultaneously. This means when you add a new feature to your part in the folded model, both the flat view and sheet metal table update instantly. “But what about defining the bend order?” you ask. Let’s take a look.
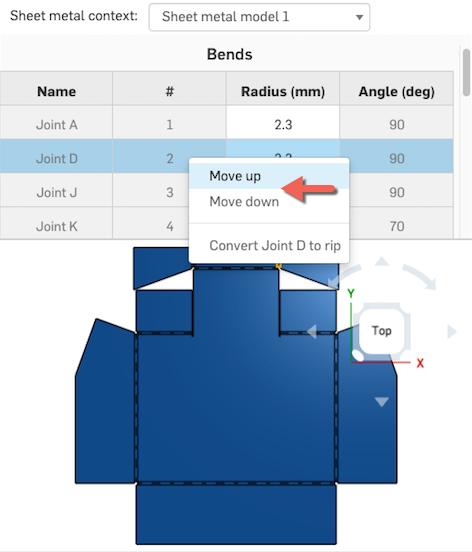
Once you’ve determined the order of bends for a particular part, setting this bend order in Onshape is easy. Simply right-click a joint in the Sheet Metal Table, and you will see options to “Move up” and “Move down.”
By moving joints up and down in the Sheet Metal Table, you can capture your bend order right inside the Onshape Document. No need for separate software or files.
Tip: The easiest way to find which bend corresponds to which joint is to left-click the bend on the folded or flat view. The joint will automatically highlight in the Sheet Metal Table. You can also left-click the joint in the Sheet Metal Table, and it will highlight the corresponding bend.
So that’s it! Adding that important manufacturing information into Onshape means that it stays with the rest of the project and also updates when the design changes. But probably the biggest benefit is the fact that you can come back to this part months or years later and understand how it was made.