2:21
In a product update last week, we added one of our most highly requested improvements – and in usual Onshape fashion, we’ve done it in a way that is unique. Let’s take a closer look at this fresh approach to exploded views.
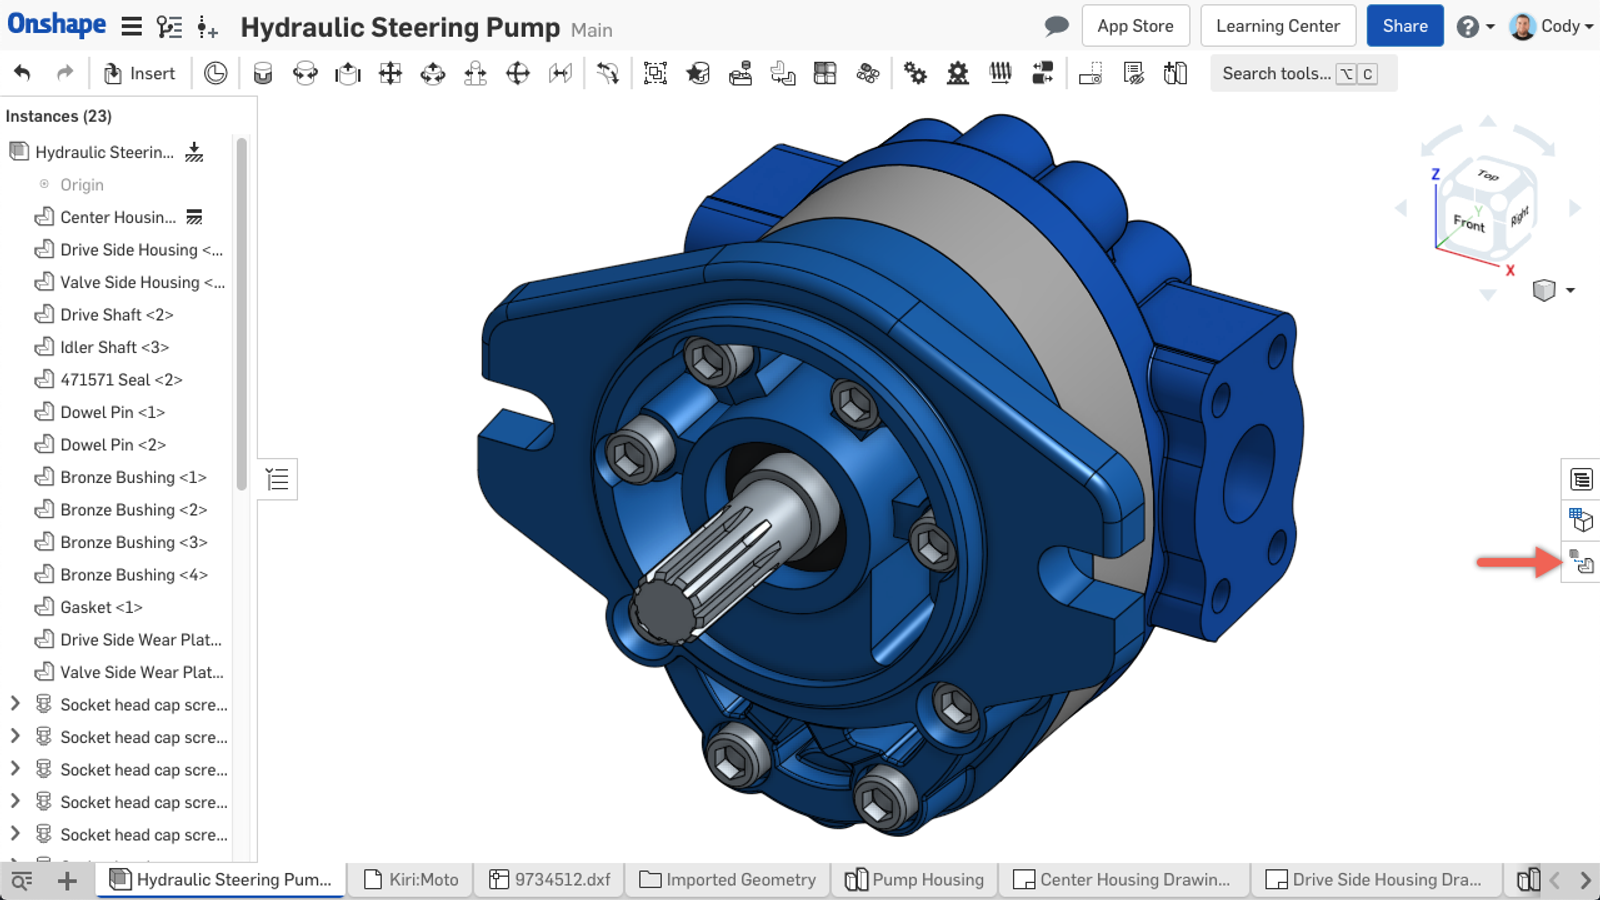
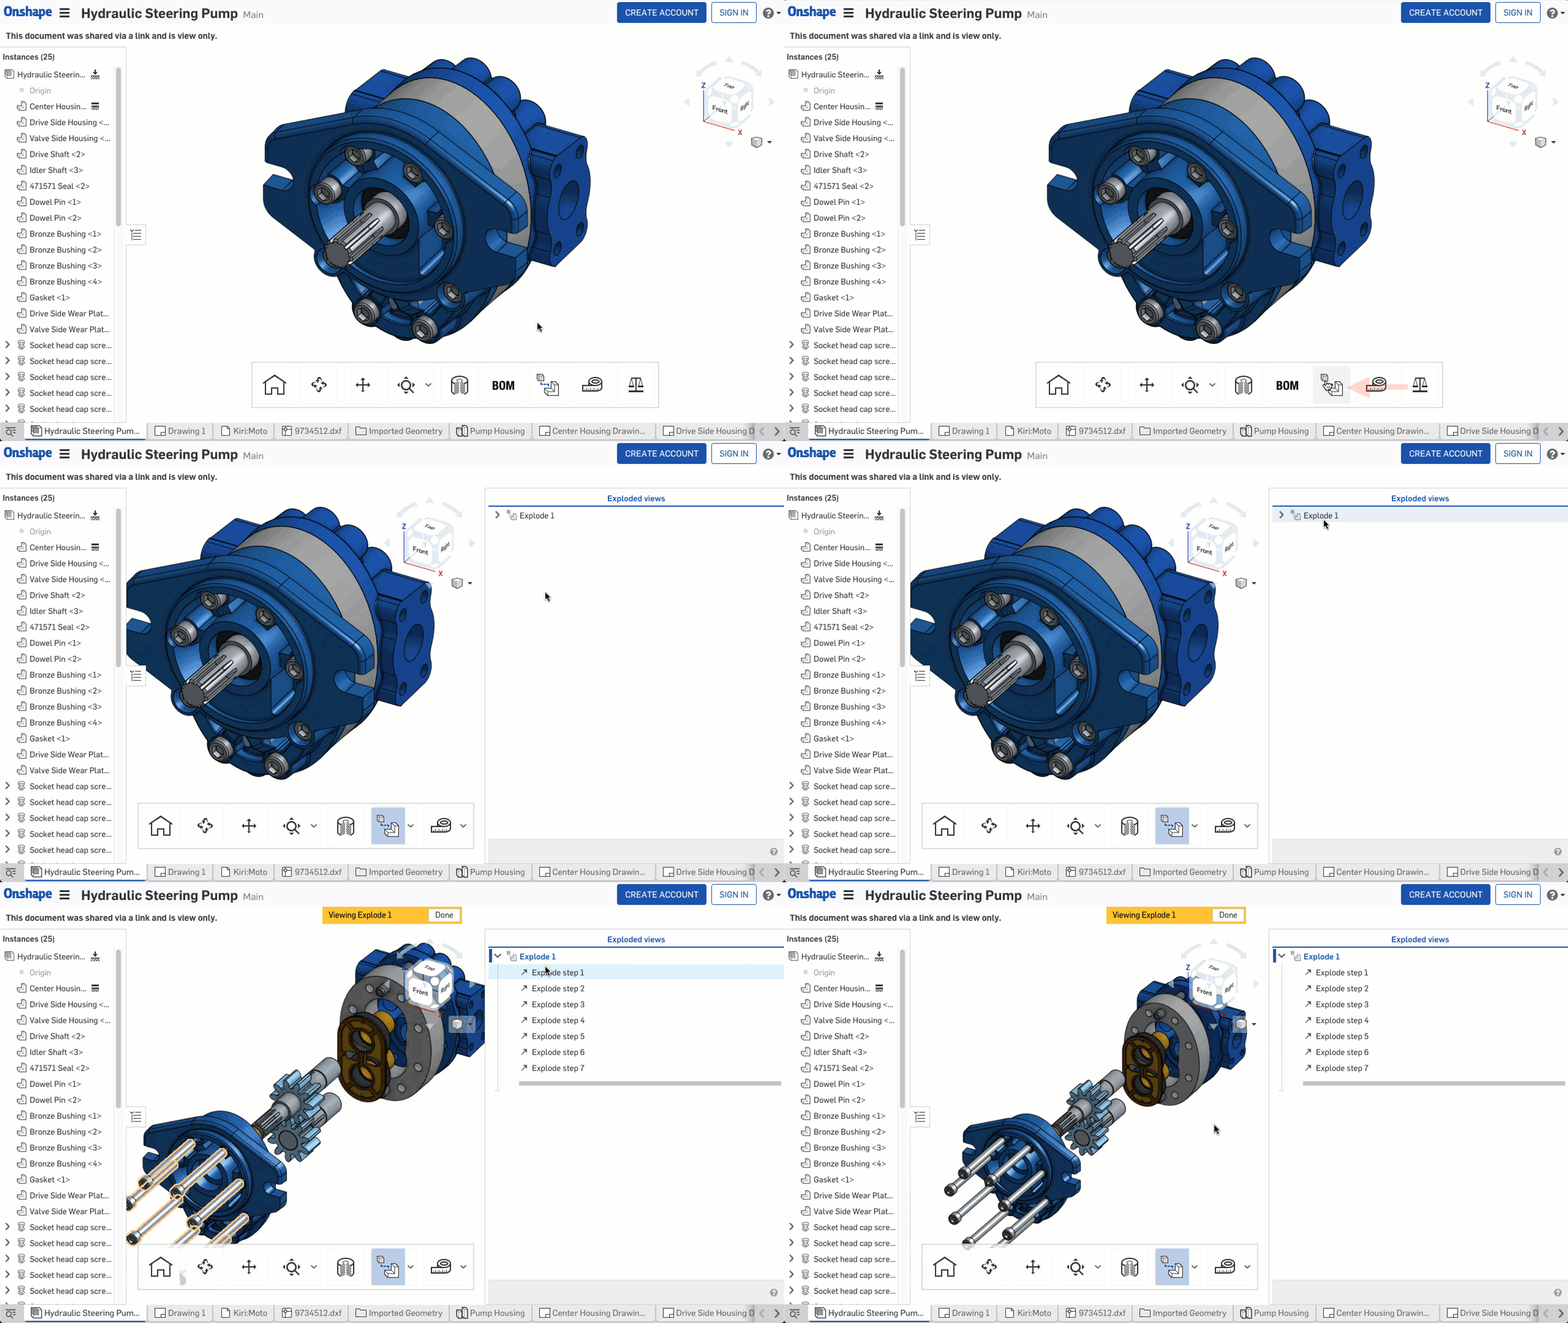
To get started creating an exploded view, click the exploded view flyout button on the right side of your assembly.
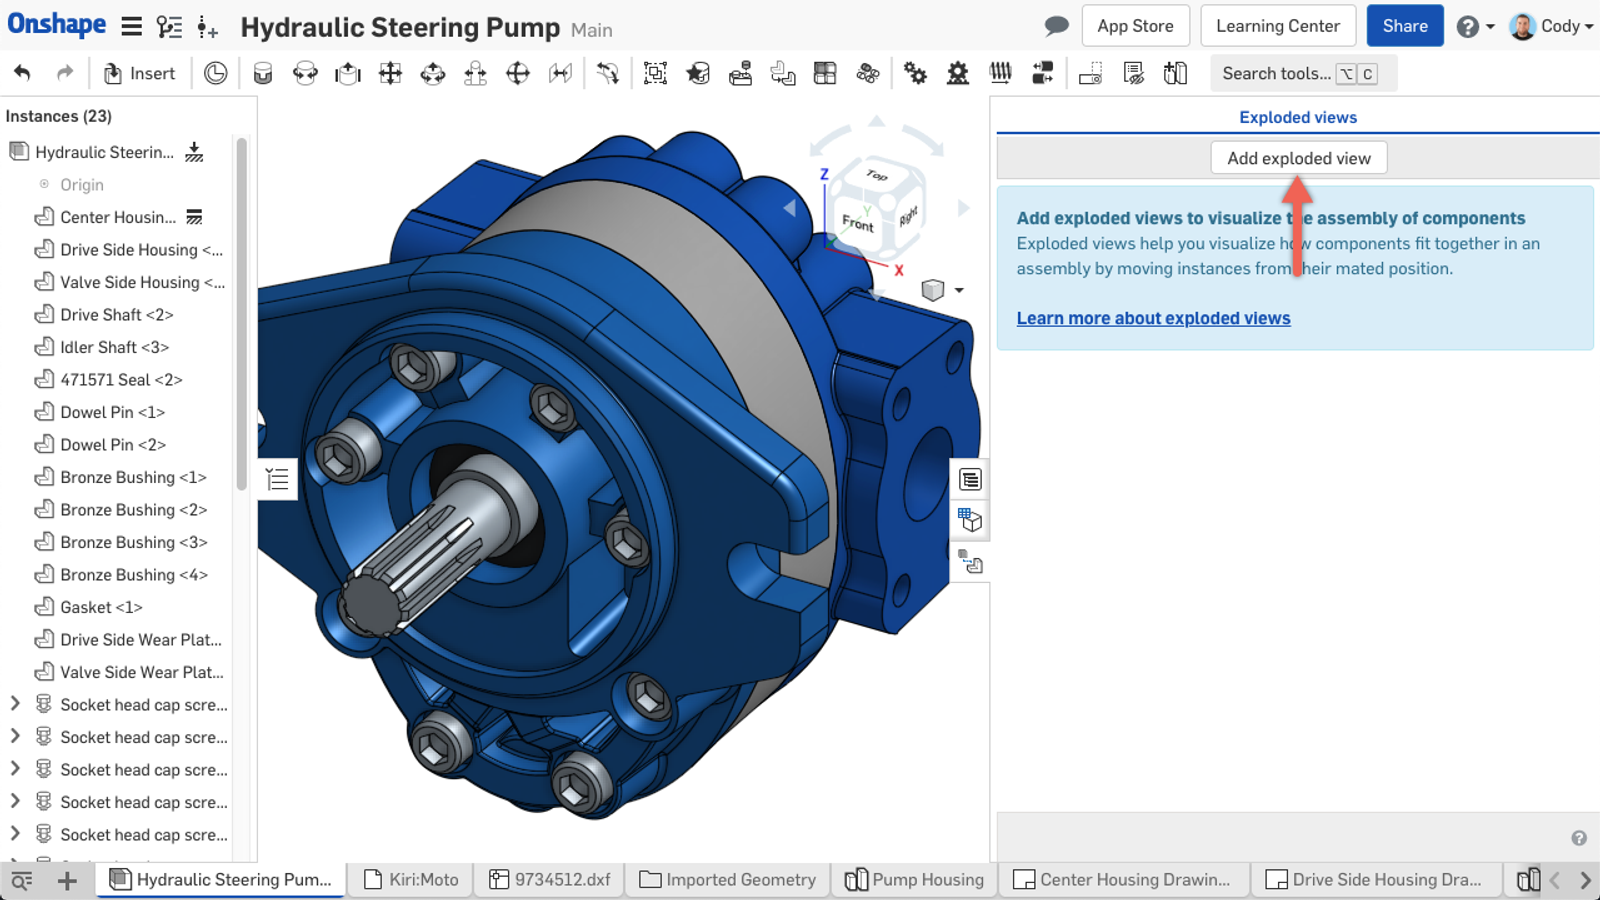
This will open the exploded views flyout. This is where you will manage all of the explode steps that make up your exploded view. To get started, click “Add exploded view” at the top and you can begin to add your explode steps.
To create your first explode step, click the part or parts that you want to explode. Then using the triad manipulator, drag the parts into their exploded positions.
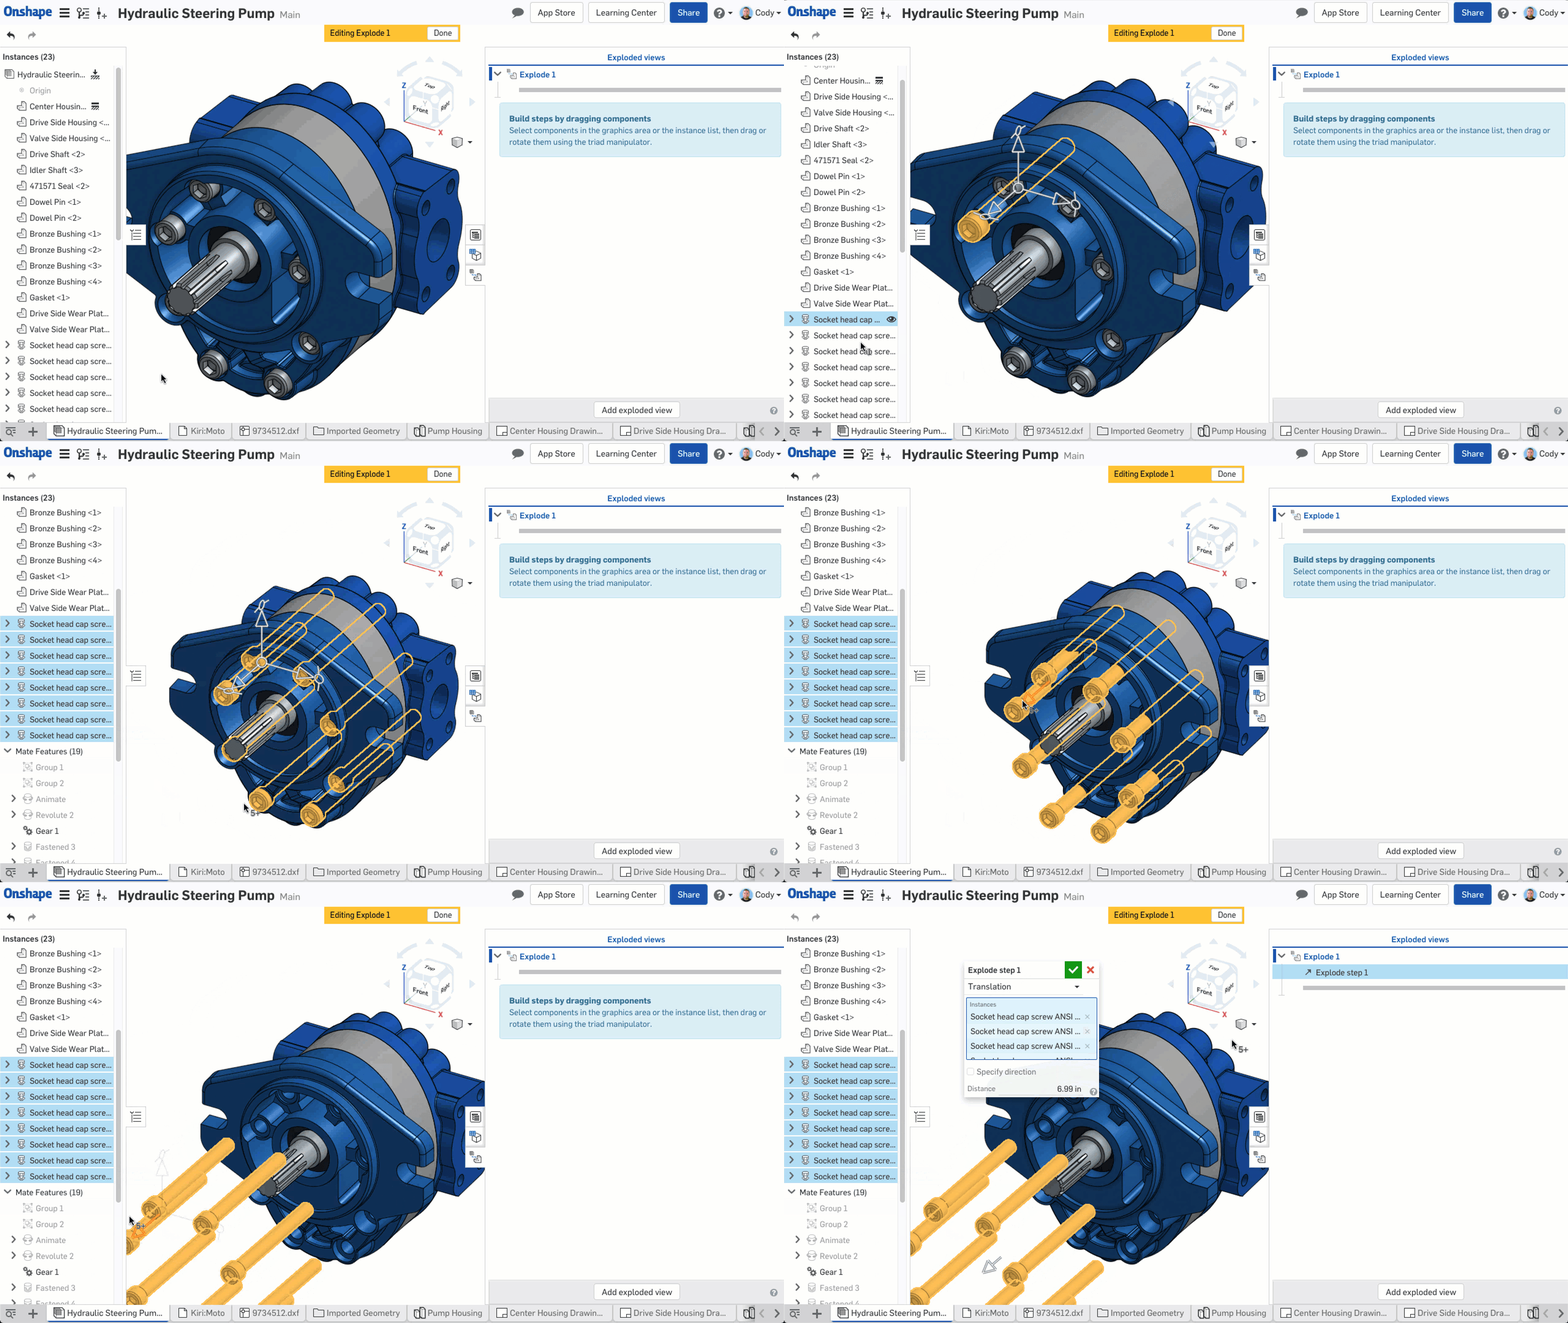
After dragging the parts into their exploded positions, the explode step dialog will appear. Here you can specify an explode type (either translation or rotation), as well as the distance or rotation for your explode step. You can also specify a direction.
One more tip: After dragging, you can still add more instances to your explode step by simply clicking on more parts in the graphics or instance list. So if you forgot to click on a part before dragging, you can do it later.
After accepting, you will see “Explode step 1” has been added to our exploded views flyout.
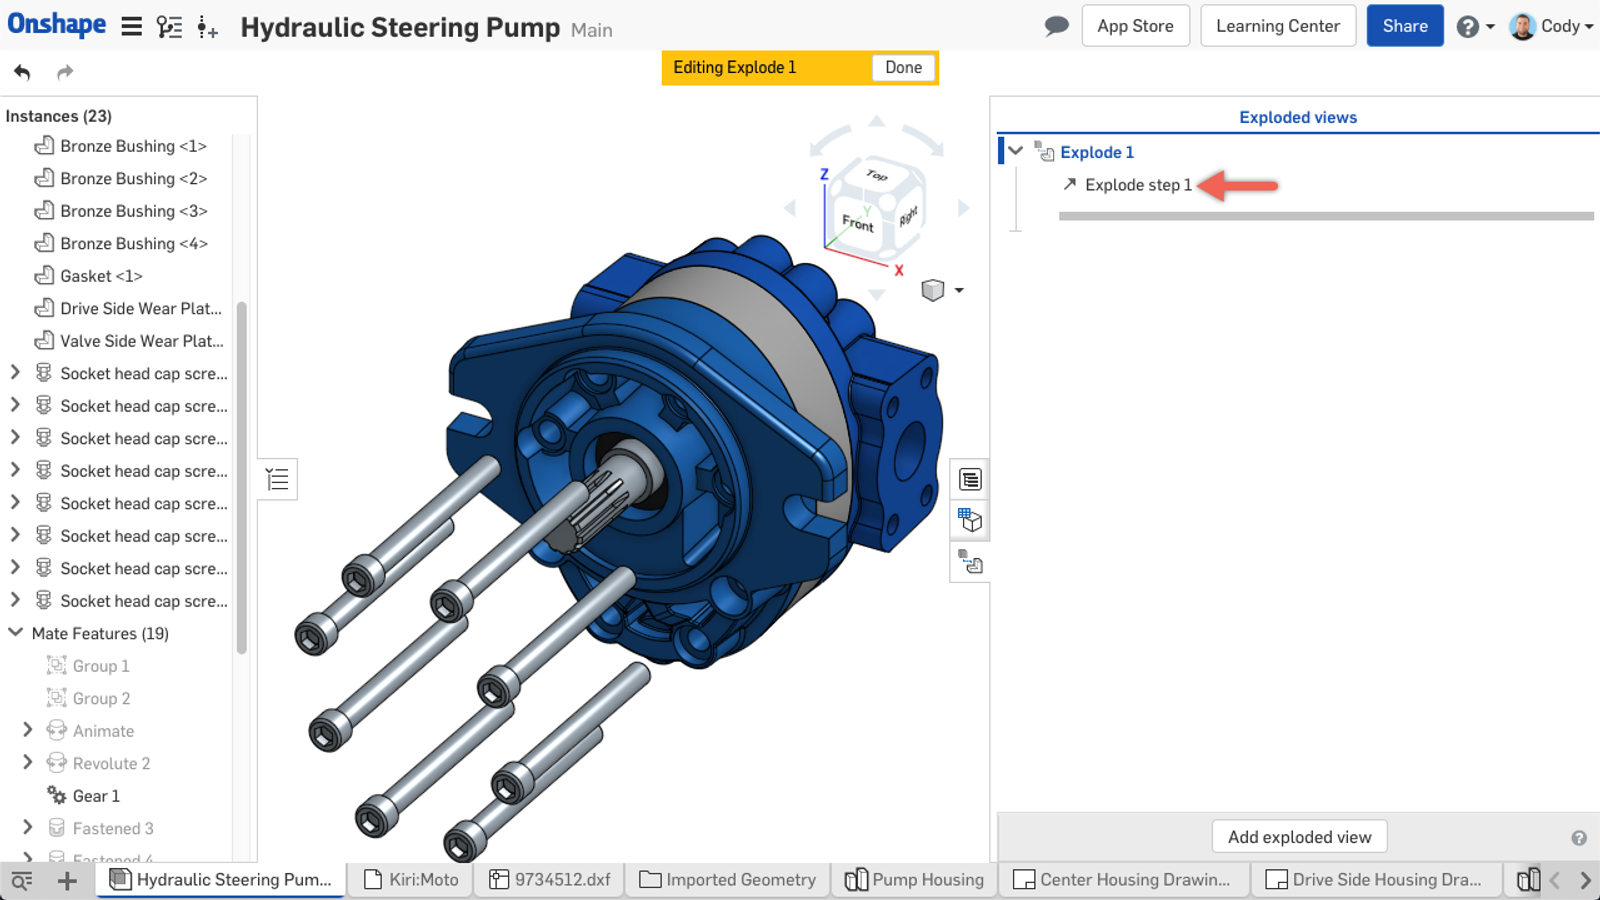
If you need to edit or delete this explode step later on, you can do that by right-clicking on it in this list. To create more explode steps, just repeat the process above.
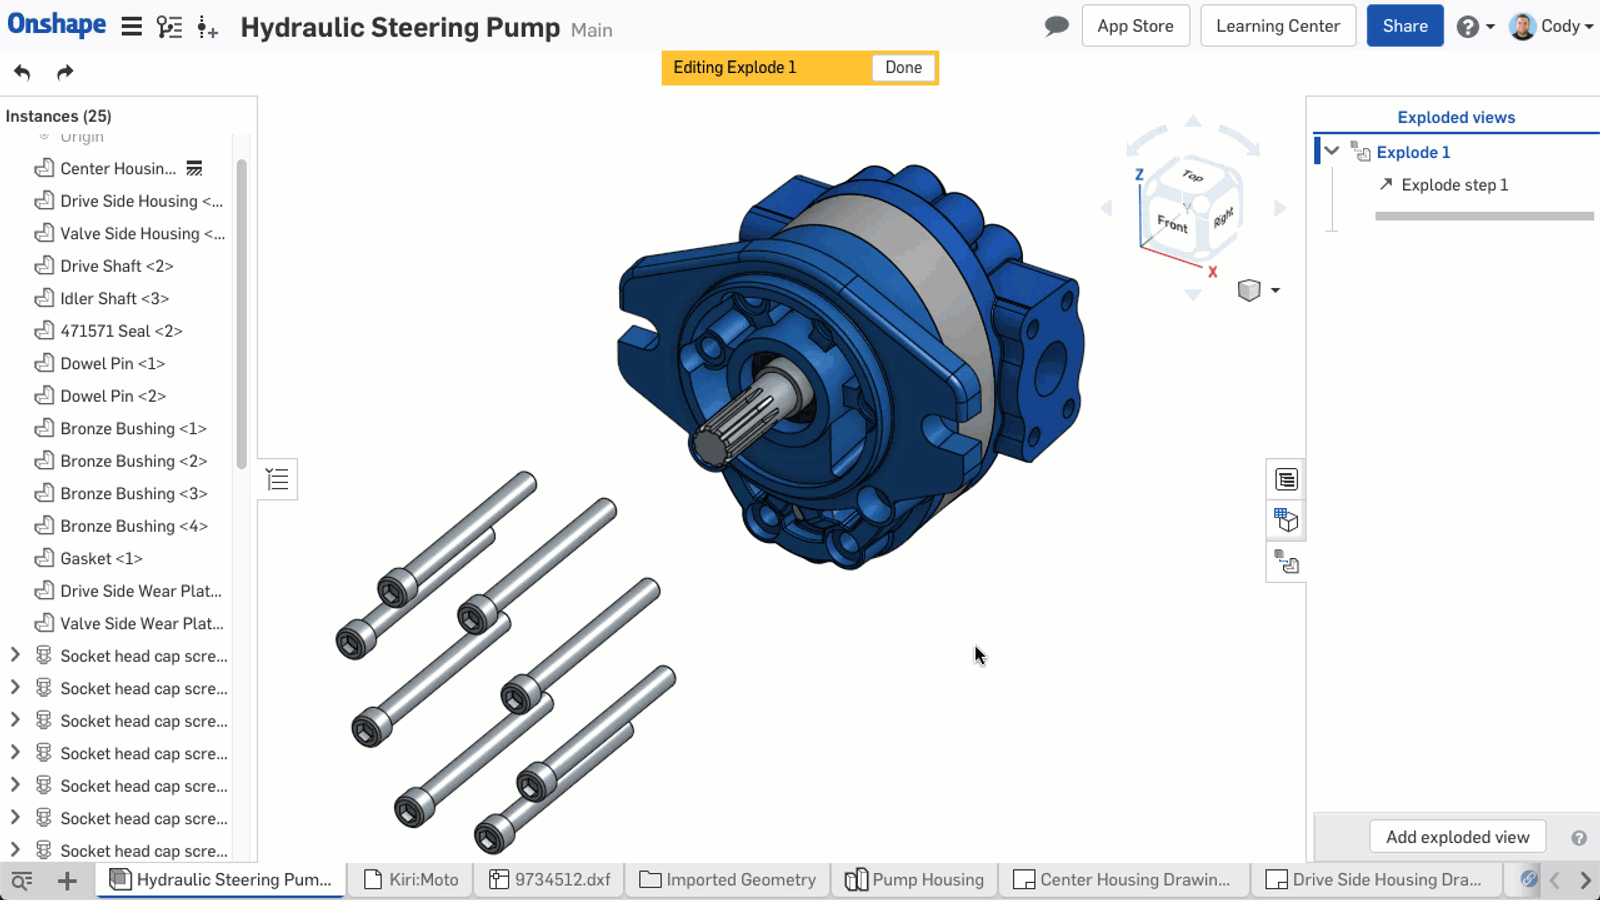
After you are finished creating your exploded view, make sure to click “Finish” at the top of the interface.
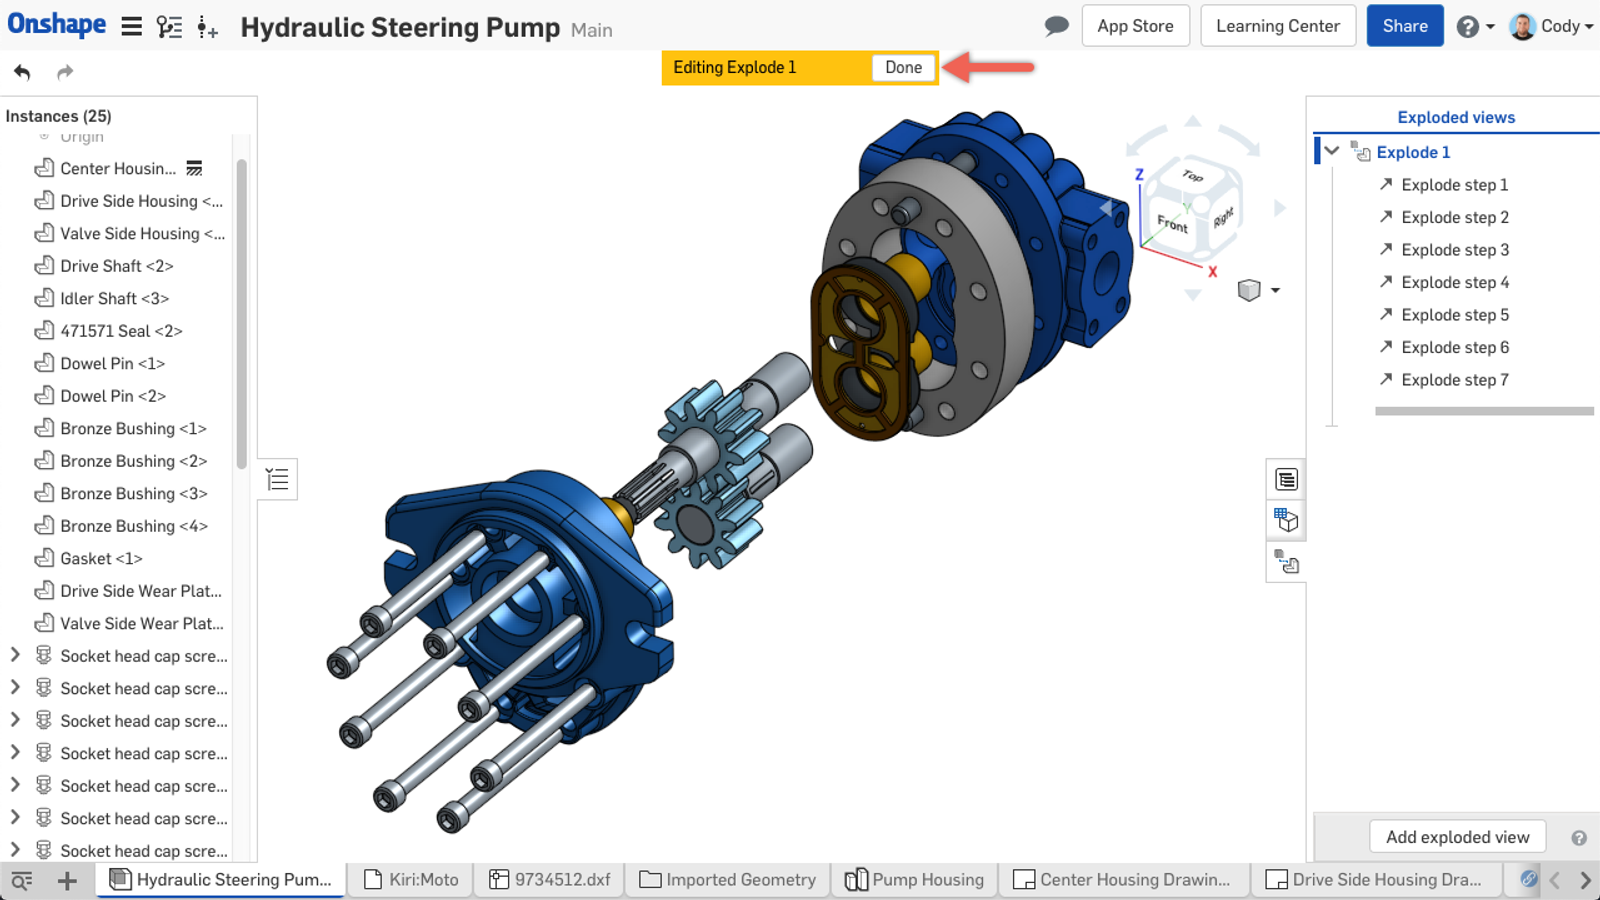
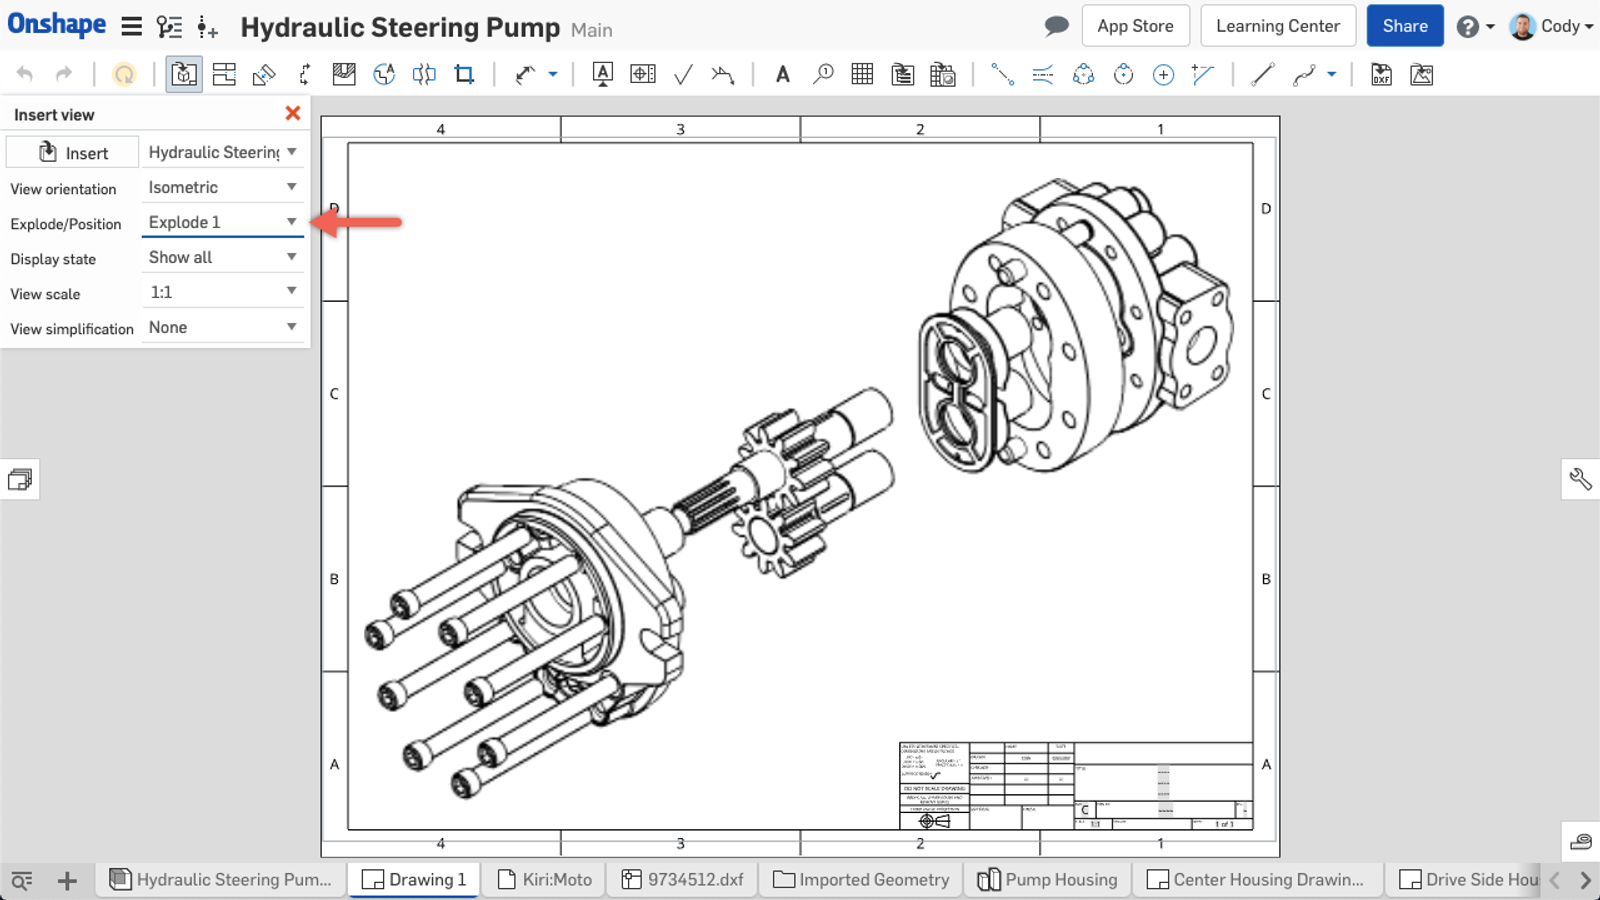
Now that your exploded view is complete, it is easy to insert into a drawing. When inserting assembly views into a drawing, you will see an option to choose from your exploded views.
A few tips regarding exploded views in Onshape:
- You can have multiple exploded views. To add another exploded view to your assembly, click “Add exploded view” at the bottom of the exploded view flyout.
- Exploded views apply across all Configurations, Display States, and Named Views. So you do not need to recreate exploded views for each of these.
- Exploded views capture the orientation of parts as they were created. So simple movements of the assembly do not mess up your exploded views.
One final tip regarding Onshape’s exploded views is that they are included when sharing view-only designs with others. In fact you will find a new “Toggle Exploded Views” option in the view-only toolbar that allows those with view-only permissions to see your exploded view.
So that’s it! If you are interested in more information about exploded views, watch the video at the top of this post.
Latest Content

- Blog
- Becoming an Expert
- Sheet Metal
Two Views, One Model: Faster Sheet Metal Design in Onshape
02.12.2026 learn more
- Blog
- Customers & Case Studies
- Collaboration
- Consumer Products
RigStrips Boosts Design Speed Using Onshape's Collaborative Tools
02.11.2026 learn more
- Blog
- Becoming an Expert
- Features
- Data Management
How Onshape's Repair Tool Fixes Broken References
01.29.2026 learn more


