
04:44
Onshape by PTC is the fastest-growing CAD platform for a reason. It’s easy to use, requires no software installations or updates, runs on any machine, and offers the industry’s only true cloud functionality. This means easy file sharing, instant collaboration, and no lost work.
Add to all of these the fact that it’s free for educators and students, making it a no-brainer; Onshape is simply awesome for education!
Today, the Onshape education team is excited to share five of our best practices for teaching with Onshape.
1. Set Up Your Educator Account
Onshape has been built in the cloud, meaning you don’t have to install anything or manage any hardware – it just runs in your web browser. For this same reason, it works on Macs, PCs, and even phones and tablets. To get started, go to Onshape for Education and sign up.
Follow the instructions and then check your inbox for an email from alerts@onshape.com. You’ll finish setting up your password, and that’s it, you’re in! The whole process should take under 2 minutes. From there, you can follow the links in the email or go to cad.onshape.com and get started! There’s no waiting for updates or installations. You and your students can jump right into CAD.
If you don’t see the email within a couple of minutes, and it wasn’t sent to your spam folder, please contact us. Sometimes schools have tight email filtering.
If you already have an Onshape account, but don’t have an educator account, get upgraded! Follow the steps to upgrade your account here.
You might be wondering how your students get accounts. Well, they can follow the same process and sign up for a free student account, or you can create your class right in your educator account. Speaking of this…
2. Create Your Classes!
You will likely want to share Onshape documents with your students, but it can be painful to share the same Document with each student one at a time. Welcome to Classes and Assignments! First, you’ll want to create your class.
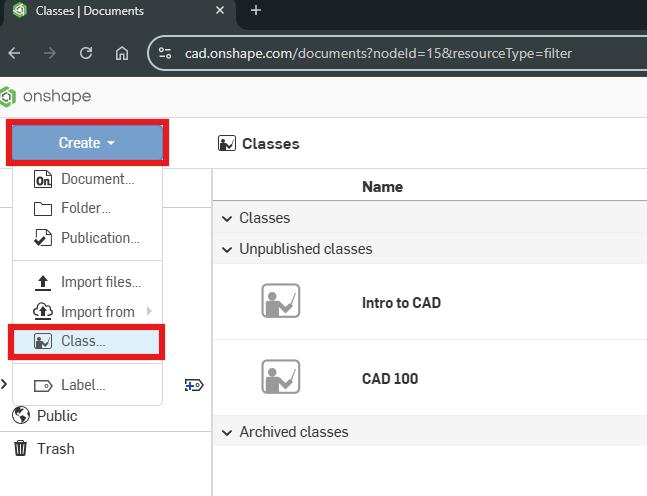
After creating your class, you can add members. You can do this individually or with a provided CSV template. If the students have an account, they’ll just be added in. If they don’t, they’ll get an email inviting them to join.
For more details, check out our Learning Center course on how to do it all! And while we’re on the topic of the Learning Center…
3. Explore the Learning Center!
The team at Onshape is on a mission to create content for every user. The Learning Center is here to help users who are new to CAD, new to teaching CAD, new to Onshape, or just wanting to learn more and broaden their skill set!
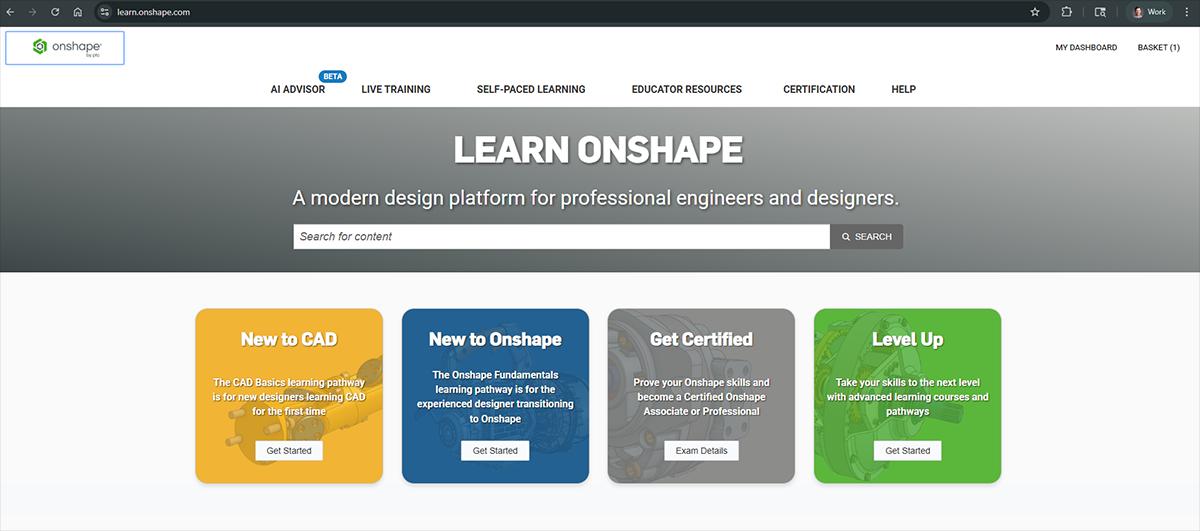
Educators, here is your chance to have students follow along with a specific curriculum, differentiate and add on by following a learning path of their own choice, or just find small courses to build skills and answer questions when needed! The Learning Center really has something for everyone and can be used however it fits best into your classroom. Check out more at learn.onshape.com!
Whether you decide to use the Learning Center or just your own content, your next step should be to….
4. Create Assignments!
Once you are set up and ready for instruction, start creating your own assignments. Find the classes you created and click "Create Assignment."

Once in, you can add your assignment name and details. You’ll then have three options for assigning things. Those options are:
- Students begin with a new document
- Students begin with a copy of the selected document
- Students can choose what to submit.
Additionally, you’ll be able to control whether students can share their documents and collaborate. Once again, for more information, check out the Classes and Assignments course in our Learning Center. Just remember, if you haven’t published your class yet, your assignments will be drafts.
Finally, let’s wrap this up with our fifth teaching practice we think you should know.
5. Use Feedback and Assessment Tools
As your students begin to complete and submit work, you’ll find it easy for you to communicate and provide feedback to them. First, in the assignment, you’ll easily see what progress students are making.
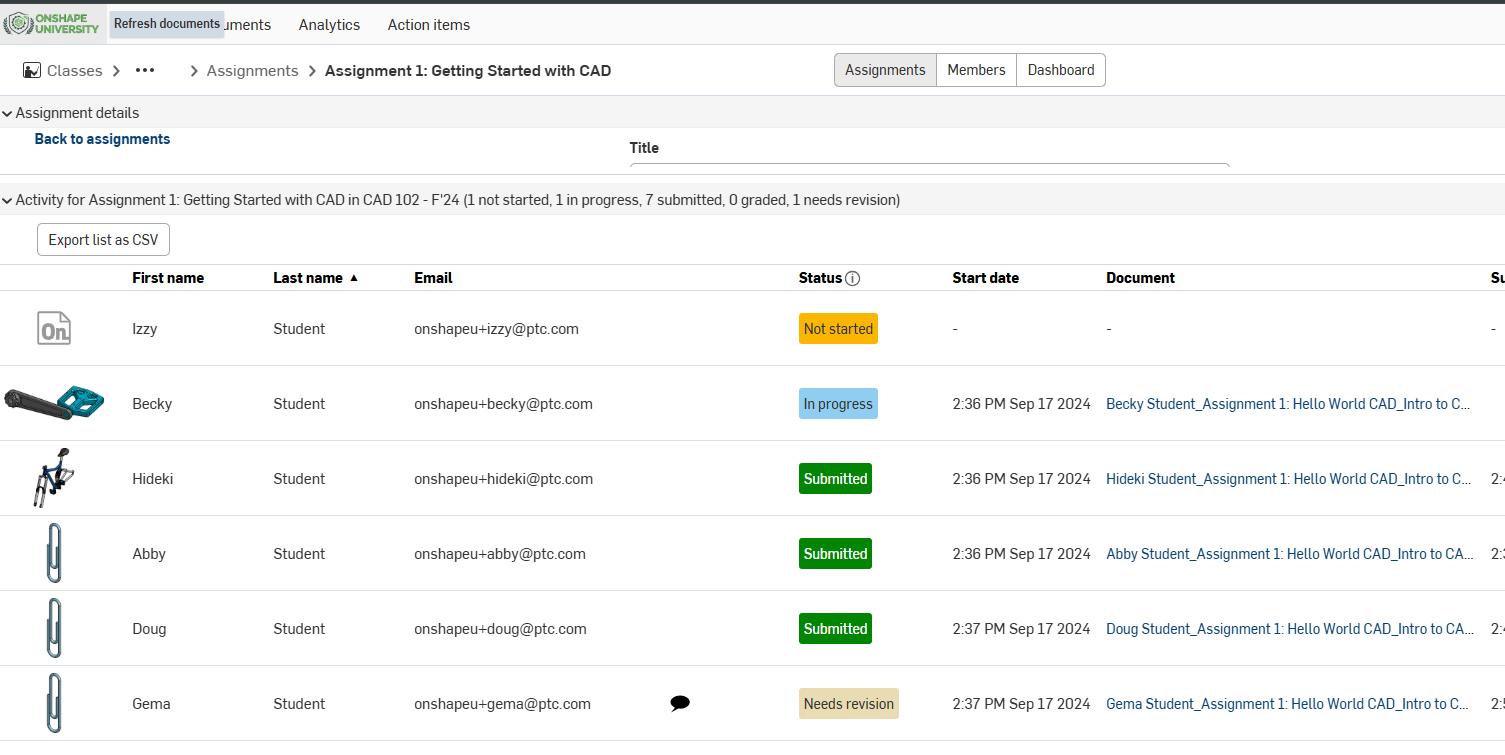
Once you click in and review their work, you will be able to add comments and tag specific features, provide screenshots and markups, and give students a chance to make revisions if necessary.
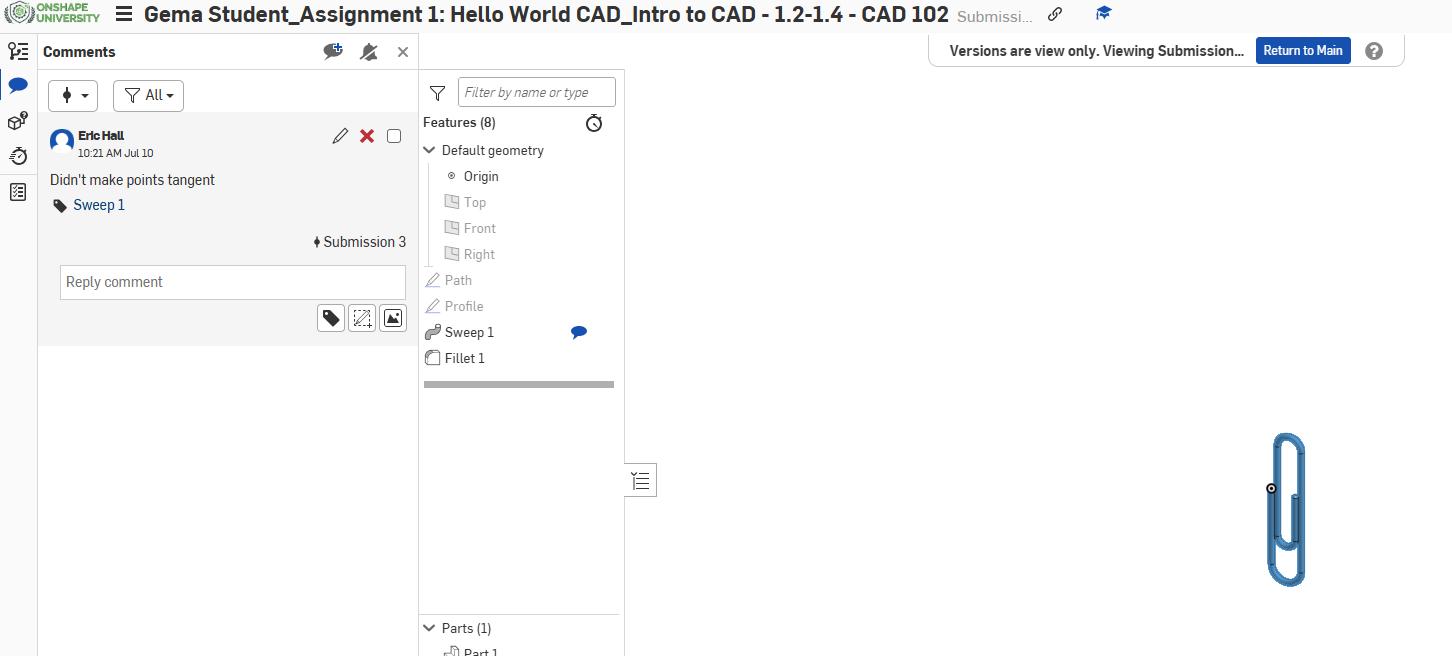
Each time students submit will automatically be recorded as a new version and will easily help you and them see the progress they have made throughout the assignment. Speaking of versions…I think this calls for a…
6. BONUS POINT! Use Versions and History
Onshape’s cloud-native functionality gives unparalleled access to document control and collaboration. Because documents are automatically saved, all users will have access to the most recent version of a document. Versions and history captures every step of the process and allows for you to provide feedback on any step, help students revert to an earlier version, allow students to create multiple branches and versions that they can then merge back together when they choose their best ideas together, and even help you see if documents are copied or being used by multiple people if you are looking for plagiarism control.
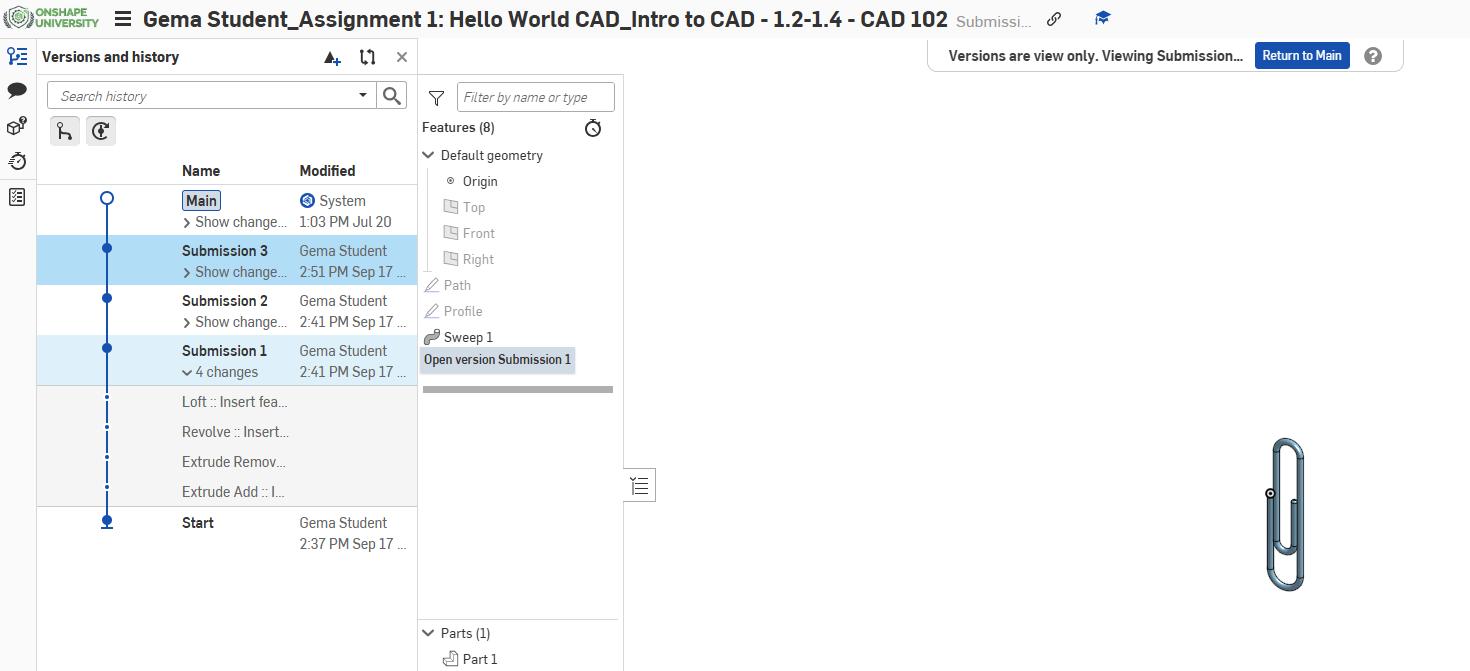
In its simplest form, each submission a student makes creates a new version. For more great ways to use this, check out our Learning Center course on Document Versions and History!
Get Teaching with Onshape
Teachers everywhere are signing up for Onshape because it is free, easy to manage, and works on any computer. We love working with educators and are here to support you on your Onshape implementation journey. For more, please check out our Learning Center course just for teachers, Teaching a Class in Onshape.
Onshape for Education
Get started with Onshape and join millions of students and educators worldwide.
Latest Content

- Case Study
- Automotive & Transportation
Zero Crashes, Limitless Collaboration, One Connected Workflow With Cloud-Native Onshape
12.04.2025 learn more
- Blog
- Becoming an Expert
- Assemblies
- Simulation
Mastering Kinematics: A Deeper Dive into Onshape Assemblies, Mates, and Simulation
12.11.2025 learn more
- Blog
- Evaluating Onshape
- Learning Center
AI in CAD: How Onshape Makes Intelligence Part of Your Daily Workflow
12.10.2025 learn more
- Blog
- Evaluating Onshape
- Assemblies
- Drawings
- Features
- Parts
- Sketches
- Branching & Merging
- Release Management
- Documents
- Collaboration
Onshape Explained: 17 Features That Define Cloud-Native CAD
12.05.2025 learn more


