
1:37
The Drawing environment in Onshape recently received new functionality that lets users "show/hide" a part in a Drawing view.
This Tech Tip will show you how to take advantage of this new ability.
During the design process, you typically create multiple display states in order to showcase different components in an Assembly by modifying the appearance, transparency and hiding Parts. This way, the Drawing Views can be associated with each display state, describing in detail what is most important for our design.
Display States
With display states, a user can showcase different components in an assembly and modify their display differently within one model/assembly, changing the transparency, appearance, display mode, and hiding bodies/components.
In a drawing environment, when inserting an Assembly that has display states defined, the display state dropdown appears below the Assembly view dropdown.
Here you can select the display state to include in the Drawing. In the insert view dialog, you can pick the orientation of the assembly, such as an exploded view, if already created, and one of the display states defined at an Assembly level.
But the display state can be edited or created only in the active workspace.
What if you want to insert the view for an already released or versioned Assembly?
Hiding a Component in a Released or Versioned Assembly
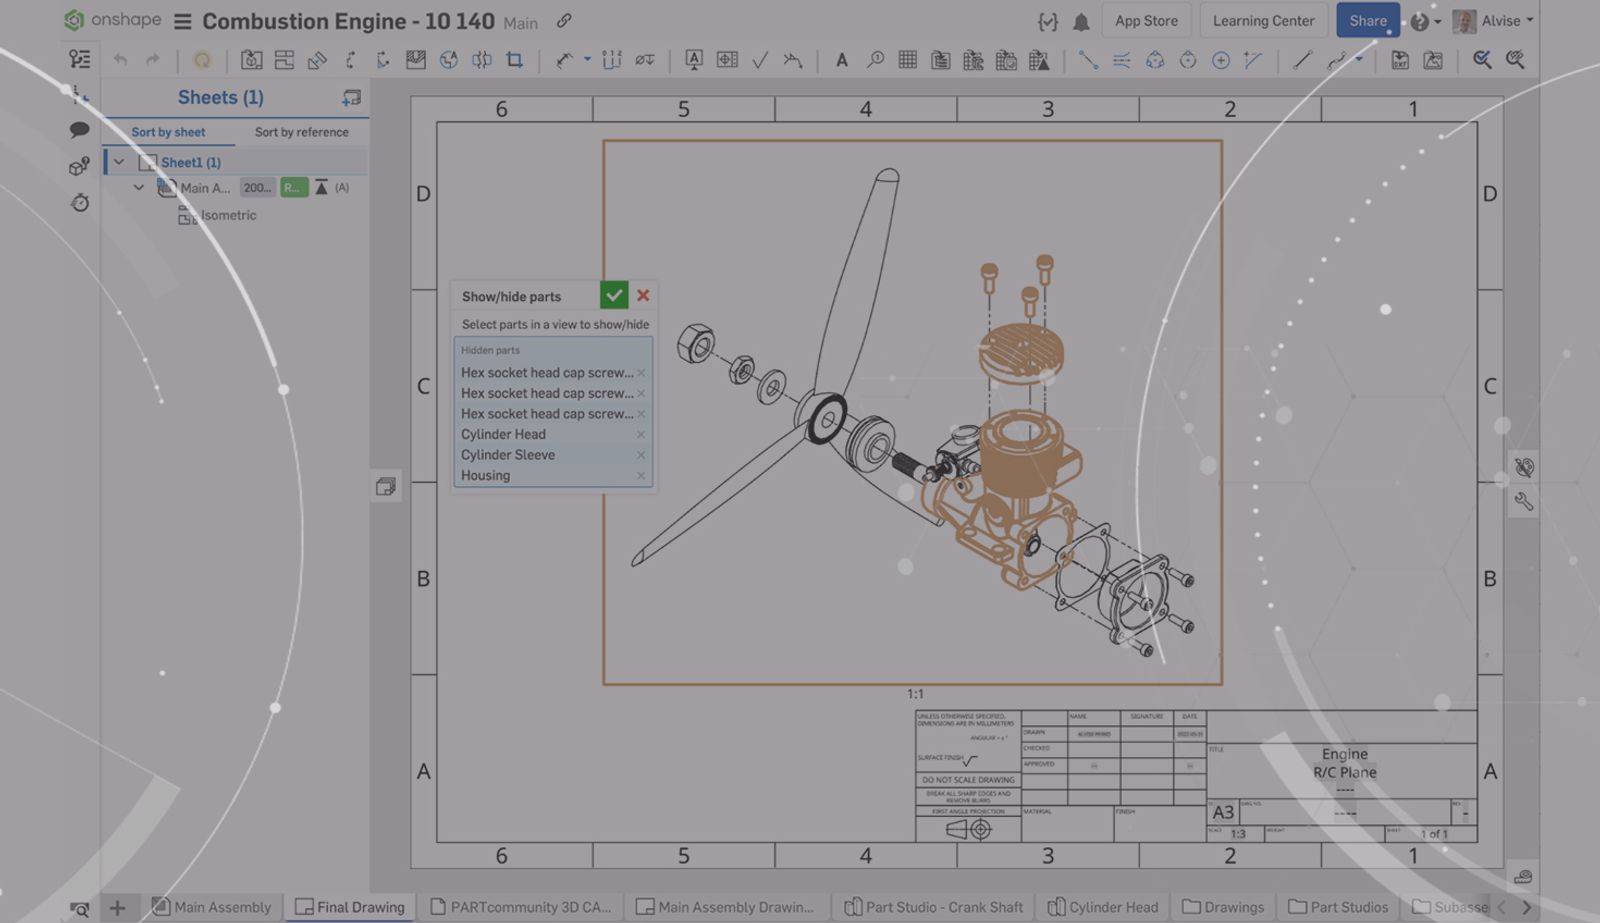
With the “Show/Hide Part” command you can always hide parts in a Drawing view, even if you are referencing a version or a release. This could be very helpful, especially in situations such as creating instructions or service manuals, where you prefer to create a small set of display states, copying the Drawing views and working on the appearance of the components.
This command is a great way to save some time!
See how to combine views for versions, releases and Drawings in the video below:
Interested in learning more Onshape Tech Tips? You can review the most recent technical blogs here.
Latest Content
- Blog
- Customers & Case Studies
- Arena PLM Connection
The Cloud-Native Workflow Behind Coco’s Next-Gen Delivery Robot
05.14.2026 learn more- Blog
- Mobile and Browser Clients
- Enterprise
- Commercial (Pro/Standard)
3 Signs Your CAD Can’t Keep Up With Your Distributed Teams
05.13.2026 learn more- Blog
- Evaluating Onshape
- PCB Studio
- Integrations
- Collaboration
- Consumer Products
- Electronics
- Medical Tech
- Robotics
How Onshape and Altium Are Erasing the ECAD-MCAD Divide
04.30.2026 learn more