
1:16
Typically when placing components into an assembly the mating component is already in place and is ready for the new components to be mated to it. This Tech Tip will show you how to enable snap mode and locate components correctly and easily while still in the Insert dialog.
Create an Explicit Mate Connector
For components that you design, you need to create a Mate Connector at the location where you want to align the components in an assembly. Make sure that the Mate Connector belongs to the component as the owner part.
Enable Snap Mode in the Assembly
Either select snap mode on the toolbar or use Shift-s to turn on the mode before you choose the Insert dialog.
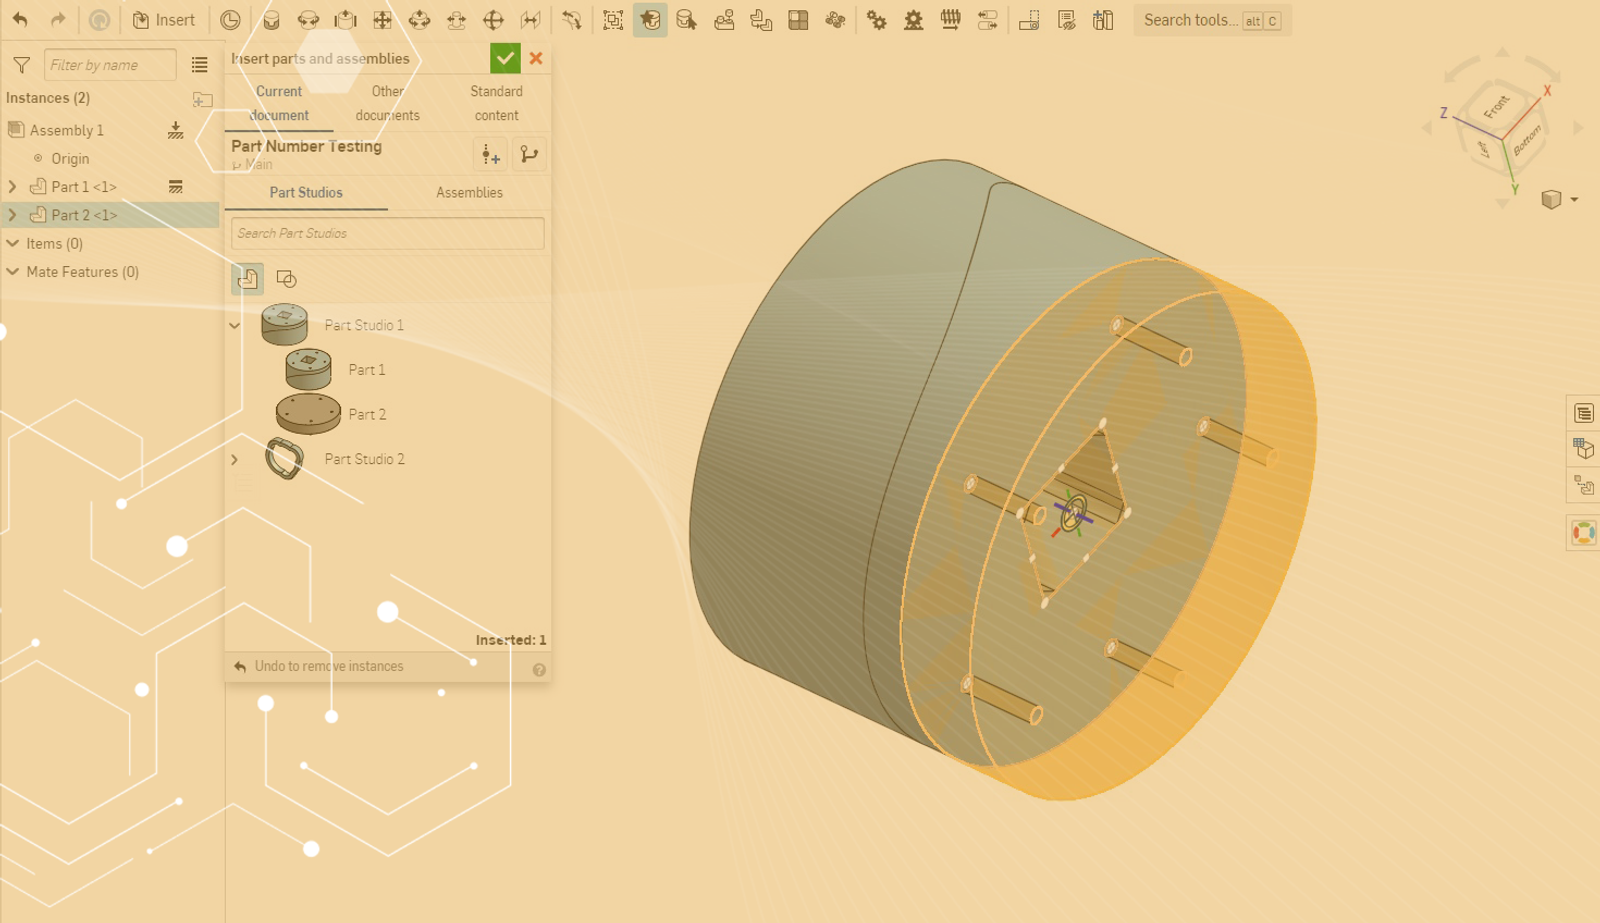
Insert and Locate Components
While in the Insert dialog you can hover over a part to activate the Mate Connector in the existing parts by using the keys A and Q to align or realign or use the Ctrl key to change between available Mate Connectors
For standard content, these Mate Connectors are already defined for you.
This Tech Tip helped you learn how to use snap mode. For more, watch the video below:
We have more resources for you to learn more about related features, like my favorite video that explains all the ways you can use Mate Connectors. We also have more information on how to use them elsewhere!
Interested in learning more Onshape Tech Tips? You can review the most recent technical blogs here.
Latest Content
- Blog
- Becoming an Expert
- Assemblies
Built to Scale: Why Large Assemblies Don’t Slow Down in Onshape
07.16.2026 learn more- Blog
- News from Onshape @ PTC
- Artificial Intelligence
Onshape Labs: AI in CAD Guided by Designers, Driven by Innovation
07.15.2026 learn more- Blog
- Evaluating Onshape
- Data Management
- Collaboration
- Artificial Intelligence
How the Most Underrated CAD Feature Improves Design Workflows
07.09.2026 learn more