
2:00
In today’s Tech Tip, we will discuss how to use variables in conjunction with sketches and patterns to vary geometry.
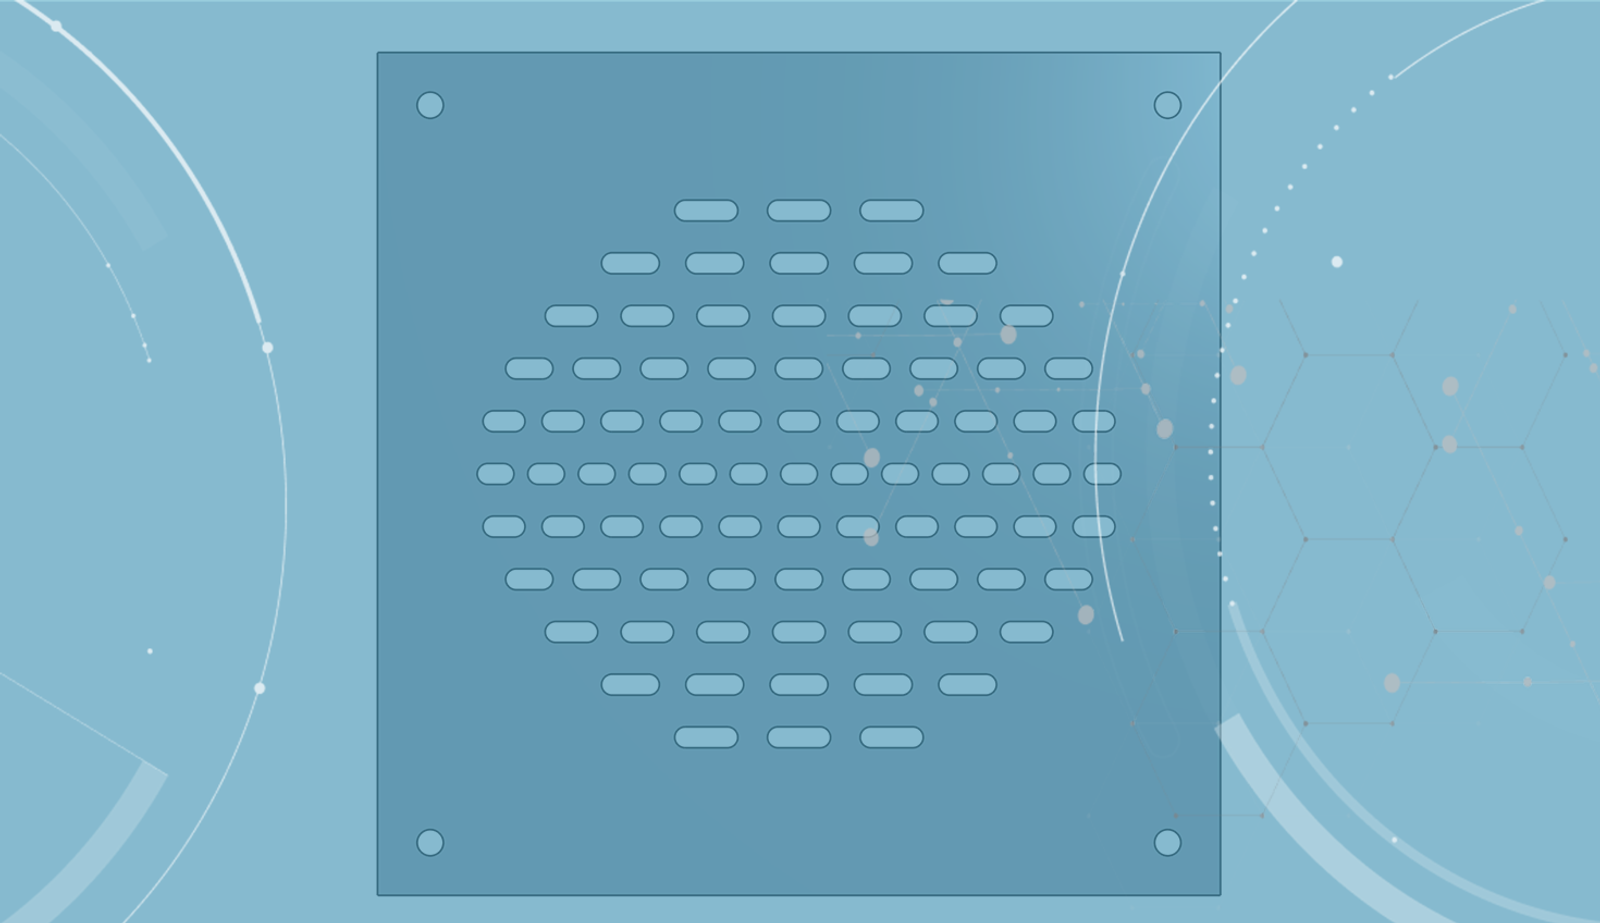
Variables in Onshape can be used in patterns and their values can be incremented through instances of the pattern. In this example, we’ll use a 8x8 fan cover that has slots varying not only in width, but also in count and spacing as they get further from the center.
To create the fan cover, you need to start with the variables. Each variable should be defined twice. The first is the initial value.
The second variable defines how it varies with the pattern.
All the variables you need for the grate are below:
Name: Slot_Width
Type: Length
Initial Value: .3in
Equation: #Slot_Width+.05in
Name: Slot_Spacing
Type: Length
Initial Value: .4in
Equation: #Slot_Spacing +.08in
Name: Slot_Count
Type: Number
Initial Value: 8
Equation: #Slot_Count-1
Next, draw a slot in the center of the plate and extrude cut it.
TIP: Constraints in sketches to outside geometry are ignored when patterning. Sometimes it is necessary to make sure that outside references are deleted and replaced with a fixed constraint to ensure the sketch will adjust appropriately in the pattern.
The full grate is created using two linear patterns and a mirror. The first pattern includes the sketch of the slot and the extrude cut centered about the seed. Distance is set to #Slot_Spacing, while Instance count is set to #Slot_Count. Use a horizontal edge to define the direction.
The second pattern must include #Sloth_Width, #Slot_Count, #Slot_Spacing, slot sketch, extrude, and the original linear pattern. This is where all the variation occurs. Distance and instance count are not linked to any variables. Make sure “Apply per instance” is checked to recalculate the features for each instance. Otherwise, it will just pattern the existing geometry.
Note: Be careful not to select the initial variables because they do not vary.
Finally, mirror the faces of the resulting holes to finish the grate.
TIP: Box select from left to right to only capture the faces of the holes that are fully encompassed by the box.
This is a simple example, but it shows the many ways a variable can change geometry in a pattern. Check out the Advanced Part Design class in the Onshape Learning Center for more advanced tips.
Interested in learning more Onshape Tech Tips? You can review the most recent technical blogs here.
Latest Content
- Blog
- Evaluating Onshape
- Collaboration
With Cloud CAD and PDM, Flexible Design for a Summer Coolcation
07.02.2026 learn more- Blog
- Artificial Intelligence
AI in Mechanical Design: The Fourth Generation of Transformation
06.25.2026 learn more