2:34
During the course of design, it is nice to follow a systematic way of organization and categorization. There are many ways to accomplish this within Onshape: Feature Folders, Tab Folders, Version and Revision control (to name a few). While an Onshape Document is a project-level container, creating multiple Documents for a single project is often encouraged to improve both performance and organization. This Tech Tip will focus on how to improve your project organization using the “Move to Document” functionality.
As outlined by this technical briefing, one recommended way to approach the design process is to start with a Document that upon creation houses a Part Studio and Assembly tab, and upon completion houses an Assembly tab and Drawing tab. Both of these tabs reference the top-level assembly of the project. To accomplish this while designing, use the Move to Document tool after new Part Studios and Assemblies are created and instanced in the top level.
Let's say we were beginning the process of a design project. The first step would be to create a project-level folder— in this case “Lamp Project” — and then a Document that will ultimately hold the top-level assembly within the folder. As the design starts, the initial state of the Document looks like this:
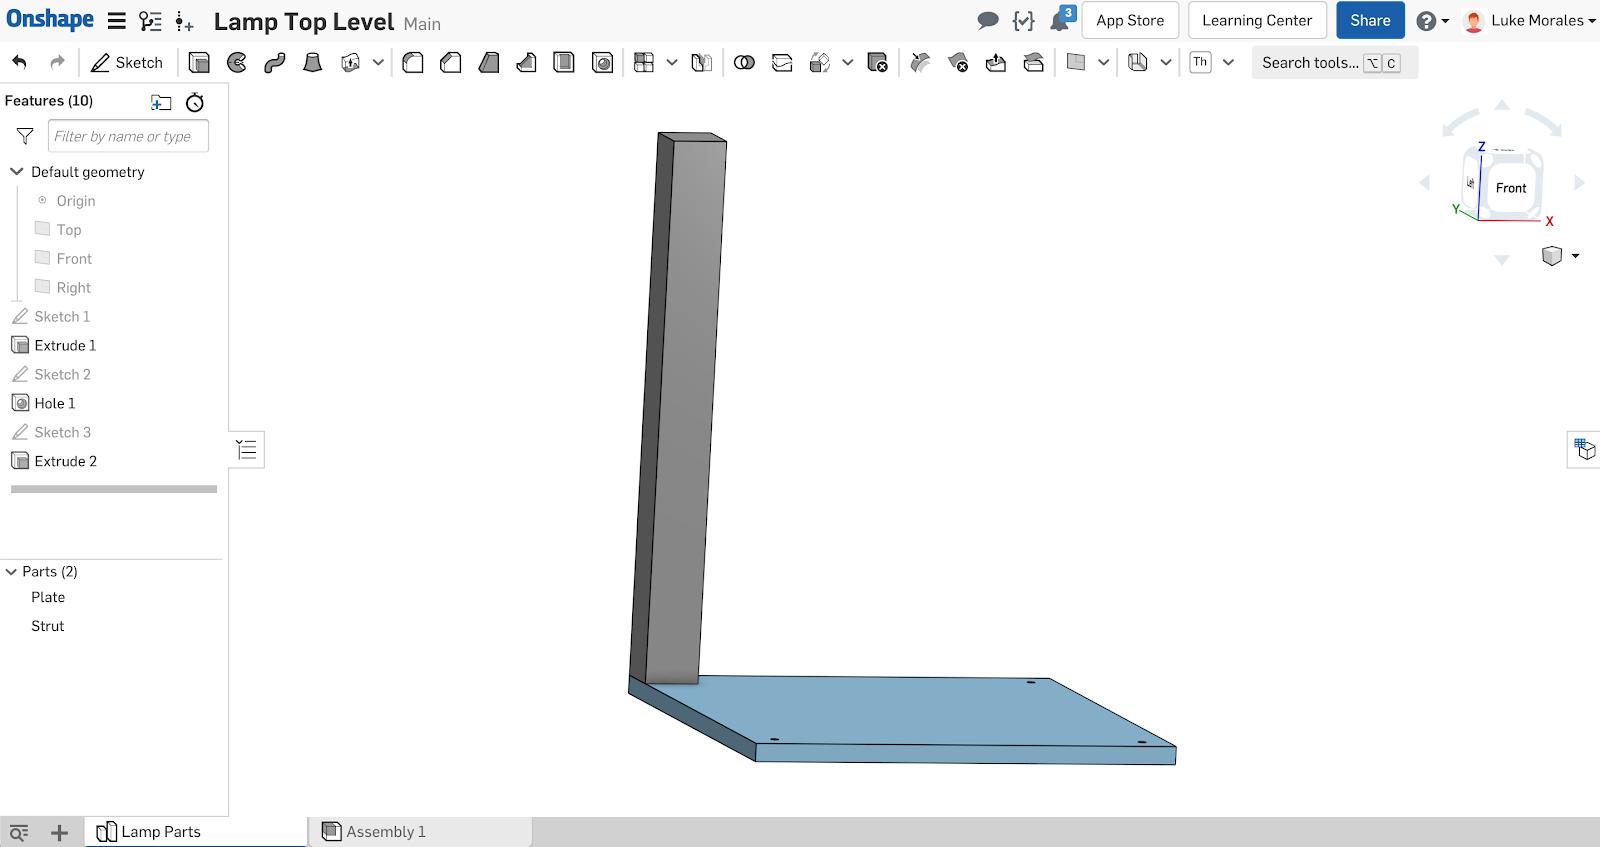
From this studio, a subassembly is made:
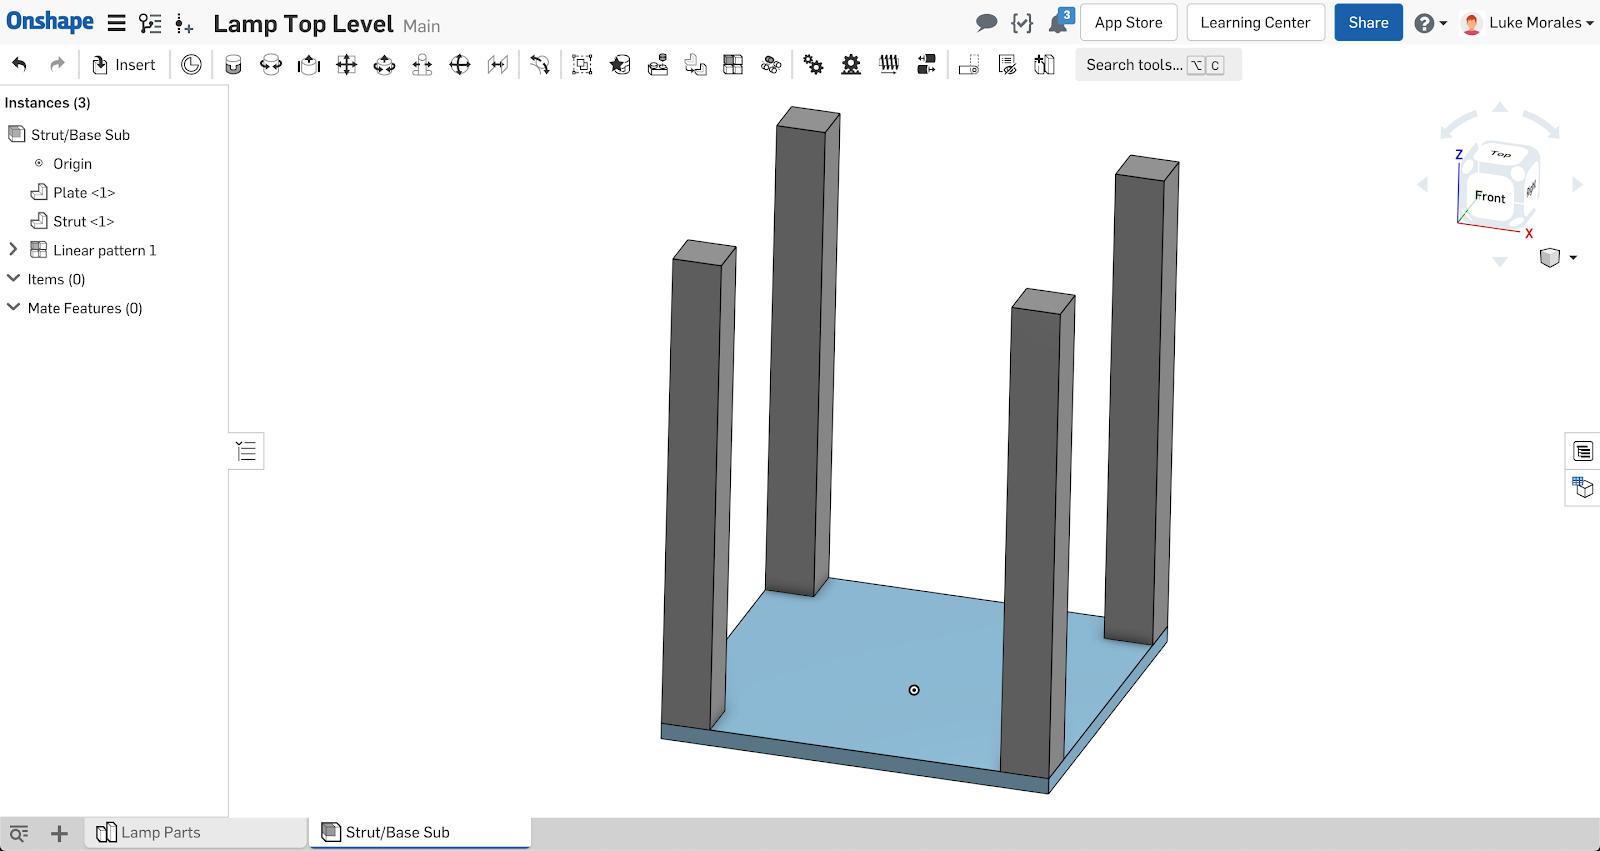
And then it is instanced in the top-level assembly. Upon instancing, the Strut/Base sub assembly is then moved to a new Document as shown in the following image:
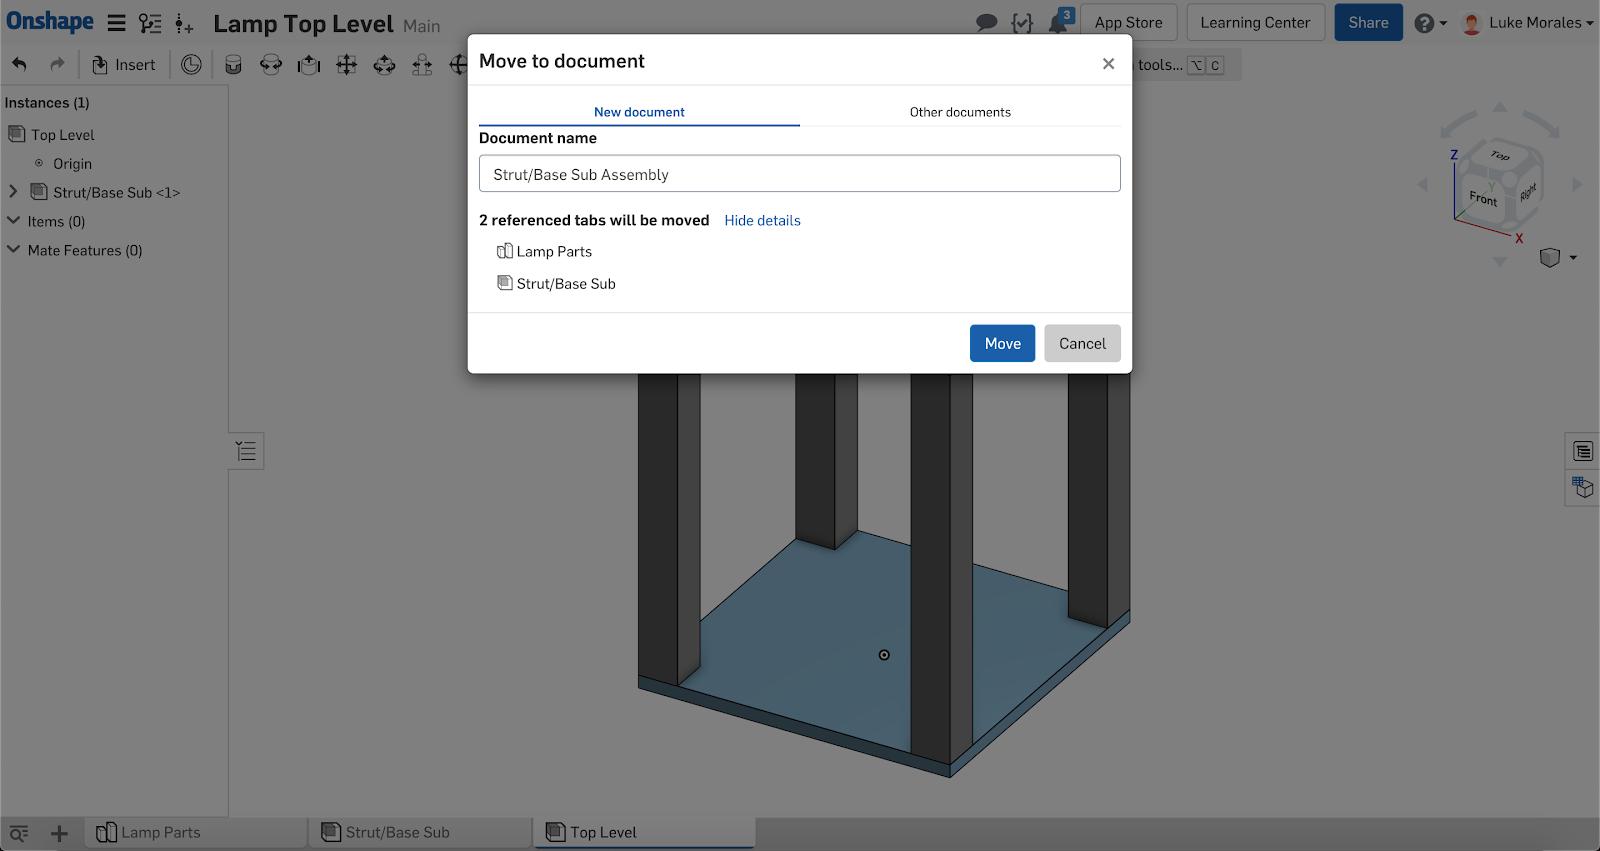
To do this, right-click on any tab that you wish to move out of the current Document. In this case, the assembly tab being moved references one Part Studio. Consequently, this Part Studio will be moved along with the assembly. I am choosing to move these items to a new Document, but the option also exists to move items to existing Documents.
After the move is accepted, the top-level assembly instance tree will look like this:
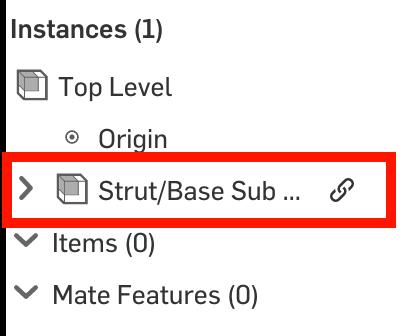
The red highlighted Instance is the subassembly that has been moved out of the Document. This image shows that the subassembly is now a Linked Document and is referencing a version — the start version to be exact. This action is done automatically as any tab is moved out.
A design can proceed in this way. Creating tabs, instancing, and finally moving tabs out to new Documents. To complete this design, let’s say a light fixture was added to the lamp and then a top plate and shade were created in the context of this insert. Post context creation and assembly instancing, the Part Studio containing those parts was moved out to a new Document.
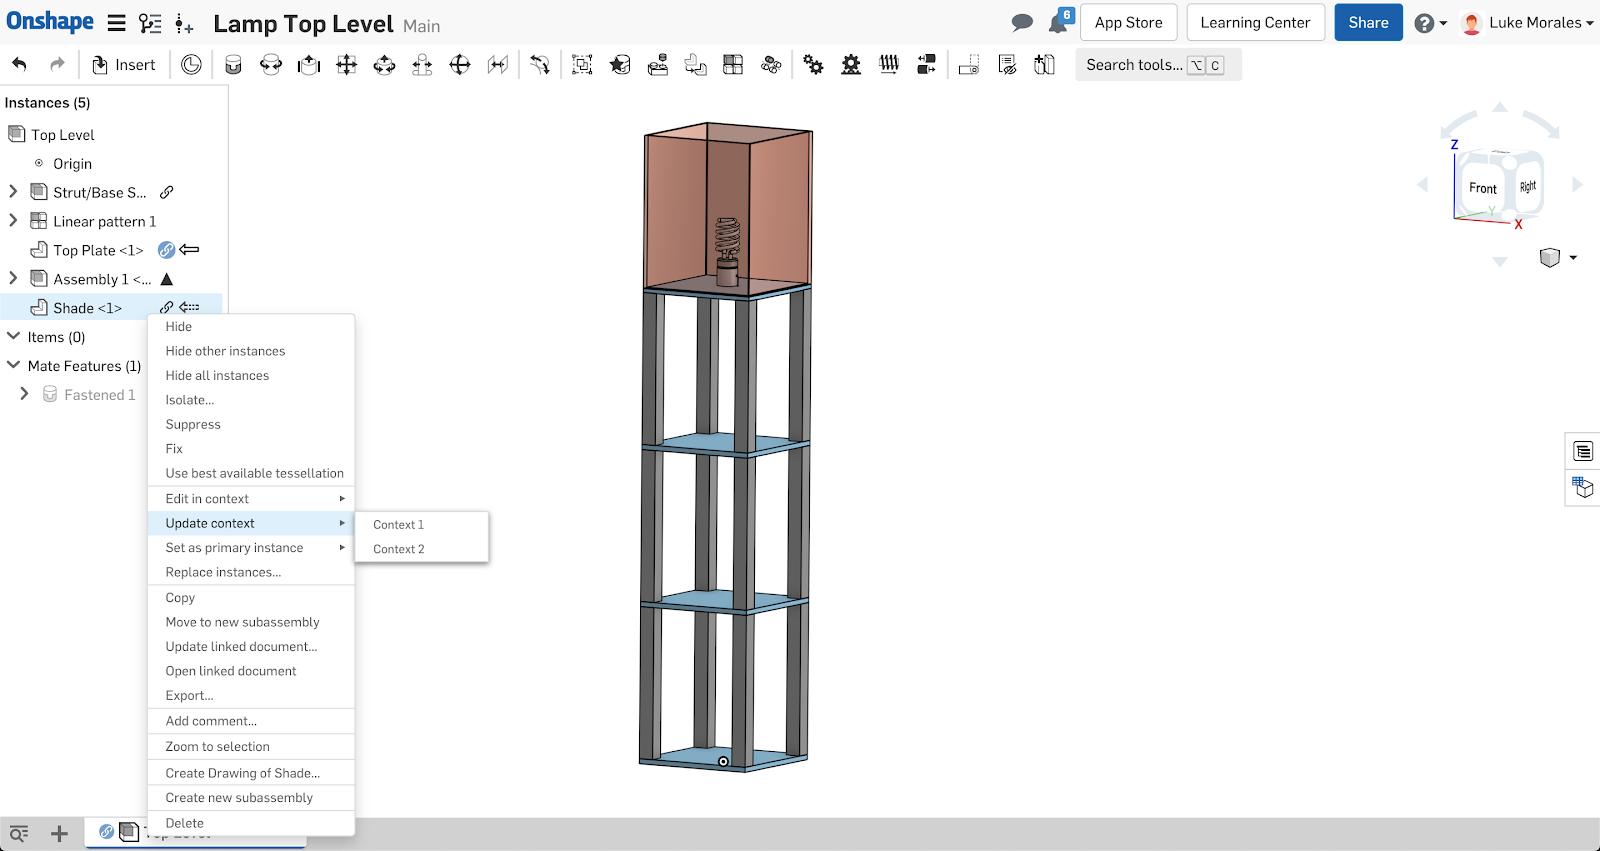
The above image shows that even post-move, the contexts used to create the shade and top plate parts remain intact and can even be updated. Finally, the project-level folder of this lamp looks like this:
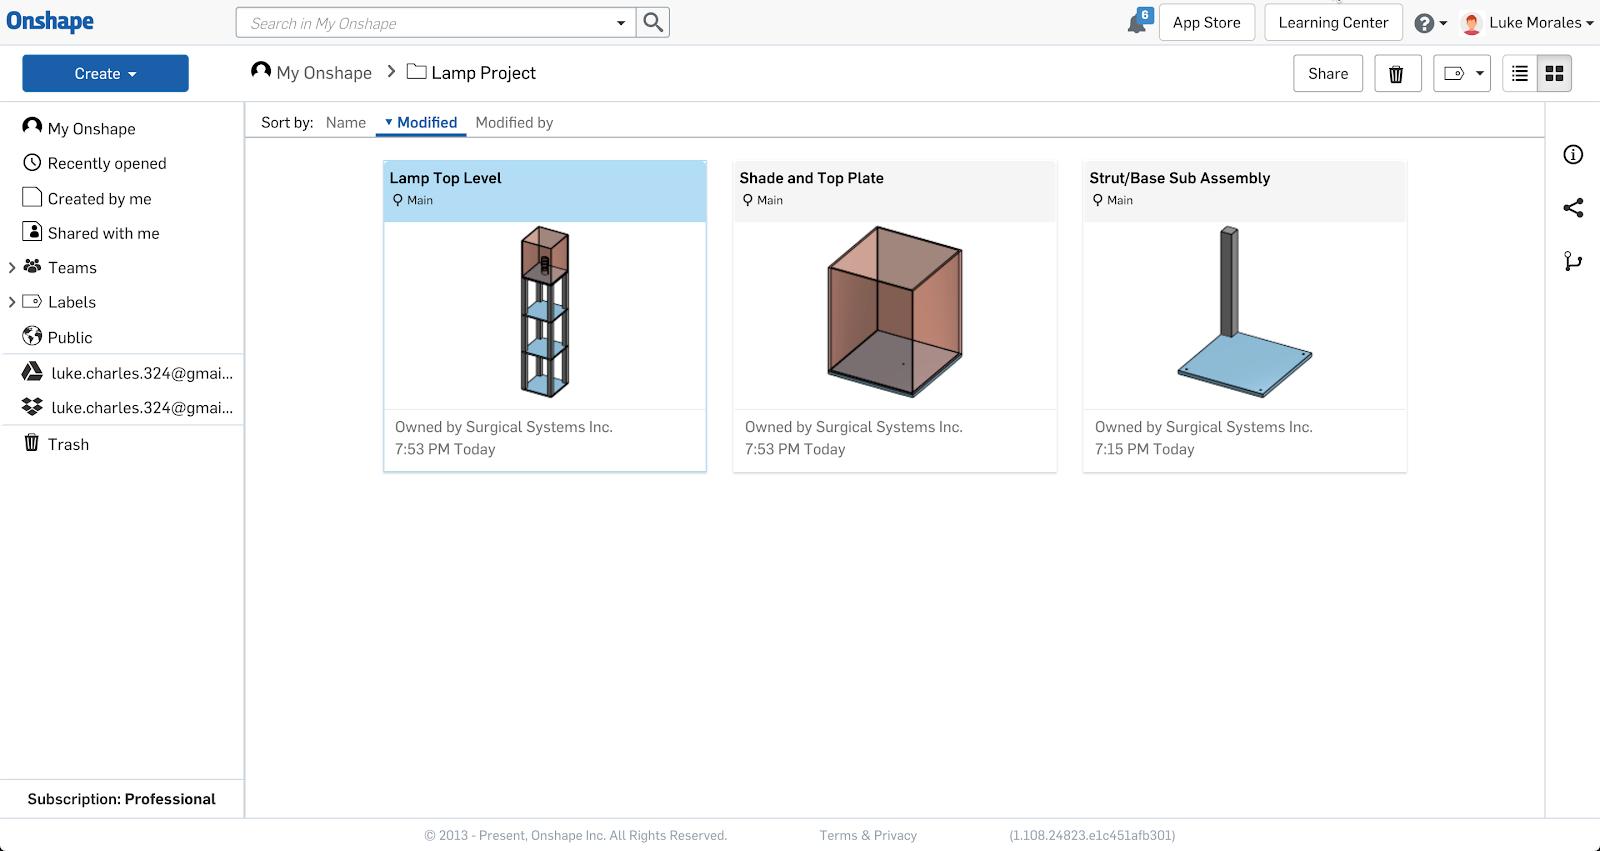
Remember that using a folder at the beginning of a new project is the best way to keep everything organized throughout the design process. .
Interested in learning more Onshape Tech Tips? You can review the most recent technical blogs here.
Latest Content
- Blog
- Becoming an Expert
- Assemblies
- Simulation
Mastering Kinematics: A Deeper Dive into Onshape Assemblies, Mates, and Simulation
12.11.2025 learn more
- Blog
- Evaluating Onshape
- Learning Center
AI in CAD: How Onshape Makes Intelligence Part of Your Daily Workflow
12.10.2025 learn more
- Blog
- Evaluating Onshape
- Assemblies
- Drawings
- Features
- Parts
- Sketches
- Branching & Merging
- Release Management
- Documents
- Collaboration
Onshape Explained: 17 Features That Define Cloud-Native CAD
12.05.2025 learn more


