2:60
Onshape’s Part Studio and Assembly configurations are great tools with a wealth of functionality. However, sometimes it is more convenient or easier to create/edit tabular data within other spreadsheet software. This Tech Tip will focus on creating and editing your configurations as well as configured properties in external spreadsheet software.
In this example, I have a desk design that has 5 different configurations to choose from for assembling the final part.
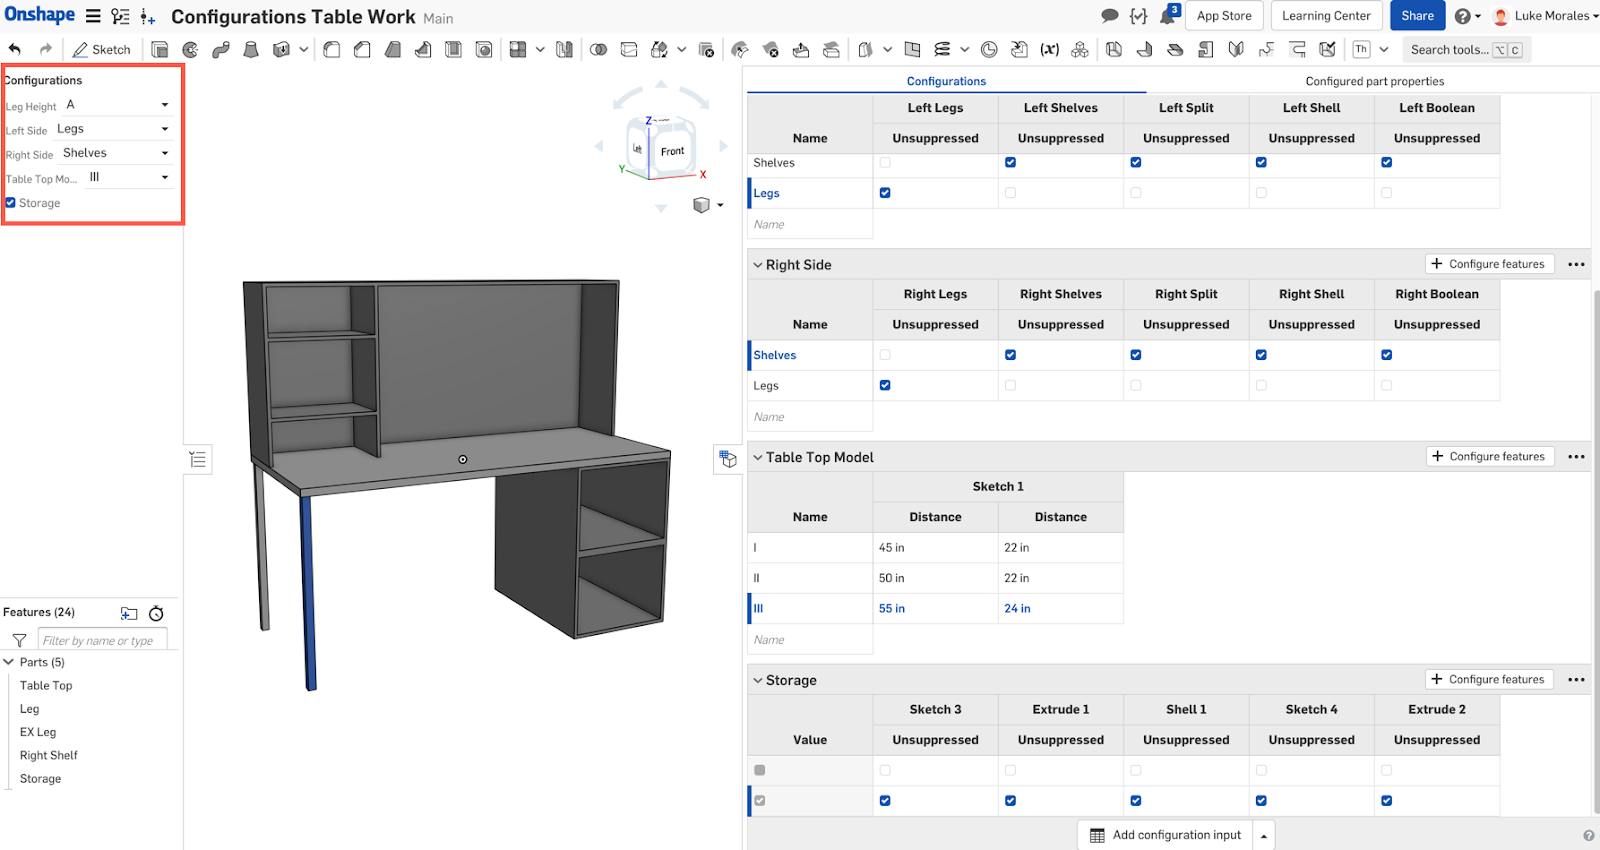
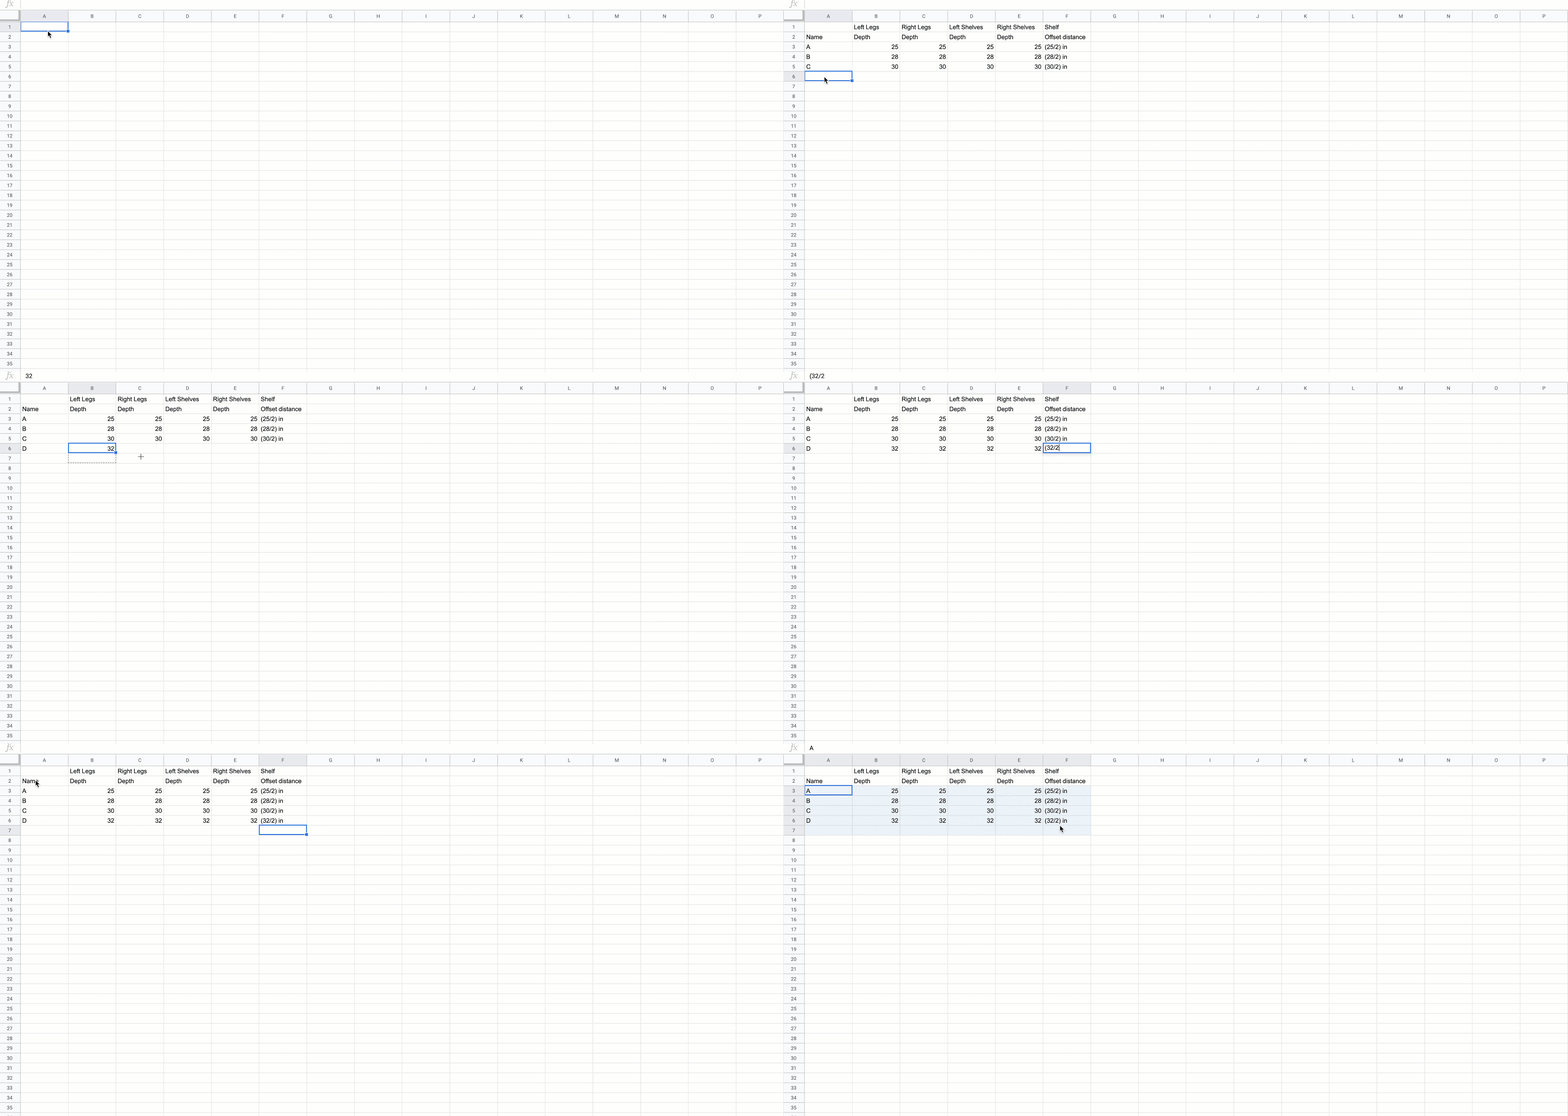
To construct these tables, you can create them natively within Onshape. However, if you want to do things that require cell dependency or perhaps use advanced equations or optimization solvers, you may opt to design your tables in a separate spreadsheet. To get the correct formatting, copy the table using the Copy table option from the 3-dot menu.

Paste this table into your desired spreadsheet software. After desired edits are made, copy your new table as shown at the end of the following video:
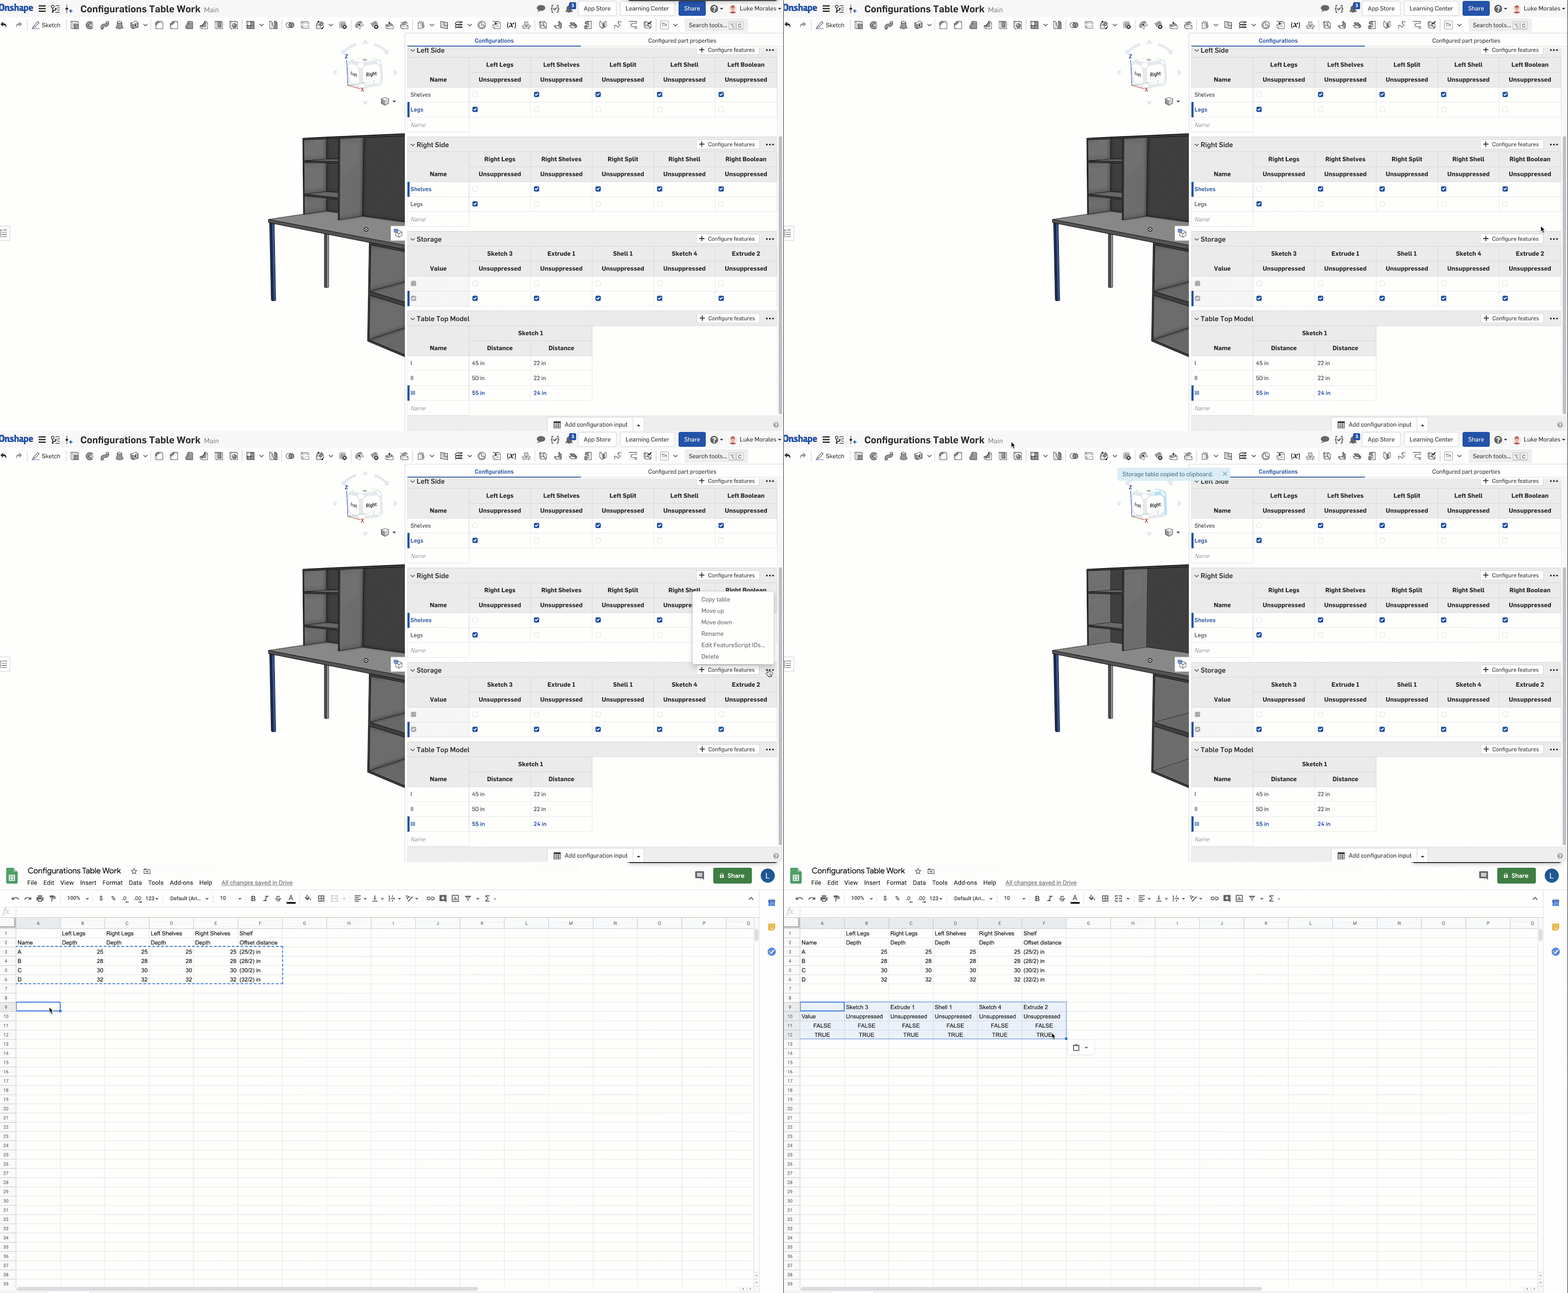
You can even copy ‘Check box’ tables as well to edit in external spreadsheet software.
This same workflow can be done for Configured Part Properties. I would argue that ensuring a complete part properties tab is imperative to having well documented data within Onshape. NOTE: It is important to recognize there is a paradigm shift with Onshape configurations. Think of configurations as a Part Studio or Assembly-level control, not only an individual feature or part control.
For example, let’s say we wanted to ensure that the table top part had the correct Part Number for each configuration. In the following video, I opt to add Part Number as the part property to configure.
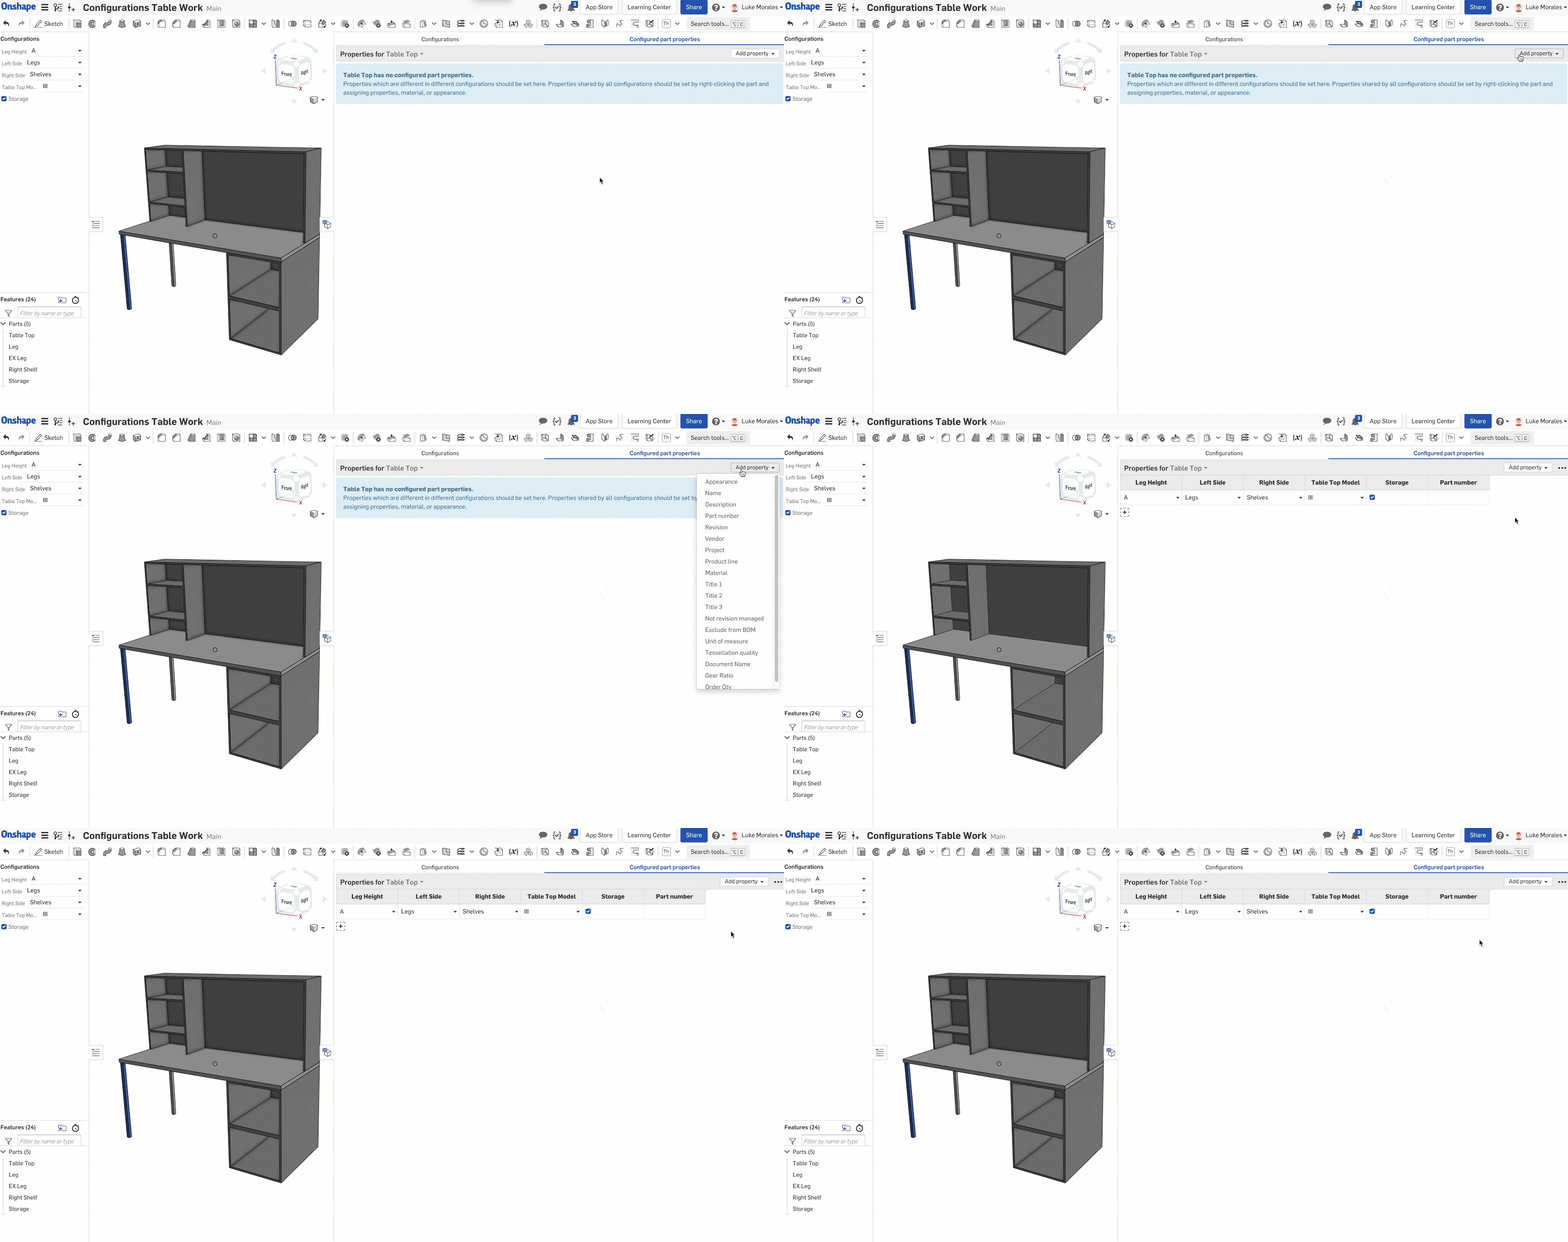
Notice that the furthest column to appear is the Part Number Property, yet there are 5 columns before it -- each corresponding to a configuration input. Even if a part is only tied to a single configuration input, the part properties of said part are affected by the specific combination of all configuration inputs present in the Part Studio. Thus, to properly configure the part properties, you must create a row for every possible combination of configuration inputs.
In this example, we have 5 different configuration inputs: Leg Height, Left Side, Right Side, Table Top Model, and Storage. Each input has a certain number of choices: 3, 2, 2, 3, and 2, respectively. To determine how many combinations you need to account for, multiply the choice quantity for each configuration input together. In this case, it would be:
3 . 2 . 2 . 3 . 2 = 72
So in this case, my Part Properties table needs 72 rows.
To make this table in a separate software, the workflow is the same as described above with one caveat: You must add the rows manually in Onshape prior to editing them in a separate software. After adding the rows, you can copy the table in the same way as with configuration tables:
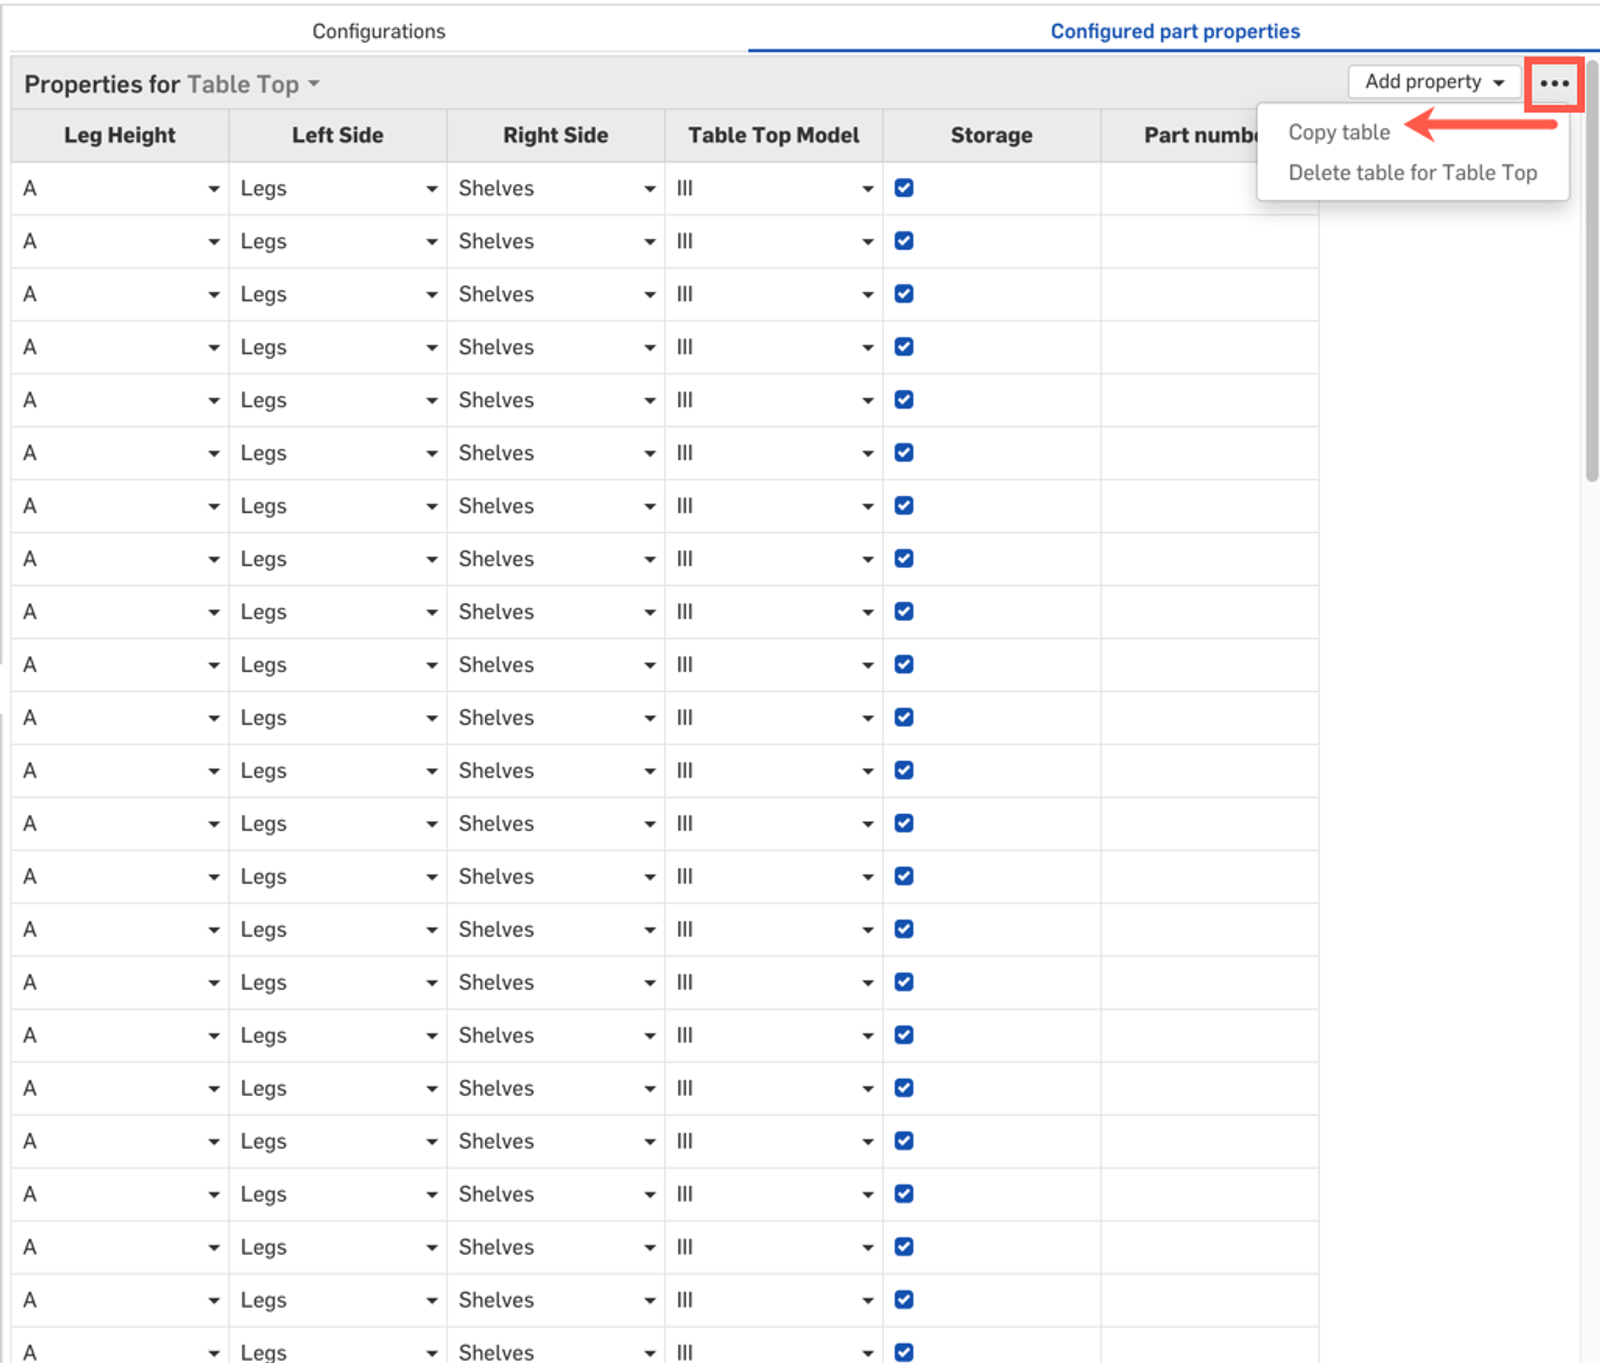
Make your edits in the external software and paste back in the same way as shown with the configuration tables. All part properties are able to be edited in external software, including the Material, Appearance (RGB formatting), Name, Description, etc..
If Metadata granularity is important to your workflow, it may be valuable to consider configuration structure before designing with it. In my example Document, perhaps splitting these parts up into different Part Studios or condensing the number of choices per table would have saved more time on the back end.
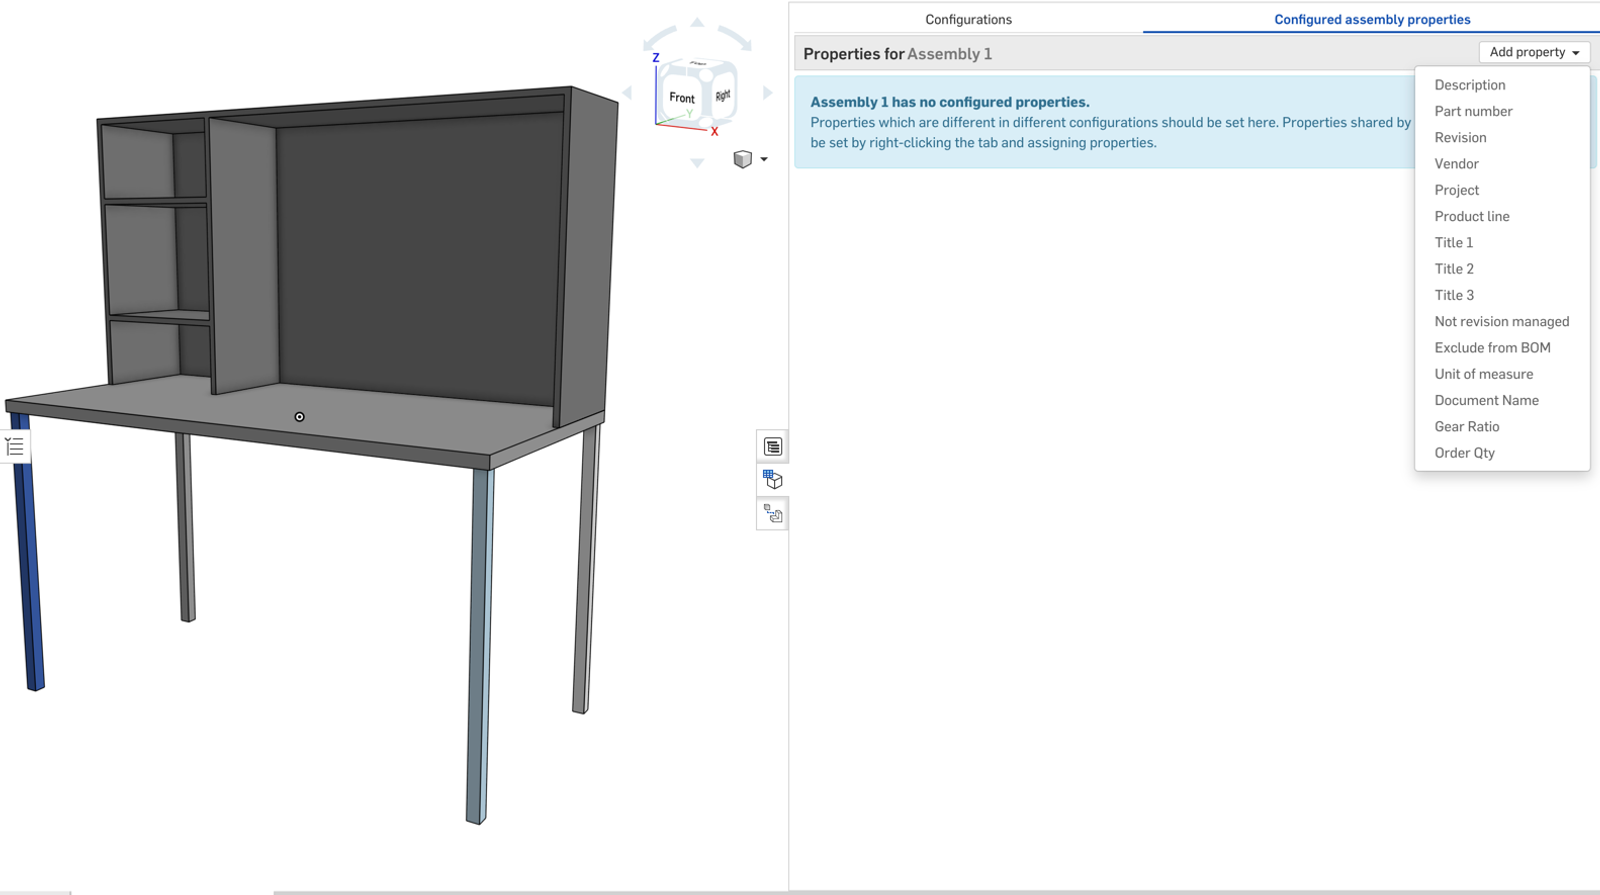
Configured properties are also accessible at the Assembly level.
Interested in learning more Onshape Tech Tips? You can review the most recent technical blogs here.
Latest Content

- Blog
- Customers & Case Studies
- Collaboration
- Consumer Products
RigStrips Boosts Design Speed Using Onshape's Collaborative Tools
02.11.2026 learn more
- Blog
- Becoming an Expert
- Features
- Data Management
How Onshape's Repair Tool Fixes Broken References
01.29.2026 learn more
- Blog
- News from Onshape @ PTC
- Integrations
- Simulation
Luminary Cloud in the Onshape App Store: Physics AI Meets Parametric CAD
02.04.2026 learn more

