
2:22
Onhape’s ability to track and organize Action Items recently got a significant improvement with the introduction of General Tasks. Action Items can now be created outside of the scope of a comment or a release, and can even be separate from CAD entirely.
Let’s take an in-depth look at these tasks and provide some tips to optimize this functionality.
What Are Onshape’s General Tasks?
On the Action Items page within Onshape Professional and Enterprise you will find a “Create task” option. Within the dialog, you have many different options where you can provide information, timing, context and anything else related to the task at hand.
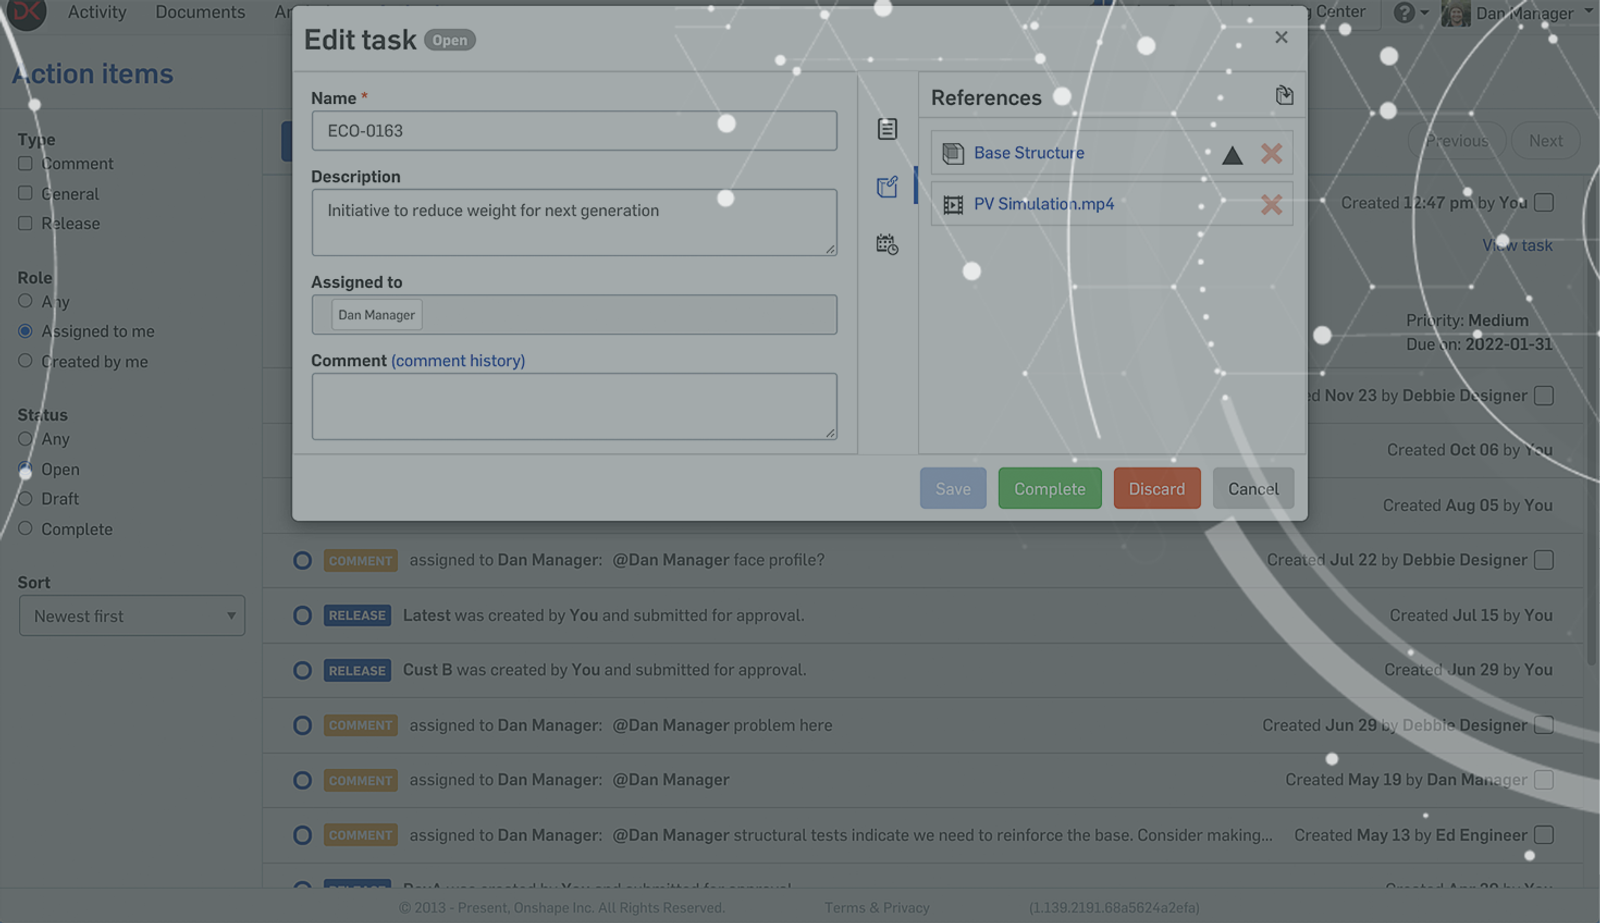
Assigning Tasks in Onshape
The “Assigned to” field indicates who will be responsible for the task. The default value for this field will be the user creating the task, allowing you to set reminders for yourself and organize your desk.
This can of course be modified, and you can choose to assign the task instead to any paid user within your company environment. Once assigned, a task will appear on that user’s Action Items page just like any comment or release task.
It is important to note that tasks can be assigned to Light users as well, allowing Onshape to be used by non-designers as a task and project management environment.
Adding Onshape References
When creating a task, you also have the ability to reference any Onshape object for which you have “Link Document” permissions. Familiar Onshape search functionality can be found in the “References” tab.
You can reference an active workspace or specific versions of parts, assemblies, drawings, files, feature studios and applications. Multiple objects can be added to any task to provide all of the relevant contexts of the assignment.
Alternatively, a task can be assigned with nothing attached at all.
Setting Priority Levels and Due Dates
Timelines and priority can be established by assigning a due date and a priority level.
Configuring the ‘Task’ Category
It is important to note that the fields in the “Create Task” dialog can be configured by a company administrator.
This functionality came with some new Onshape properties and a new “Task” category. Any property added to this category will show up as an input when creating a task. Properties like “Reason for change” and “Proposed solution” can be added to this category to extend the depth of the task.
Watch the video below to see how to use Onshape’s General Tasks:
This new piece of core Onshape functionality extends past the realm of modeling, assembling, and drawing into project management capabilities. As with other aspects of Onshape, it is fully configurable. I, for one, am excited to see how you take advantage of it!
Interested in learning more Onshape Tech Tips? You can review the most recent technical blogs here.
Latest Content
- Blog
- Becoming an Expert
- Assemblies
Built to Scale: Why Large Assemblies Don’t Slow Down in Onshape
07.16.2026 learn more- Blog
- News from Onshape @ PTC
- Artificial Intelligence
Onshape Labs: AI in CAD Guided by Designers, Driven by Innovation
07.15.2026 learn more- Blog
- Evaluating Onshape
- Data Management
- Collaboration
- Artificial Intelligence
How the Most Underrated CAD Feature Improves Design Workflows
07.09.2026 learn more