02:28
Drawing and part revisions can have an interesting relationship. Depending on how you choose to manage your revisions, you’ll generally find one of two paths you can take with regards to this relationship:
- The part revision letter ALWAYS matches the drawing revision letter.
- The drawing revision can be independent of the part revision.
There are pros and cons to each option, but that is a discussion for another day. In this tech tip, we’ll show you how to handle both of these situations in Onshape Release Management.
Situation 1: Part and Drawing Always Match Revision
This first situation is the simplest in Onshape. The trick to making sure the part revision and the drawing revision are always in sync is to always create the release from the drawing.
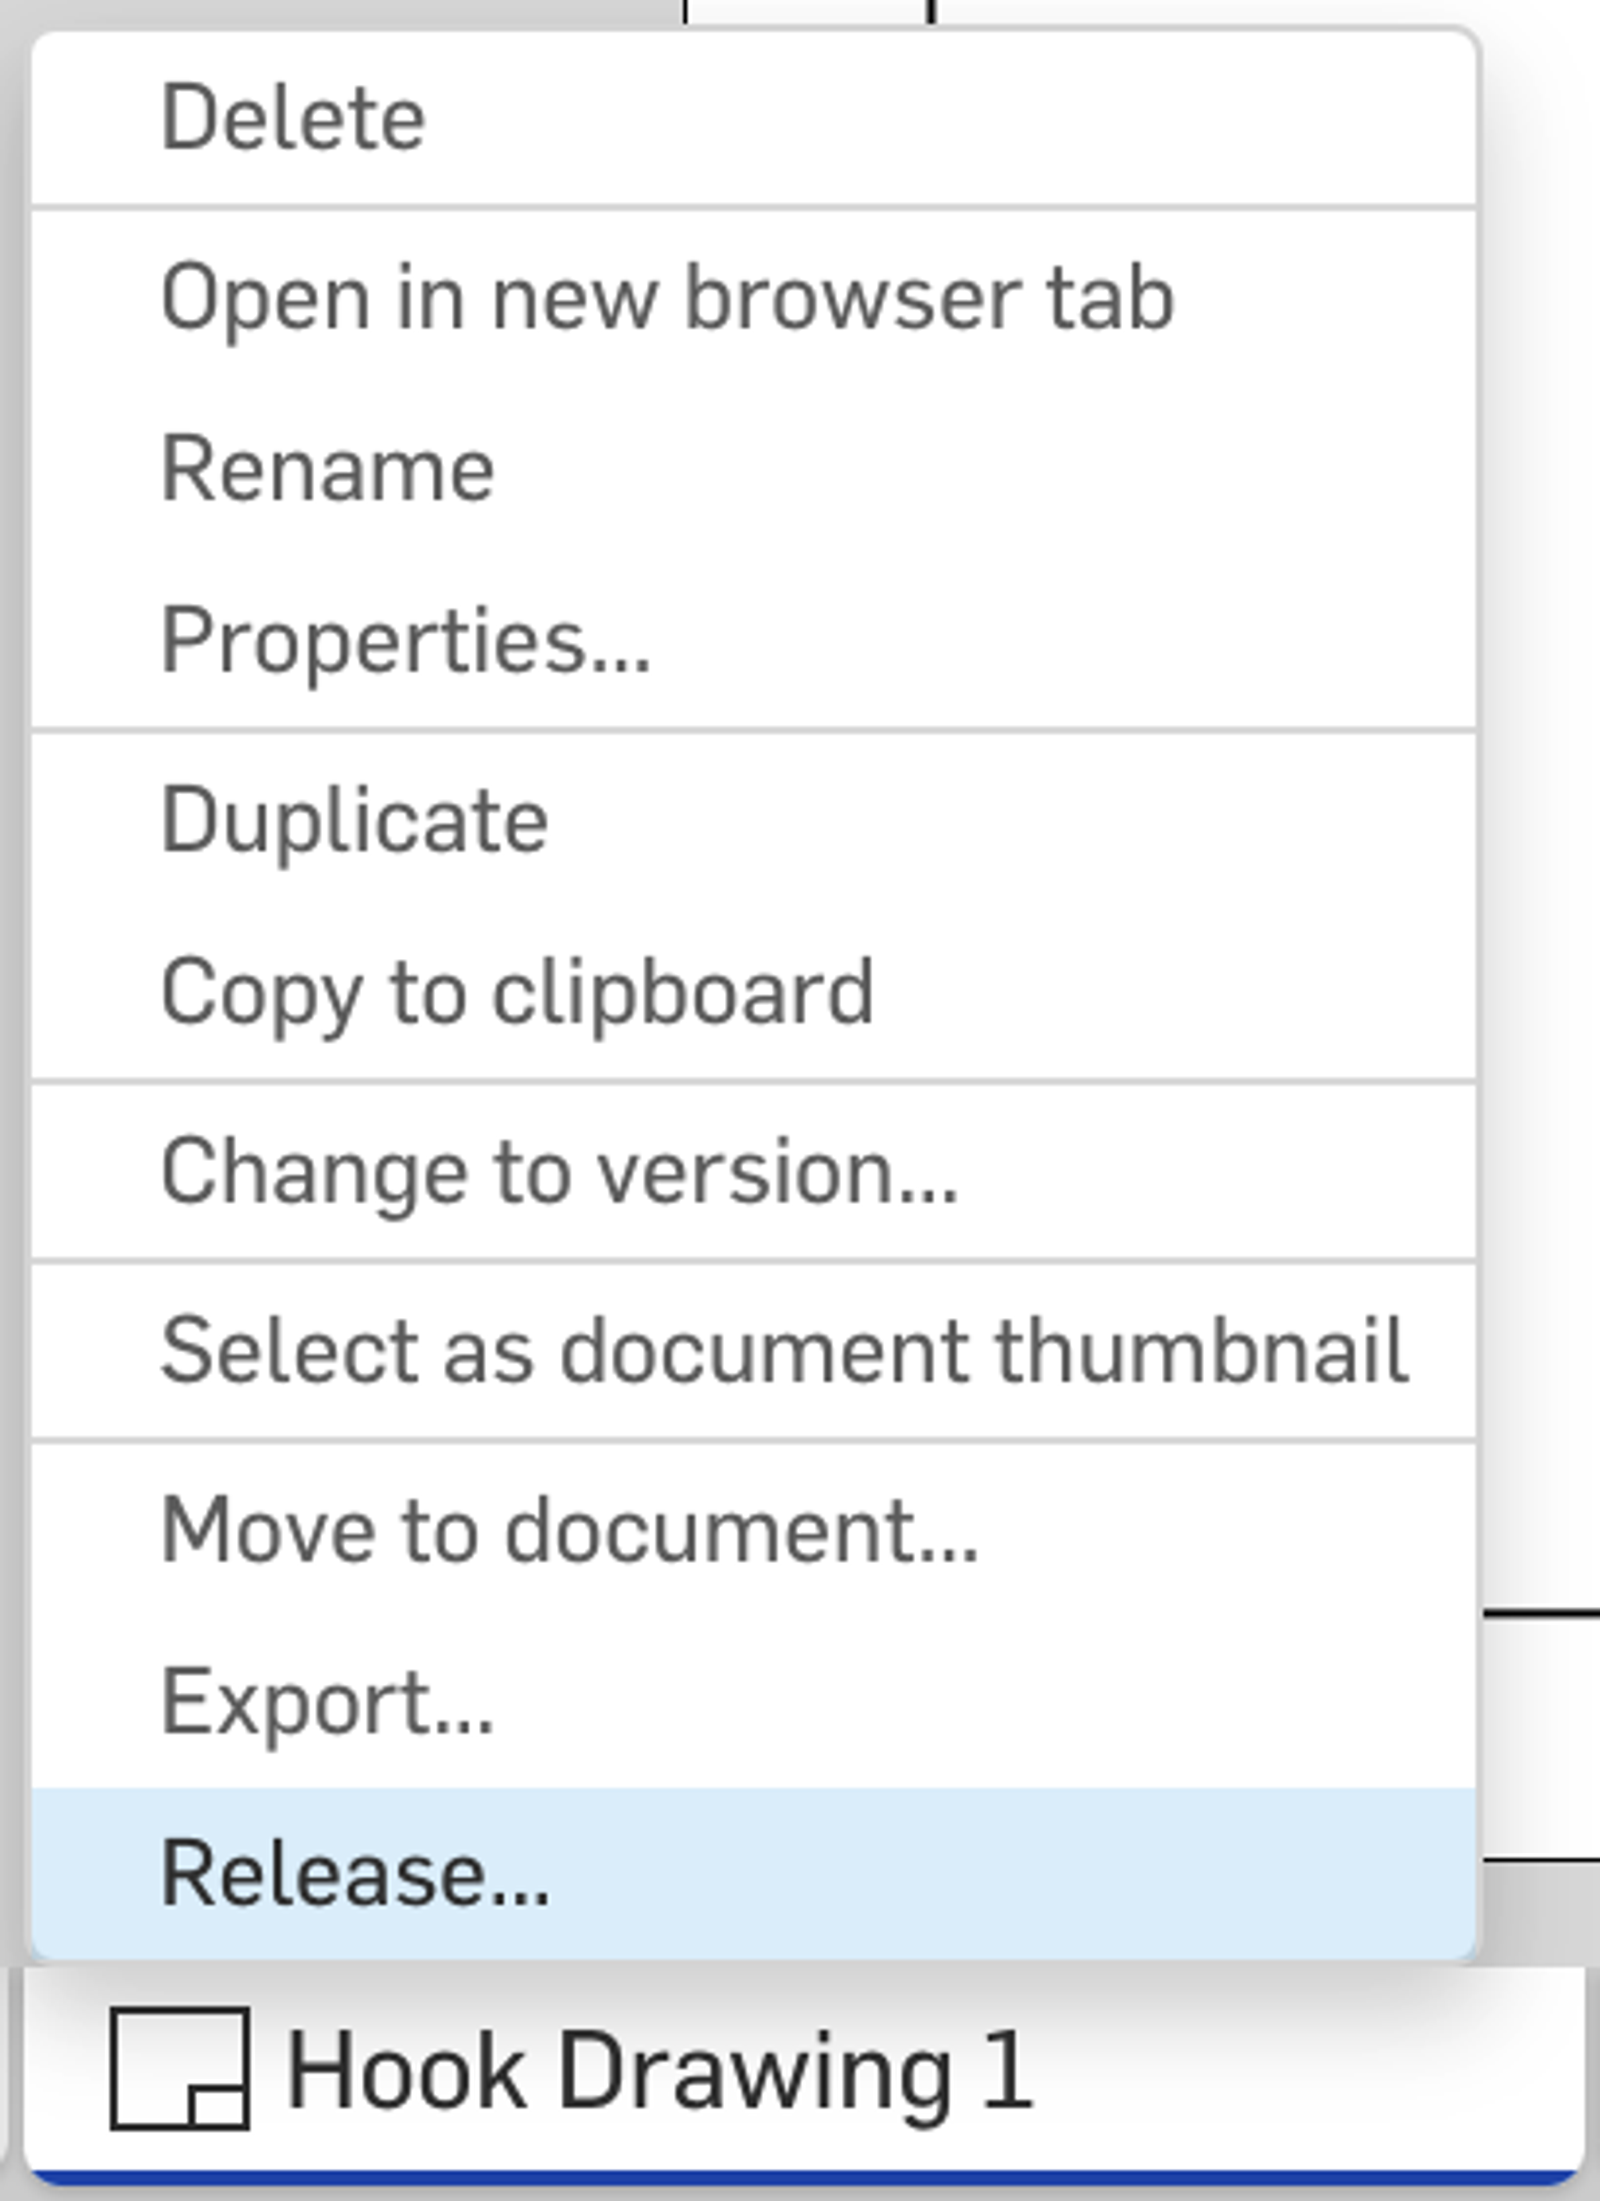
To do this, right-click on your drawing tab, and select “release.”
Notice that the release candidate automatically includes the referenced part, and is matching the revision letter to that of the drawing.
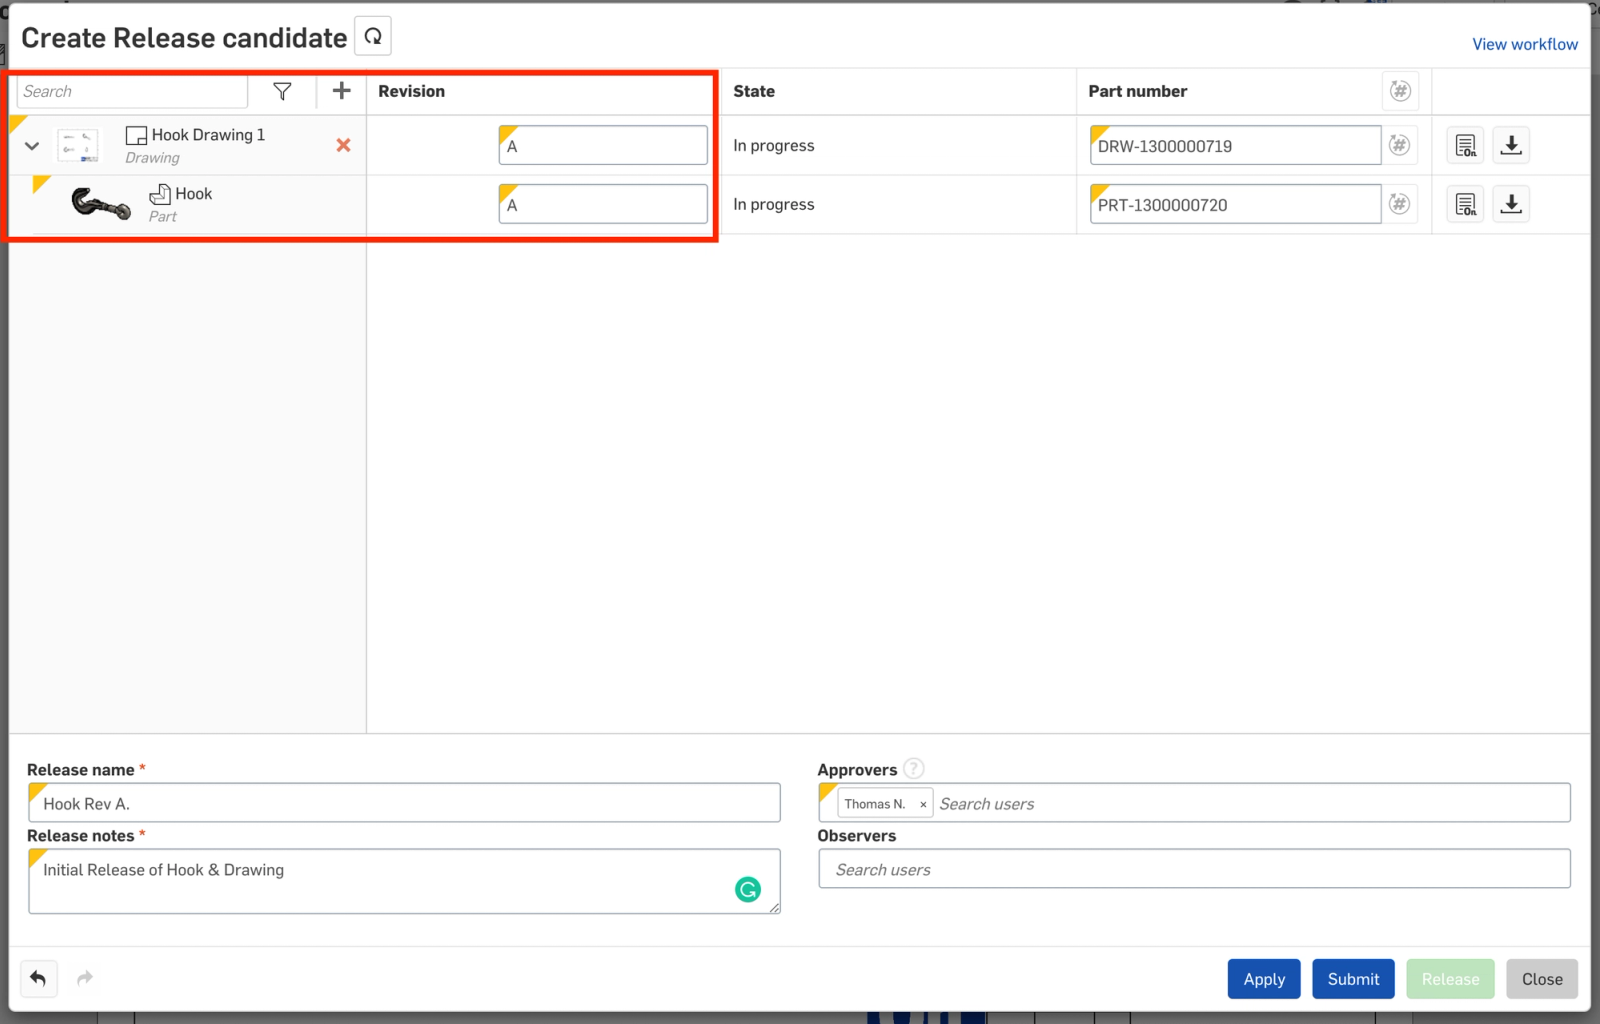
This will work as long as you have not already released the part independently before creating the drawing.
Moving forward, the drawing and part will continue to match revision letters B, C, D, etc., as long as you continue to initiate the release candidate from the drawing, and the drawing reference is maintained as the workspace (as we currently have) or a version (when linked across Onshape Documents).
Situation 2: Drawing Has a Separate Revision From Part
Sometimes the drawing revision needs to be increment, but the part itself should stay the same. The simplest example of this is when a basic error such as a typo has been made in a note or dimension.
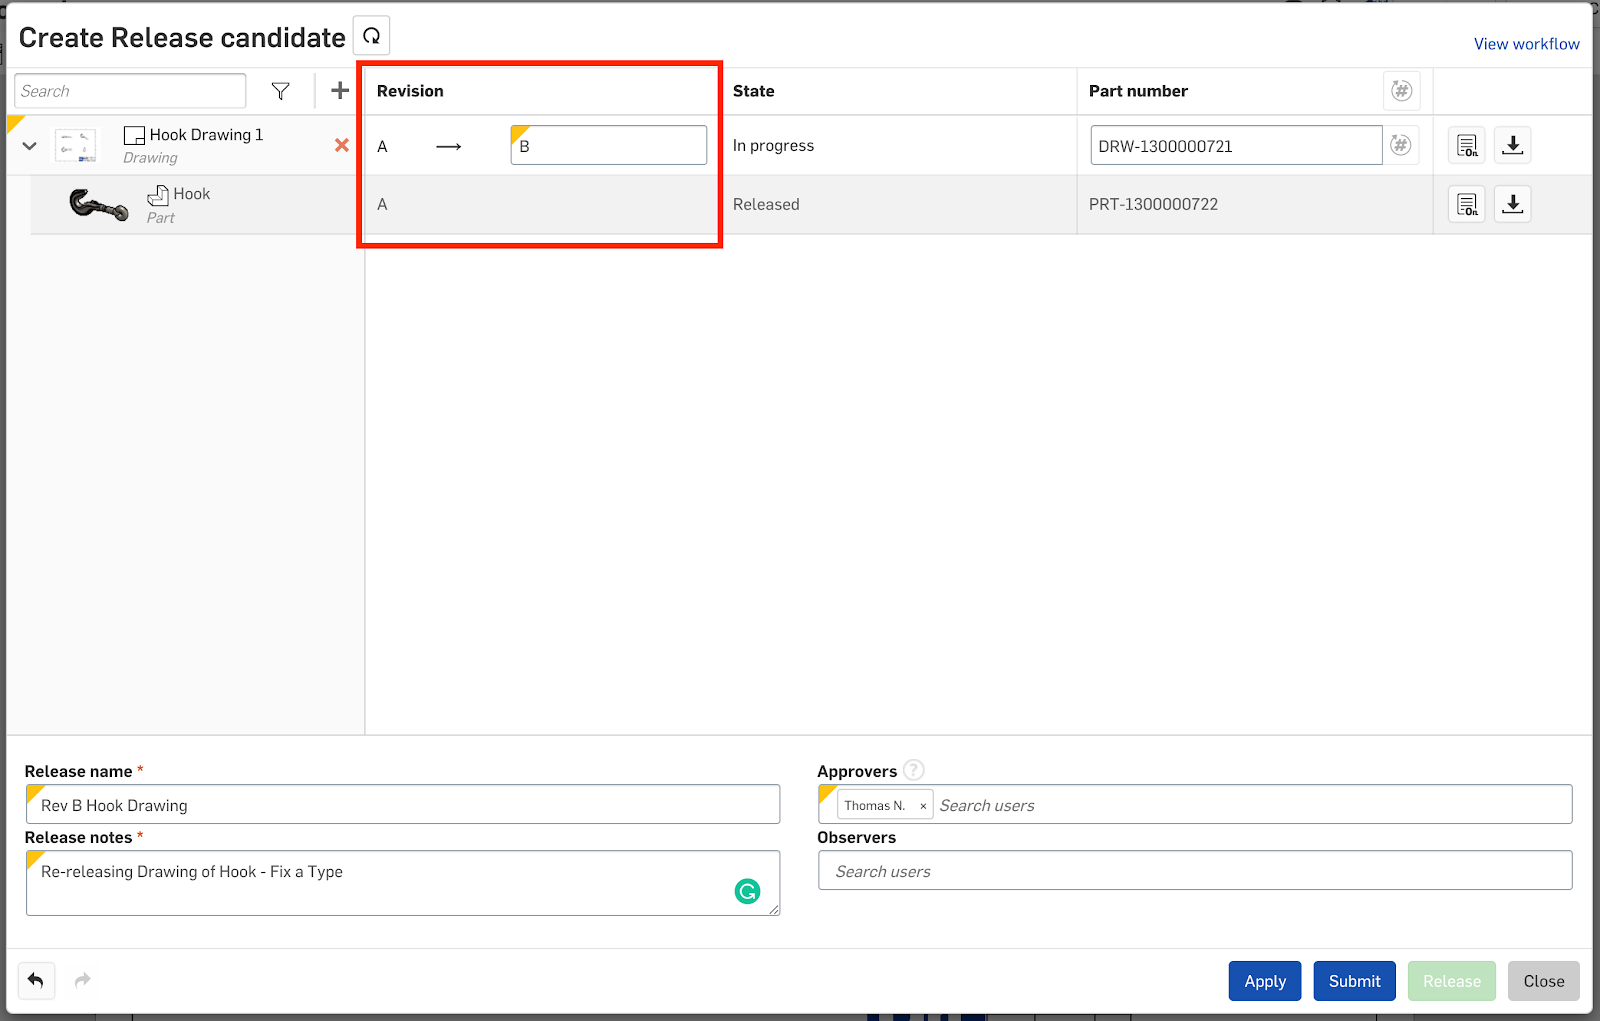
The drawing has changed and needs to be re-released as Revision B. But technically, nothing about the part itself has changed. Issuing Revision B of a part that is identical to the original might be confusing. So we want to increment just the drawing, but not the part revision.
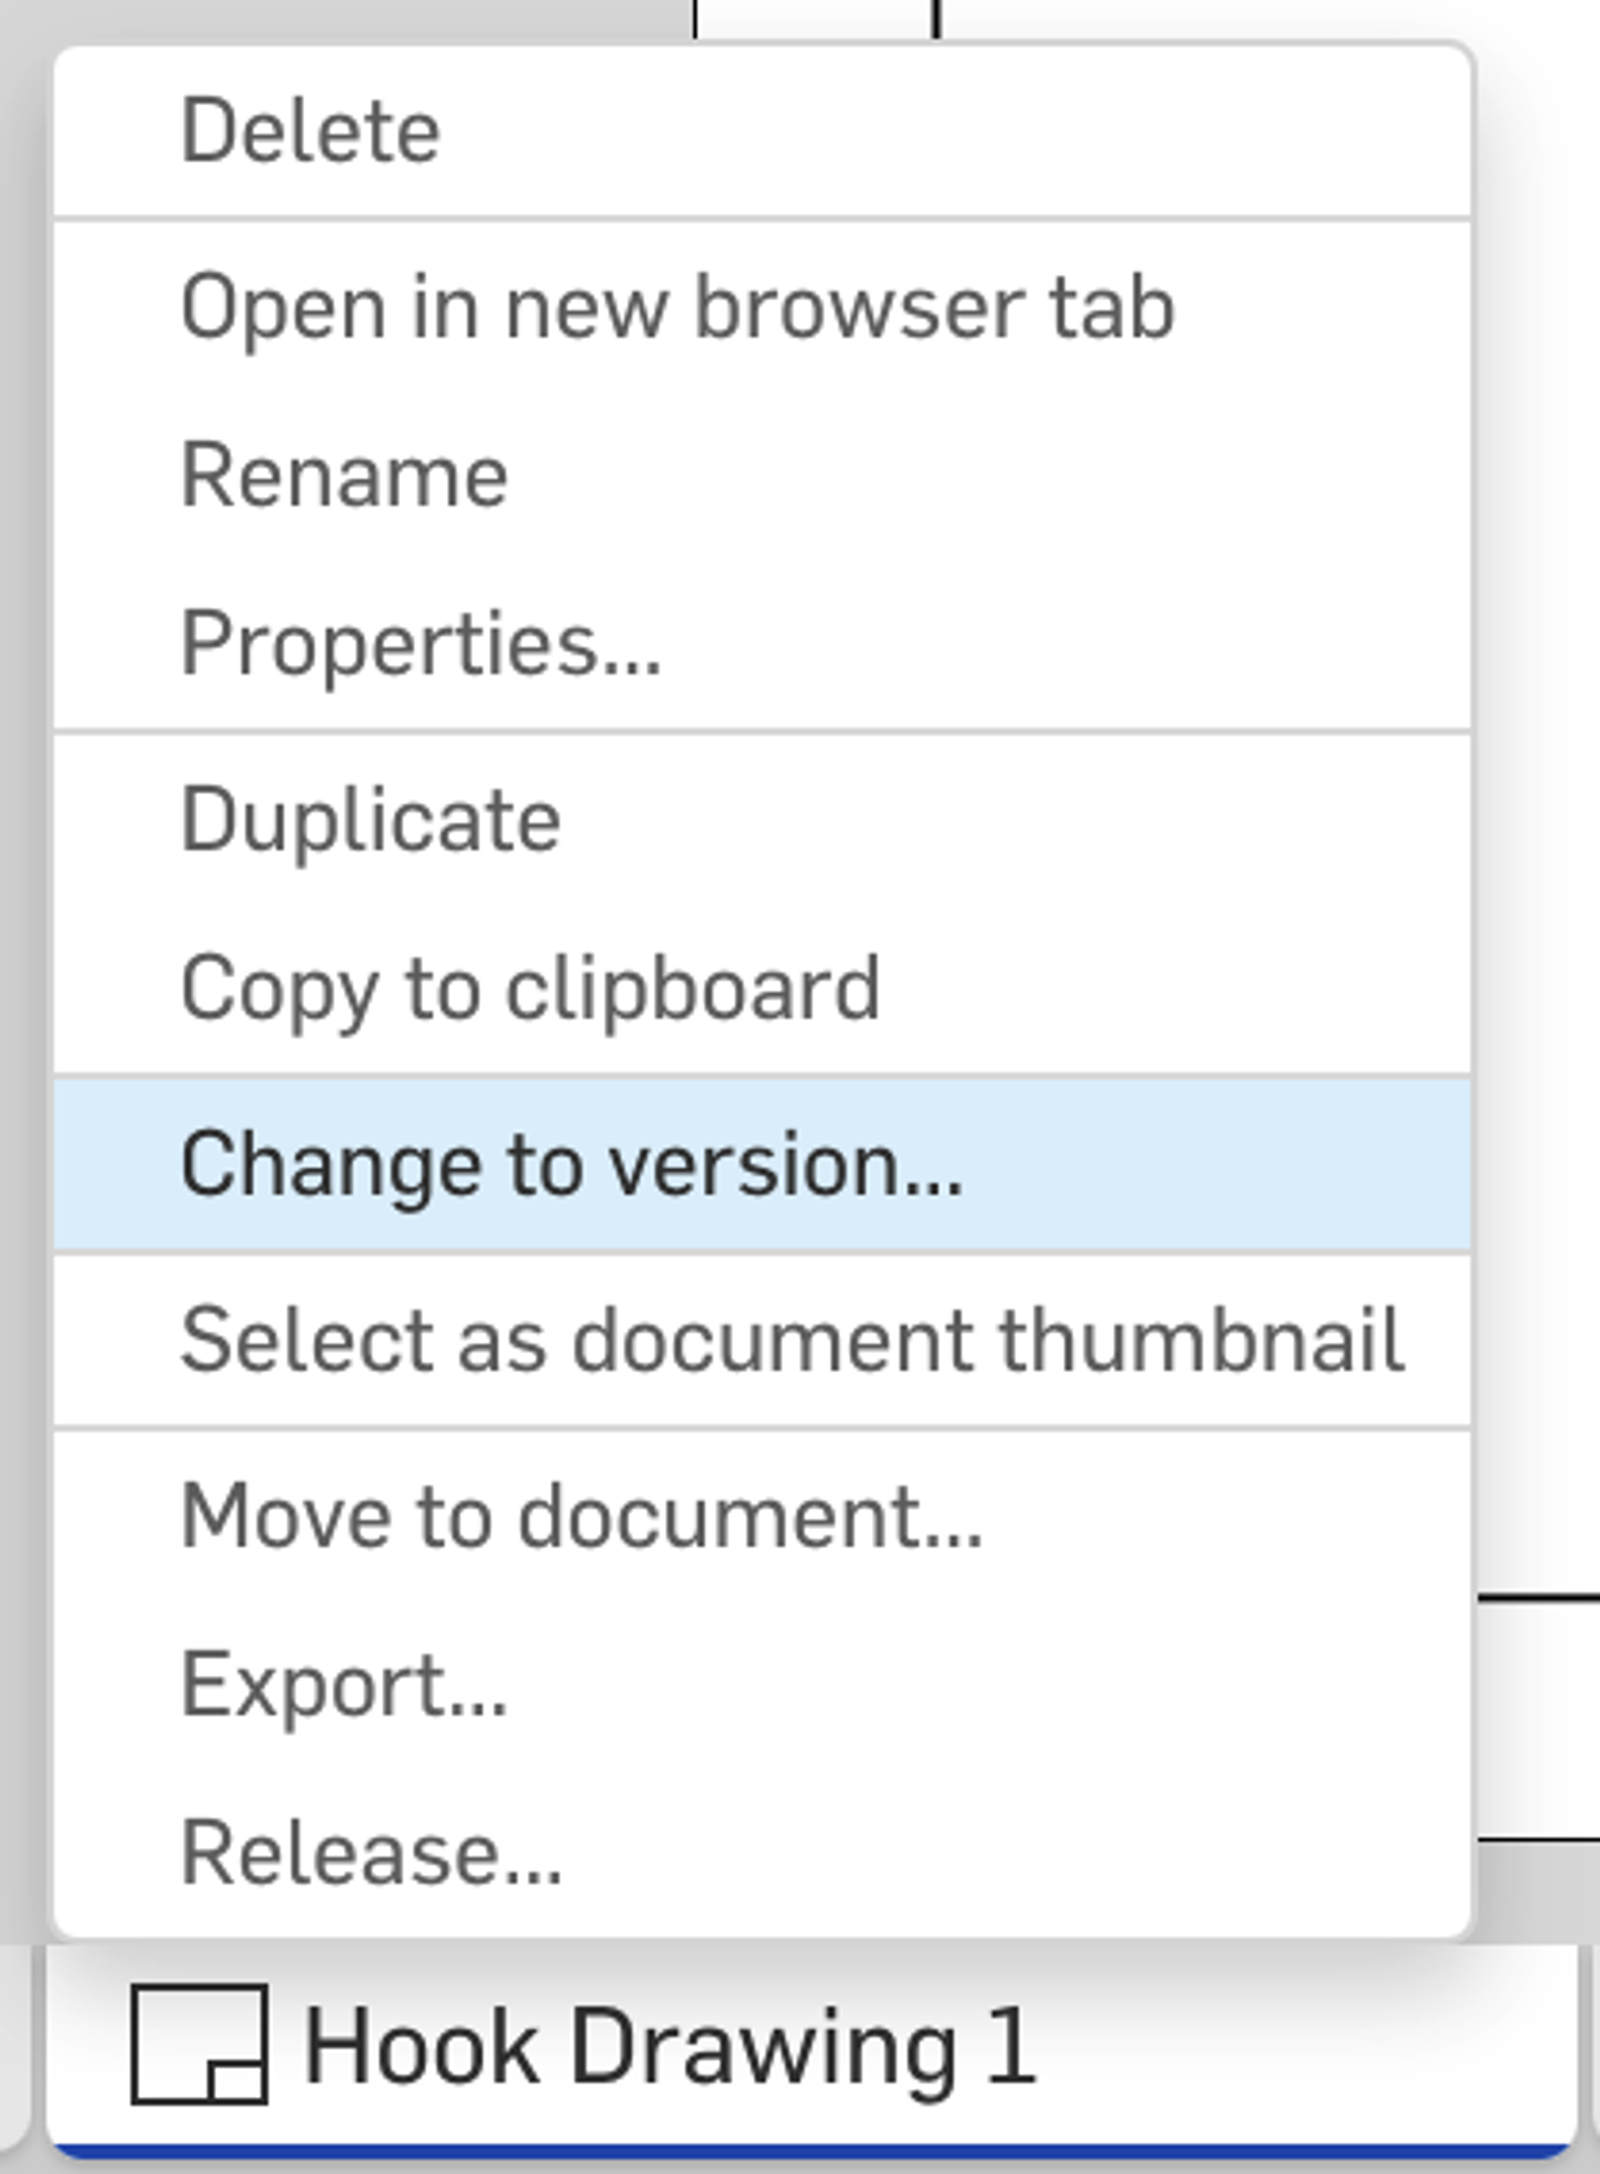
To do this, we’ll first need to change the drawing reference to look at Revision A of the part. Right-click on the drawing tab, and select “Change to version.”
The Reference Manager dialog will pop up. Select the triangle icon in the top right corner to filter only revisions. Select Revision A of the part, and update all.
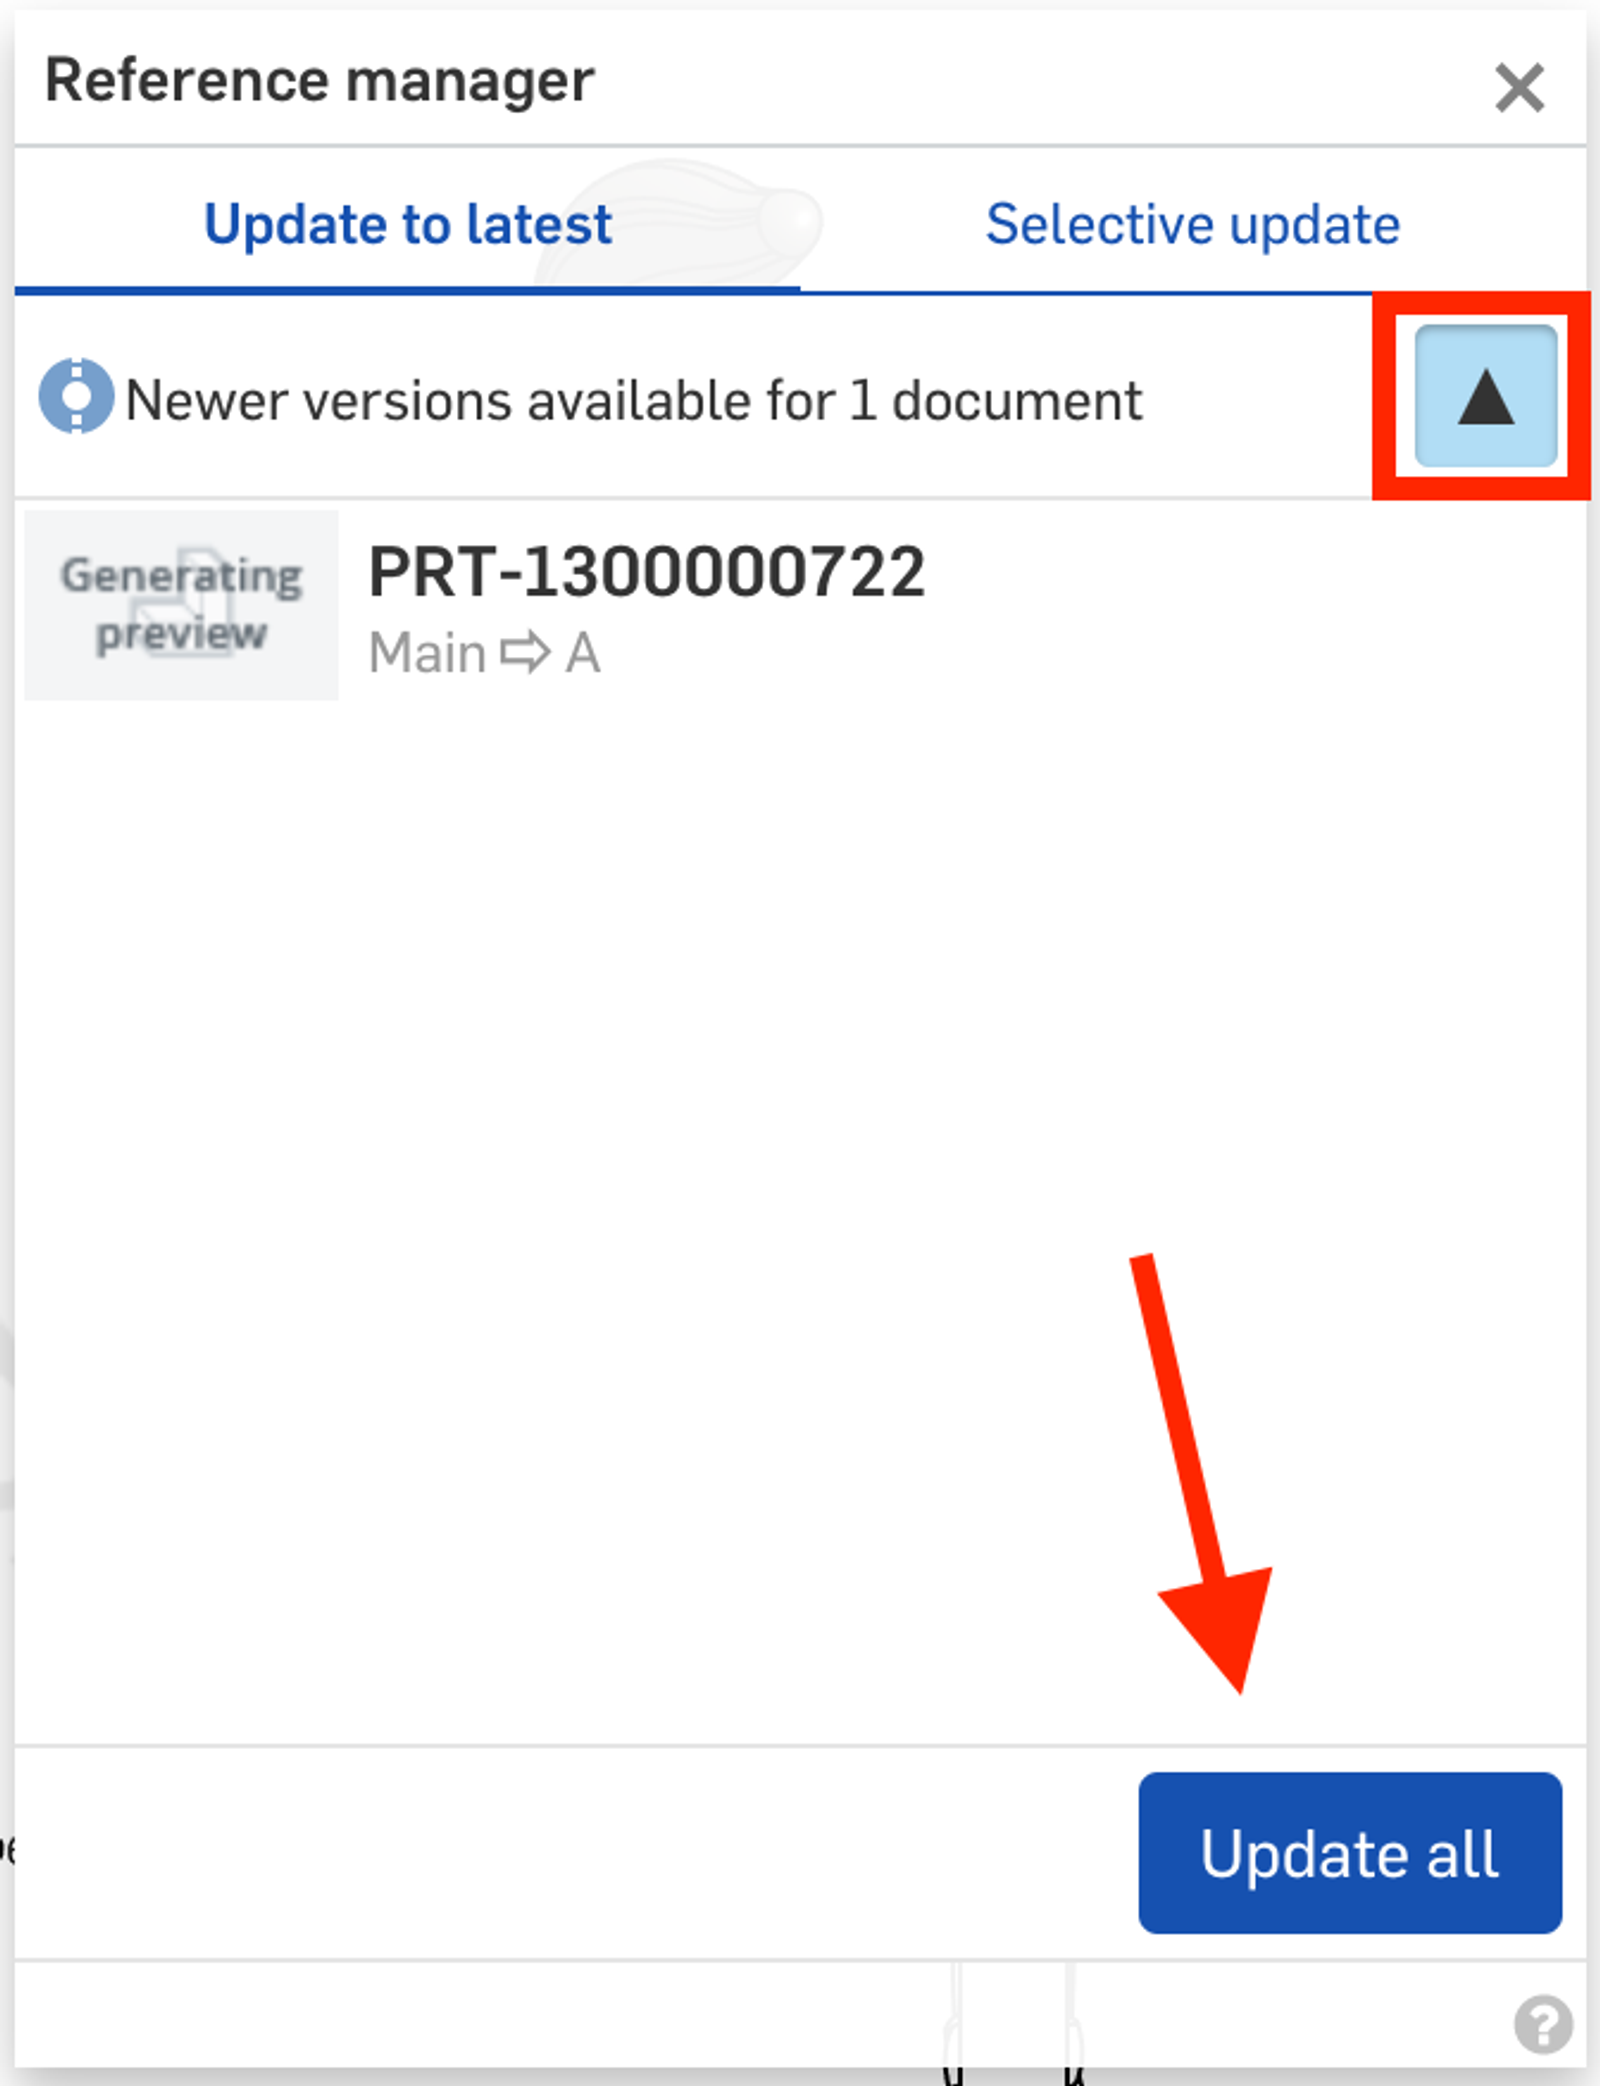
Your drawing will now be linked to Revision A of the part. Because of this, creating a release of the drawing will no longer try to increment the revision of the part; you will correctly see it increment the drawing to Revision B, but the part itself stays at A.
IMPORTANT: Your drawing is now linked to a “static” revision of the part. Even if changes are made to the part itself, you will need to use the “update linked document” option from a right-click on the drawing tab in order to see the changes.
Of course, there’s much more to release management than what we just covered in this tech tip. For more information, check out Onshape’s Release Management Tech Briefings, and register for our Release Management Instructor-Led Training Course.
Latest Content

- Blog
- Becoming an Expert
- Sheet Metal
Two Views, One Model: Faster Sheet Metal Design in Onshape
02.12.2026 learn more
- Blog
- Customers & Case Studies
- Collaboration
- Consumer Products
RigStrips Boosts Design Speed Using Onshape's Collaborative Tools
02.11.2026 learn more
- Blog
- Becoming an Expert
- Features
- Data Management
How Onshape's Repair Tool Fixes Broken References
01.29.2026 learn more


