3:01
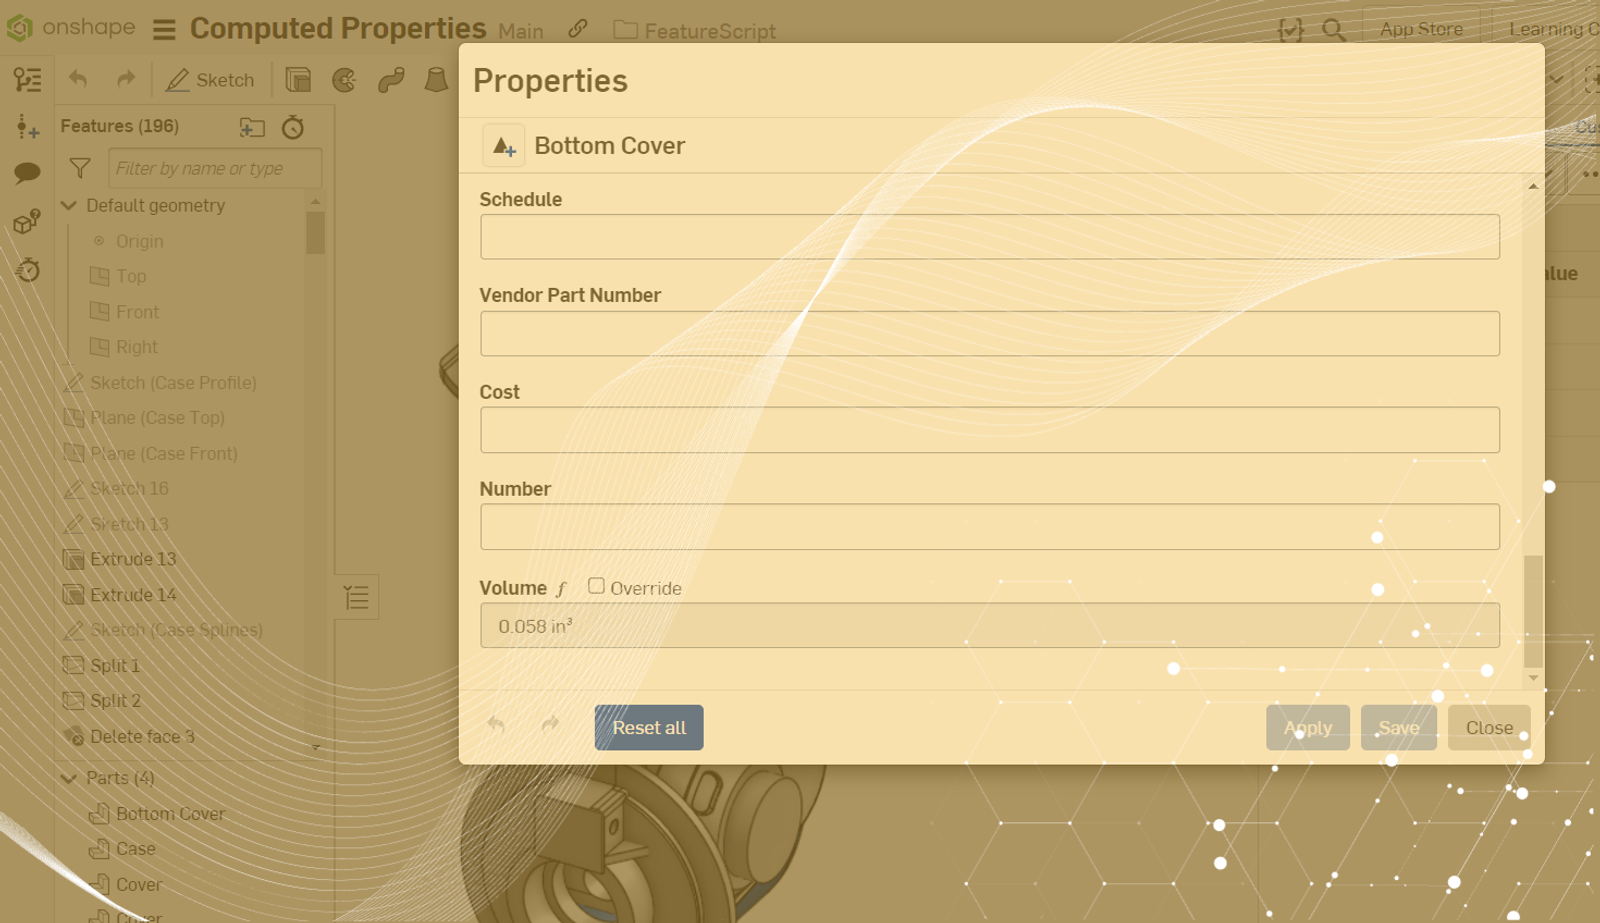
Onshape automatically calculates the mass of a part and puts it into a mass custom property. Professional and Enterprise subscriptions can create their own properties to automatically calculate other values, like volume, through the use of Feature Studios.
Defining the Property Function
Computed part properties are controlled by a Feature Studio, which is a Document tab containing FeatureScript. All Feature Studios start with declaring the version and importing the geometry.fs.
In this case, we do not need it for a property function, and it is recommended to remove it because it can hurt performance. Instead, add the following imports:
import(path : "onshape/std/math.fs", version : "1691.0");
import(path : "onshape/std/computedPartProperty.fs", version : "1691.0");
import(path : "onshape/std/properties.fs", version : "1691.0");
import(path : "onshape/std/evaluate.fs", version : "1691.0");
Next, define a property function in the following format:
annotation { "Property Function Name" : "name" }
export const name = defineComputedPartProperty(
function(context is Context, part is Query, definition is map) returns type
{
//computation here
});
The return value type could be a string, number, boolean, or ValueWithUnits.
In this example, we will create a property function to calculate volume. Change the name of the annotation and constant to “computeVolume” and have it return the type "ValueWithUnits".
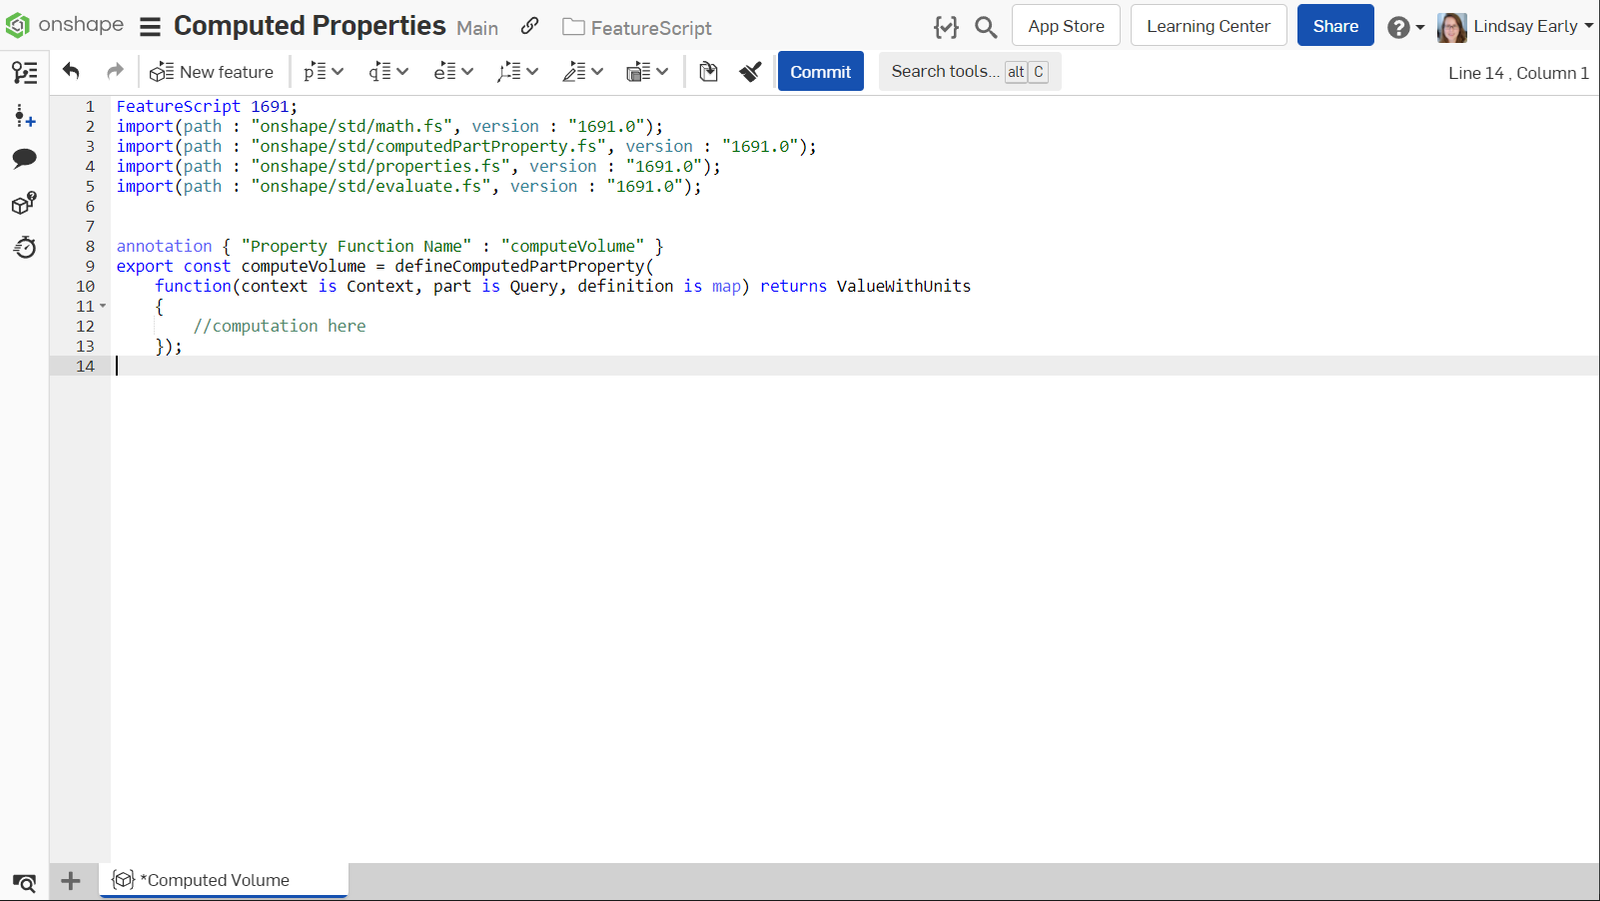
Now, you are ready to calculate the volume to return. All FeatureScript calls are available to property functions (as long as you have the correct imports). To get volume, use the "evVolume" function:
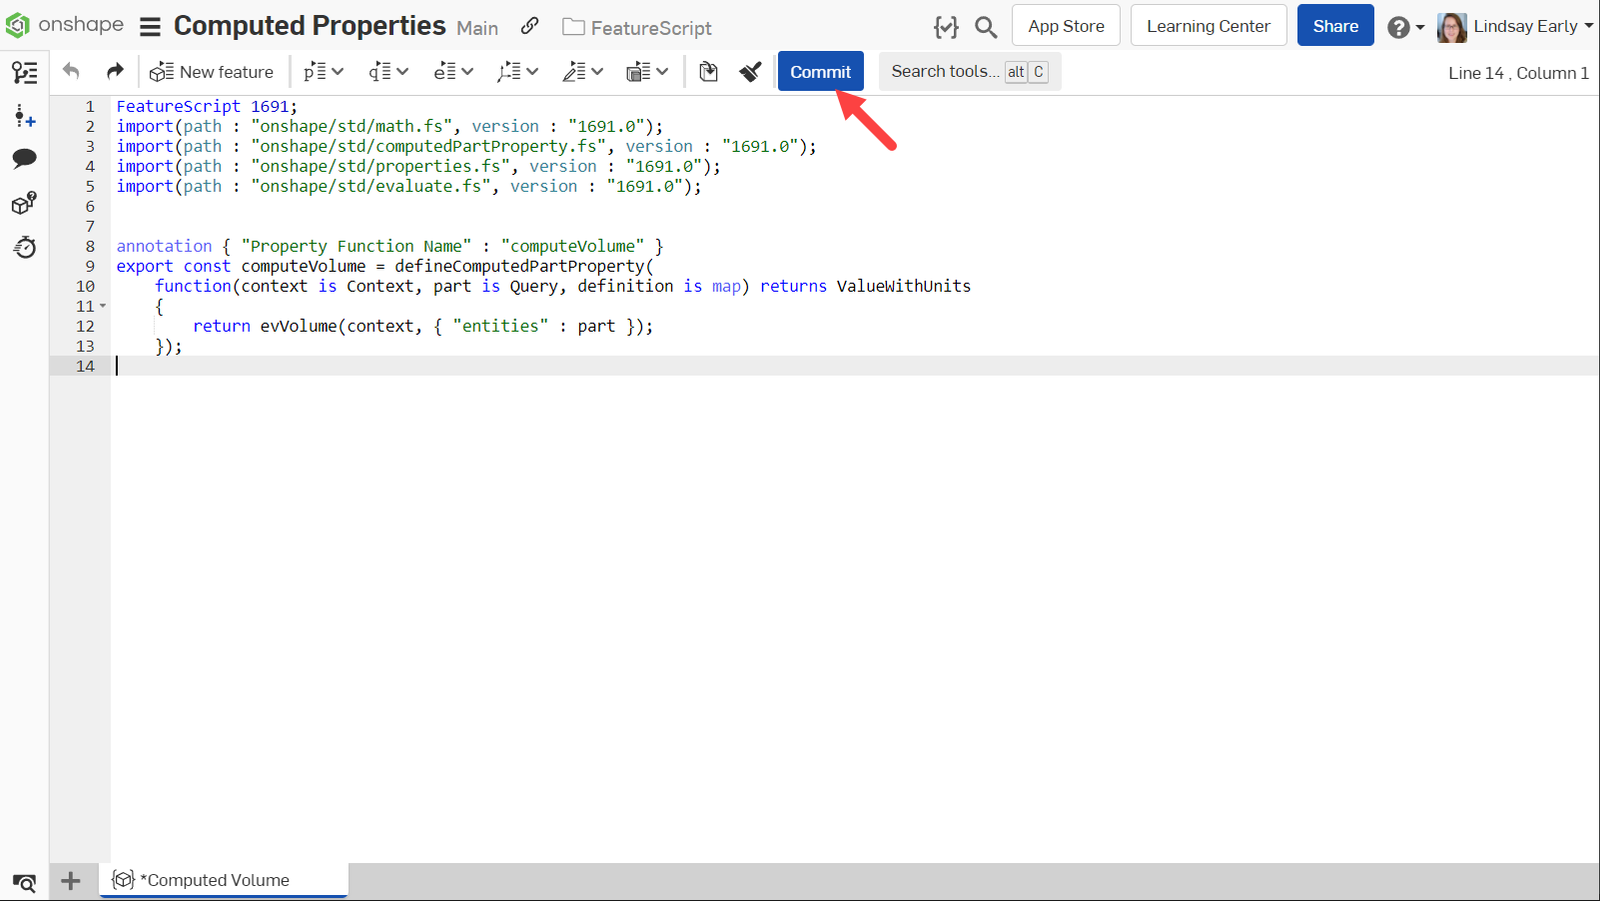
return evVolume(context, { "entities" : part });
The part comes from the arguments in the function. When this is applied as a computed part property, it will assign unique volumes for each part.
Commit the finished Feature Studio to execute the function.
Test the Property
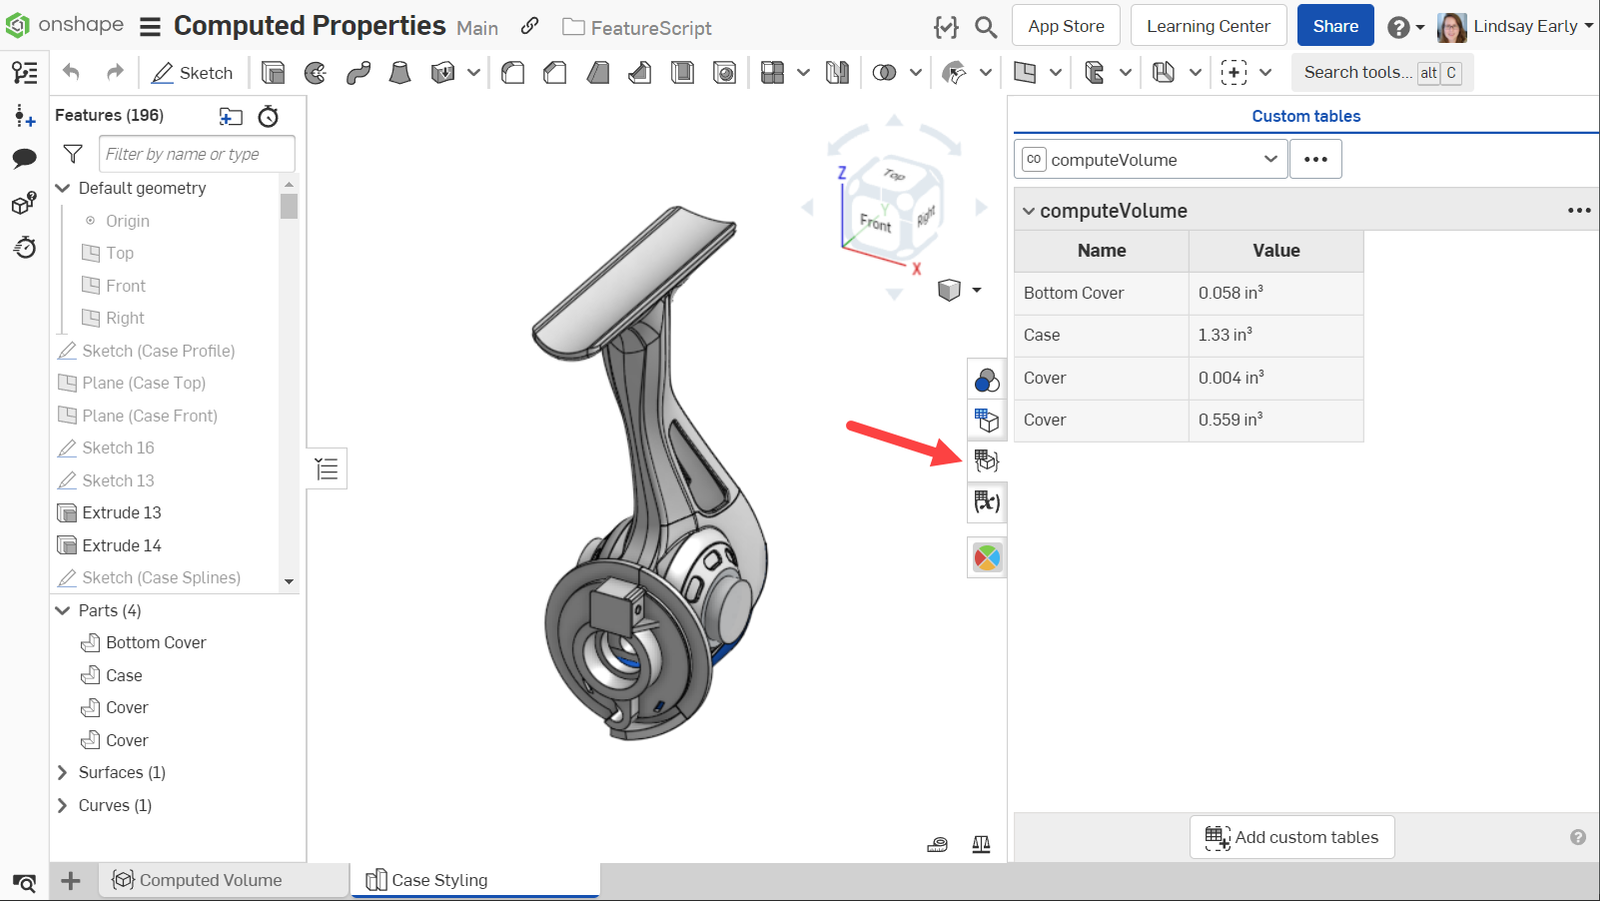
Computed properties are automatically added as a custom table within the same workspace. Create a Part Studio in the same document with some geometry inside. Select the Custom Tables tab on the right. The "computeVolume" function shows in the droplist, and the volumes of each of the parts display correctly.
Create a version of the document to publish it and make it accessible outside of the current workspace.
Configure the Computed Property
Finally, you are ready to implement the property function in a custom property. In the Company or Enterprise settings, select the Properties tab. Create or select a property for volume. The property must be a compatible type for the function. You can only compute properties for "Text", "Double", "Boolean" or "Value with units" property types.
In this case, it must be "Value with units". After adding “Part” as a Category, the computed part properties will show at the bottom. Click “Select computed part property function” to navigate to the document and function.
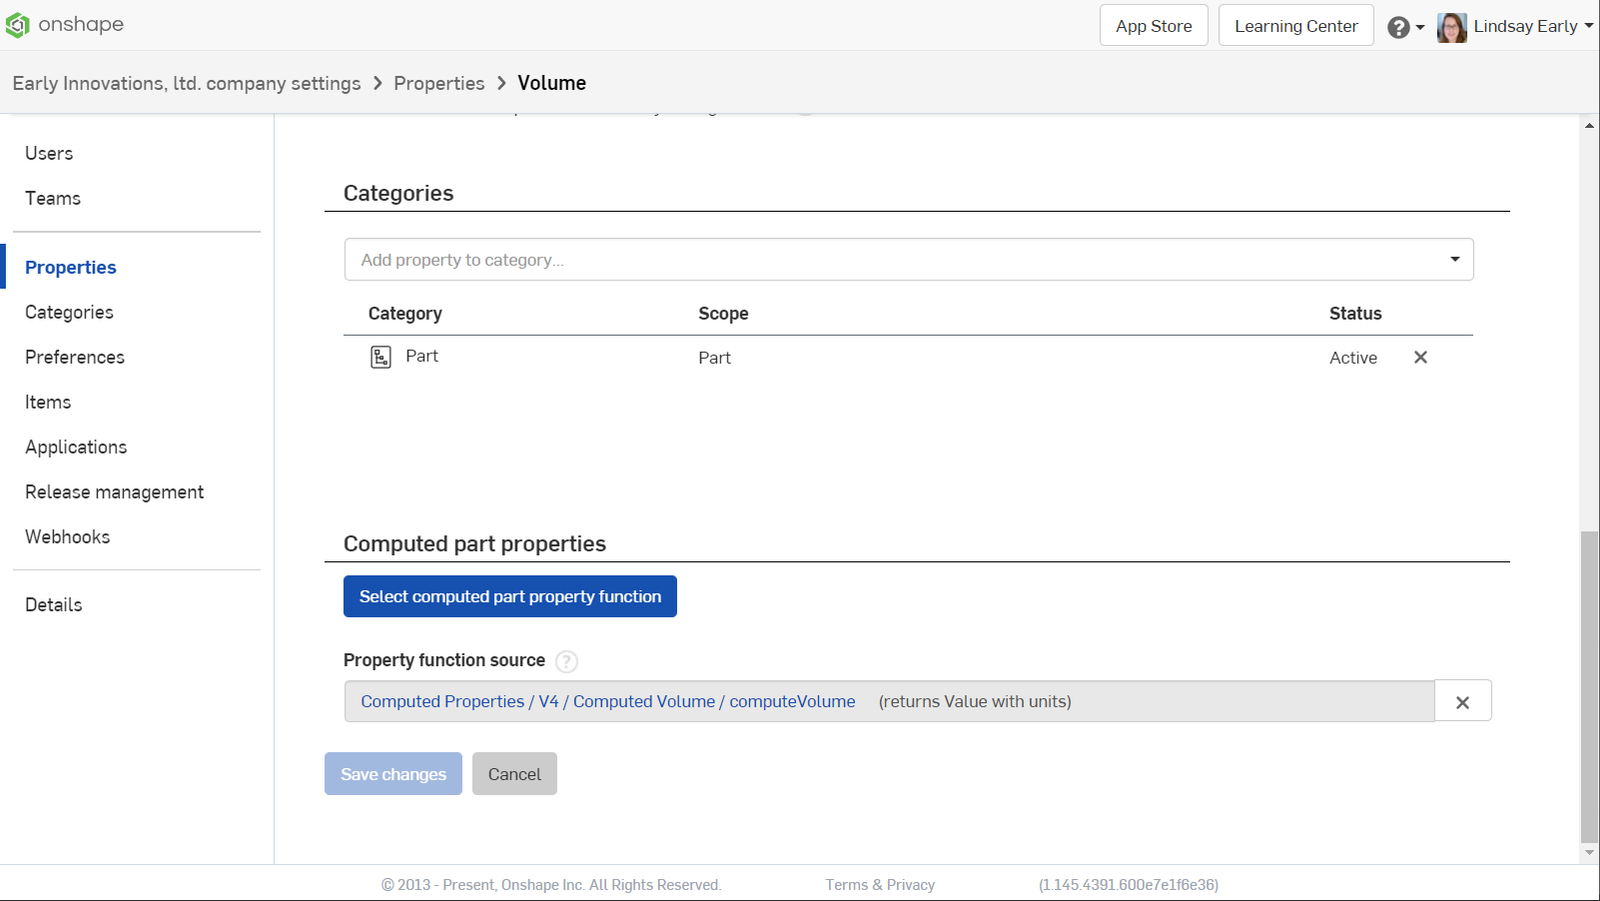
Note: If you make any updates to the function, you will need to update it here by clicking the “Select computed part property function” again.
Now, the Volume property shows in the Properties dialog for a part.
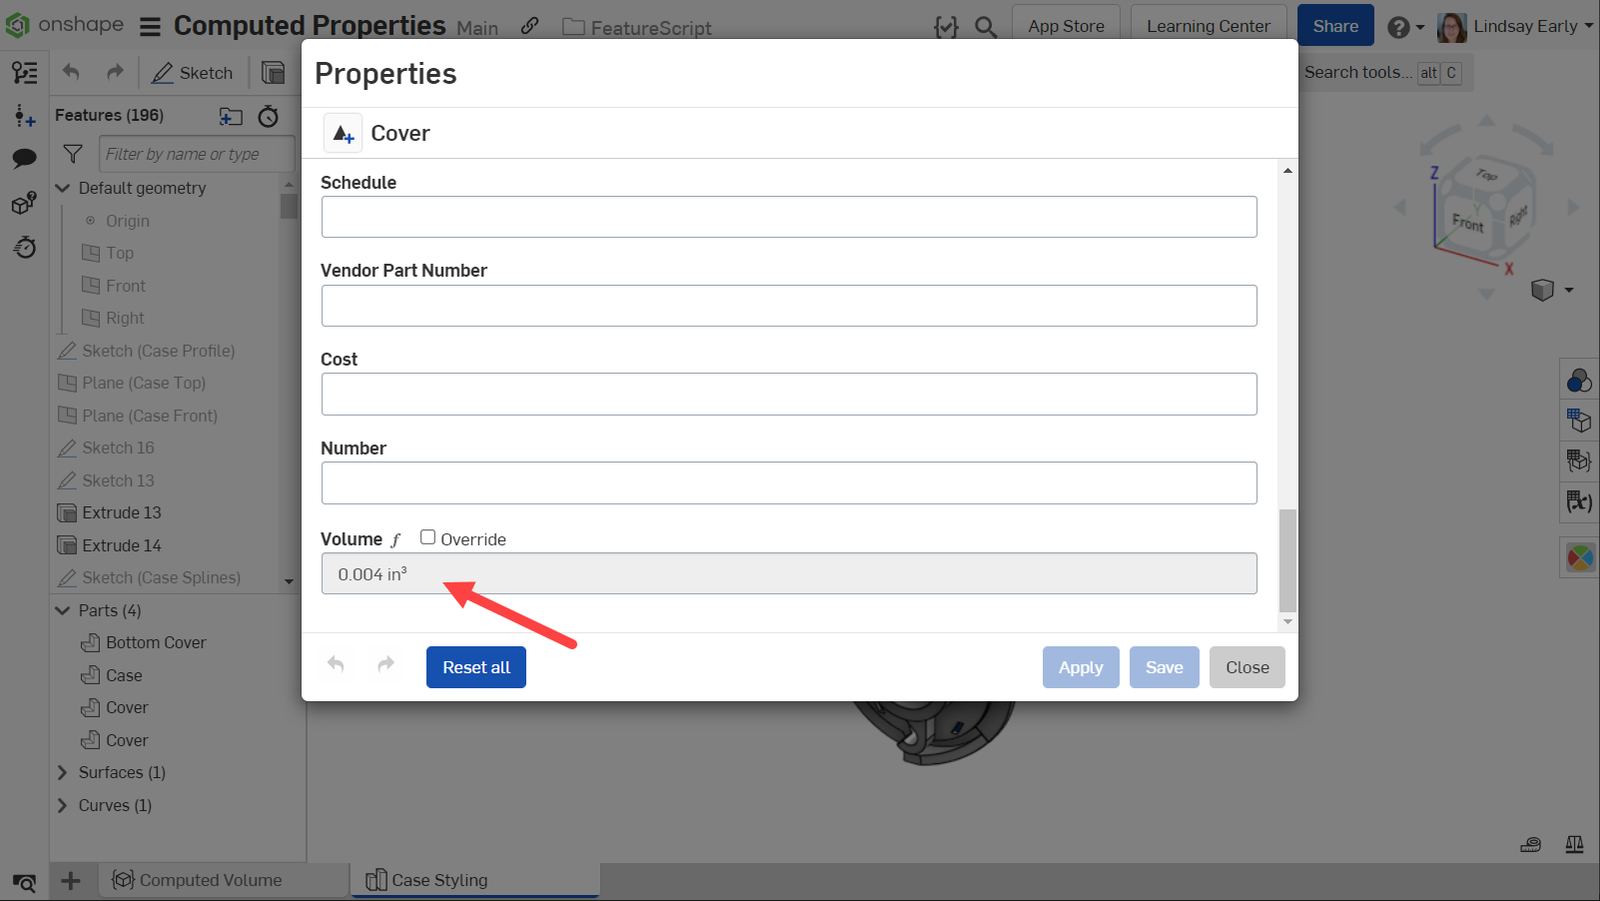
Note: The “Override” checkbox is only available if you have checked the “Edit value in workspace” or “Edit value in version” checkboxes. If you don’t want anyone to be able to override, clear those options in the property definition.
Take a look at the completed example Onshape Document. Find out more by visiting FeatureScript documentation that outlines how to create a computed property.
You can use computed properties to concatenate strings, calculate costs, and many other things. Just bear in mind that there isn’t a user input as there would be for a Custom Feature.
Watch the video below for more:
Interested in learning more Onshape Tech Tips? You can review the most recent technical blogs here.
Latest Content

- Blog
- Becoming an Expert
- Sheet Metal
Two Views, One Model: Faster Sheet Metal Design in Onshape
02.12.2026 learn more
- Blog
- Customers & Case Studies
- Collaboration
- Consumer Products
RigStrips Boosts Design Speed Using Onshape's Collaborative Tools
02.11.2026 learn more
- Blog
- Becoming an Expert
- Features
- Data Management
How Onshape's Repair Tool Fixes Broken References
01.29.2026 learn more


