2:09
Onshape’s additive selection behavior makes it easier to select multiple entities within a sketch. Other CAD systems require you to use a keyboard shortcut while making selections to add multiple entities to a selection set. Conversely, they often require a different keyboard shortcut to remove entities from that selection set.
Previous Tech Tips have given helpful insight into Onshape’s unique selection tools:
- Tech Tip: Getting the Right Selection
- Tech Tip: How to Create Selections to Save Time in Onshape
- Tech Tip: Using the Window Select Tool to Quickly Select Edges
In this Tech Tip, you will learn more about selecting sketch entities in Onshape using the box or drag selections.
Selecting Sketch Entities
Onshape makes this process easier. Click items to add them to your selection set and click them again to remove them from the selection set.
When selecting a large number of sketch entities, however, even this simple selection method can take time and effort. To more easily select multiple sketch entities, use click/tap and drag to create a selection box that encloses the sketch entities.
A left-to-right box selection is an “enclosing” selection. This method adds entities completely enclosed within the blue selection box to the selection set.
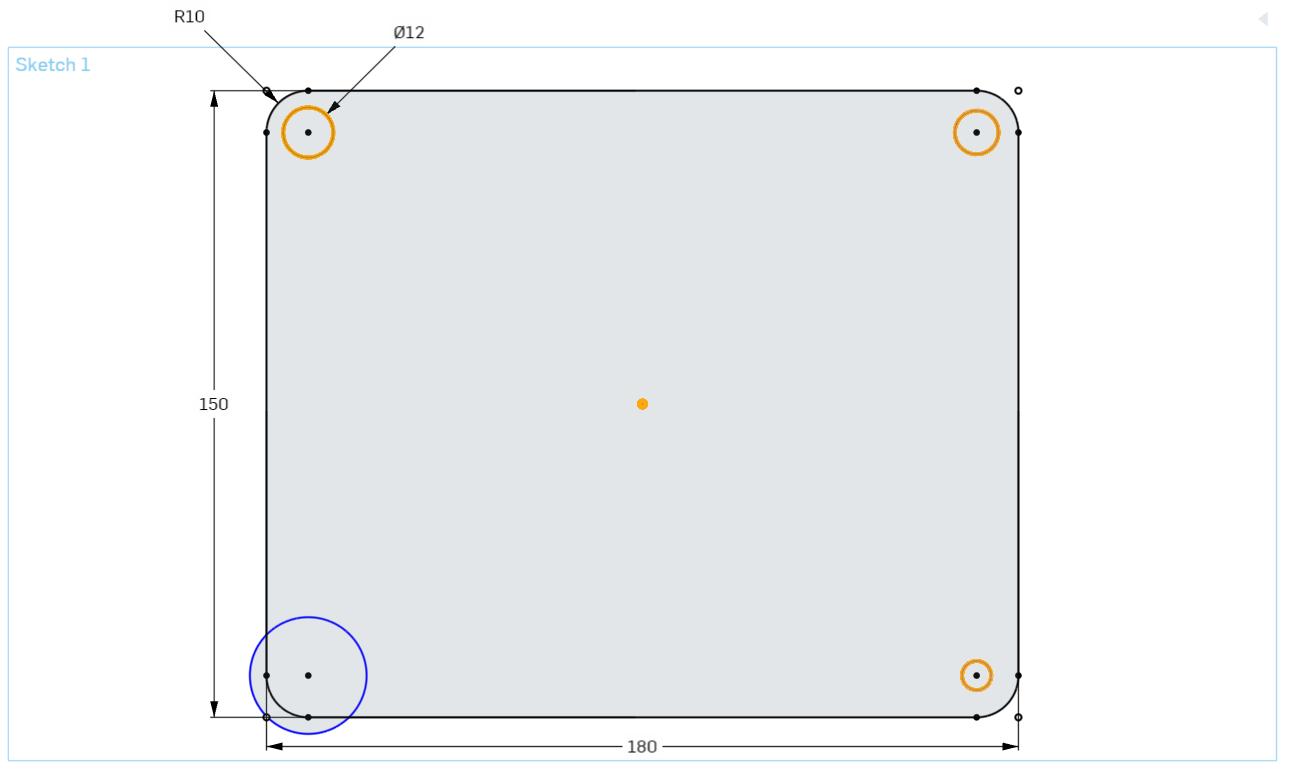
A right-to-left box is a “crossing” selection. This method adds entities completely enclosed within the orange selection box to the selection set, as well as any entities crossing or touching the border of the selection box.
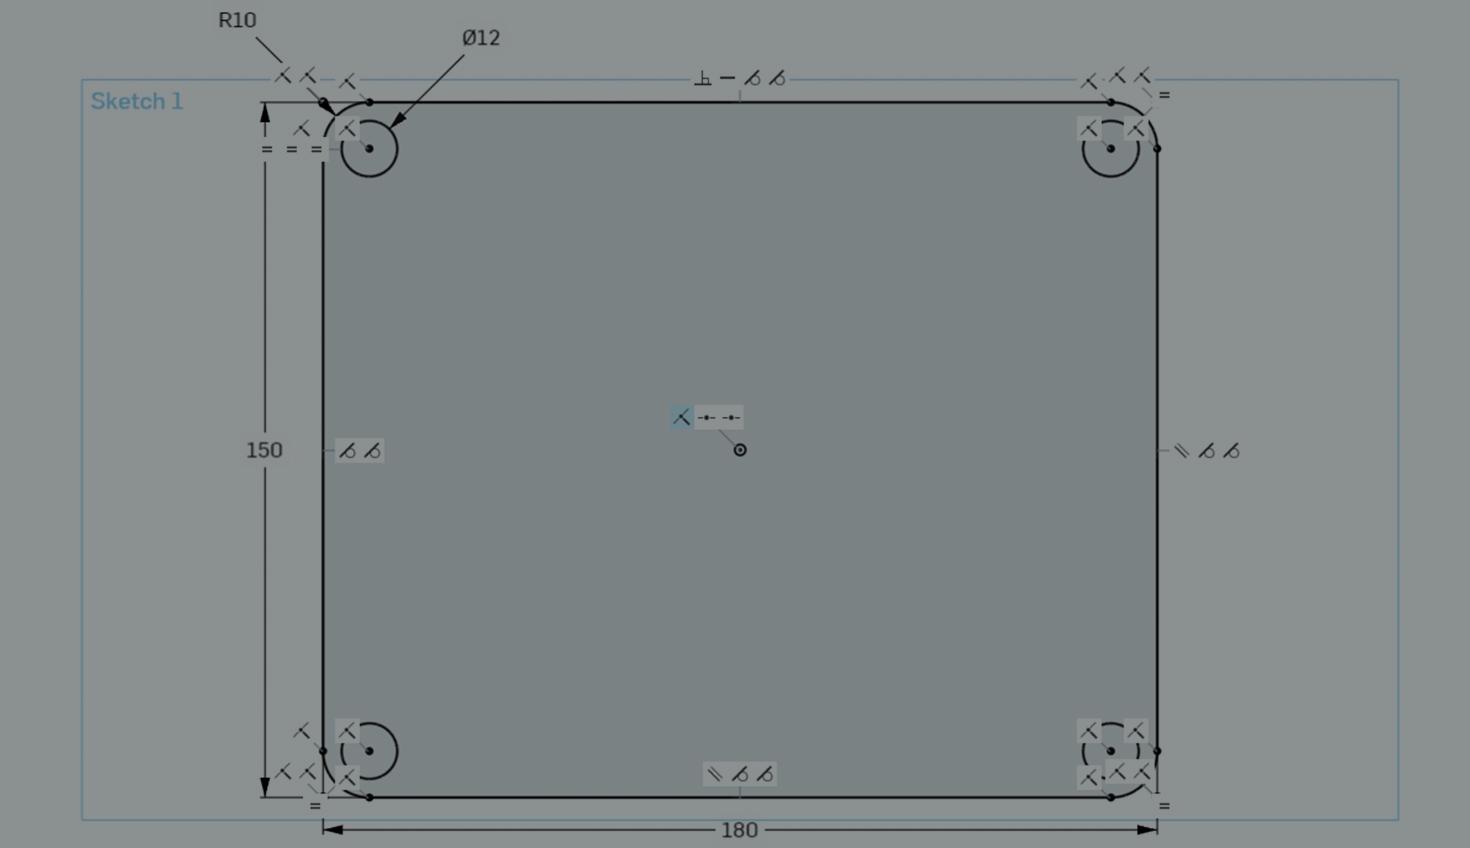
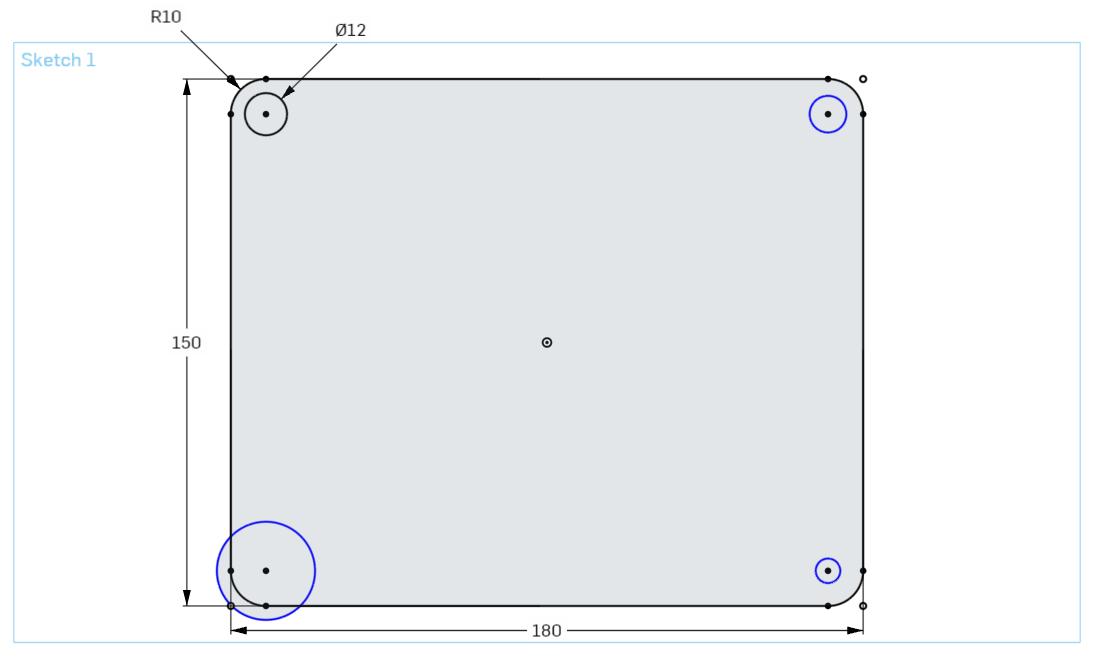
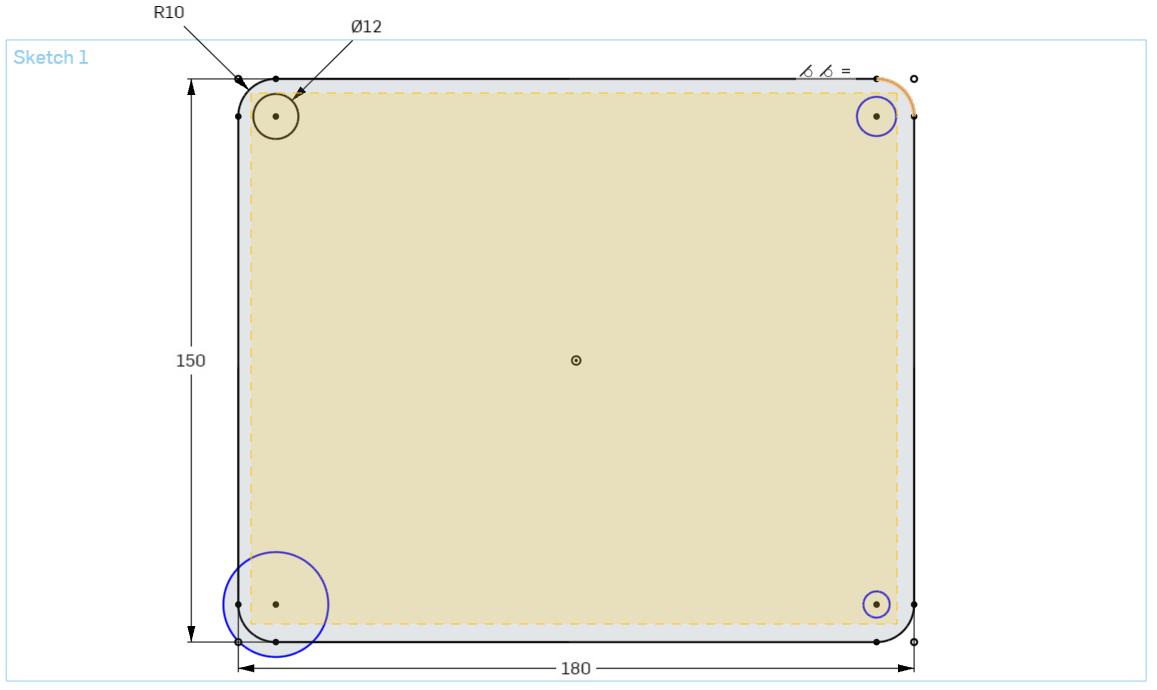
For example, the following diagram shows a sketch of a large mounting plate and four holes of varying sizes. You want to apply an equal relation to all the holes. This requires you to select all four holes, but not the mounting plate:
A left-to-right enclosing selection box (outlined in blue below) selects all holes except the large lower left hole:
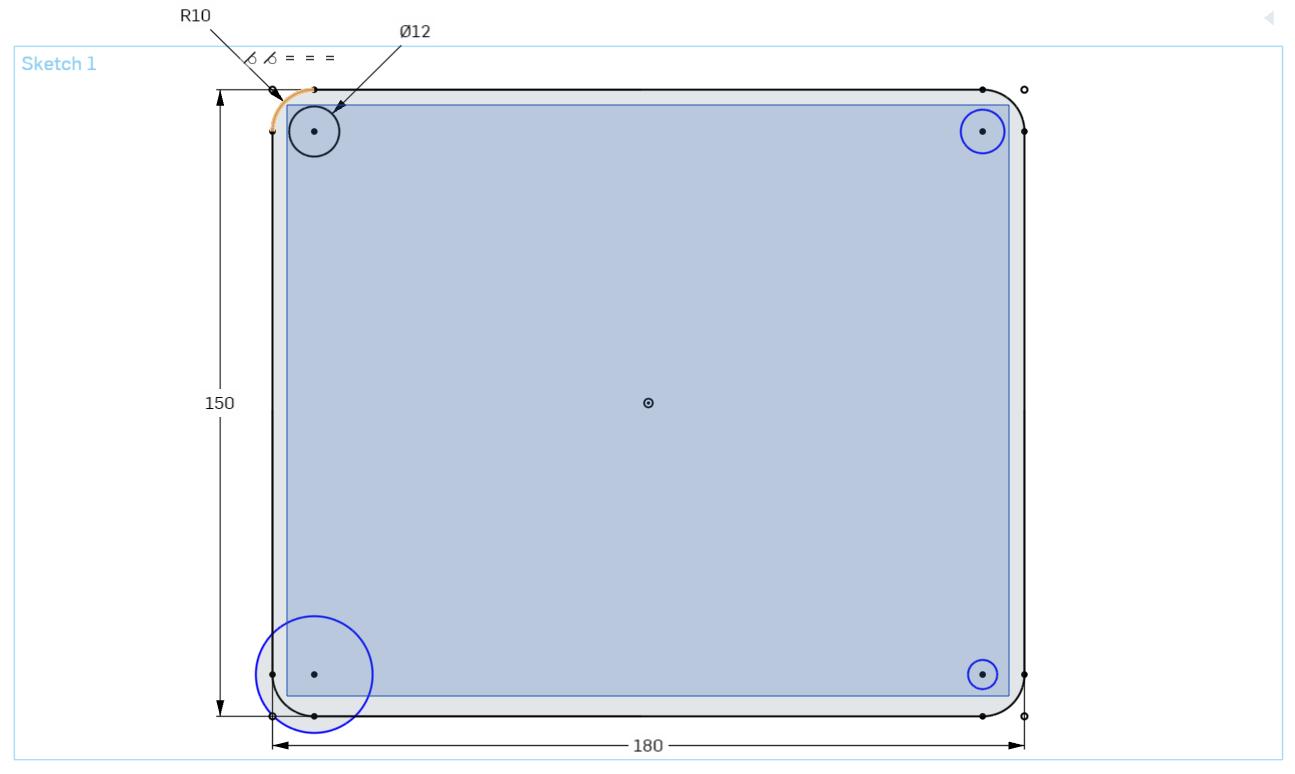
Dragging the box to surround the entire lower left hole would inadvertently select the mounting plate, and is not the best selection method for your task.
Alternatively, using a right-to-left crossing selection box (outlined in orange below) selects all four holes since they are either enclosed within the selection box or crossing the box's border:
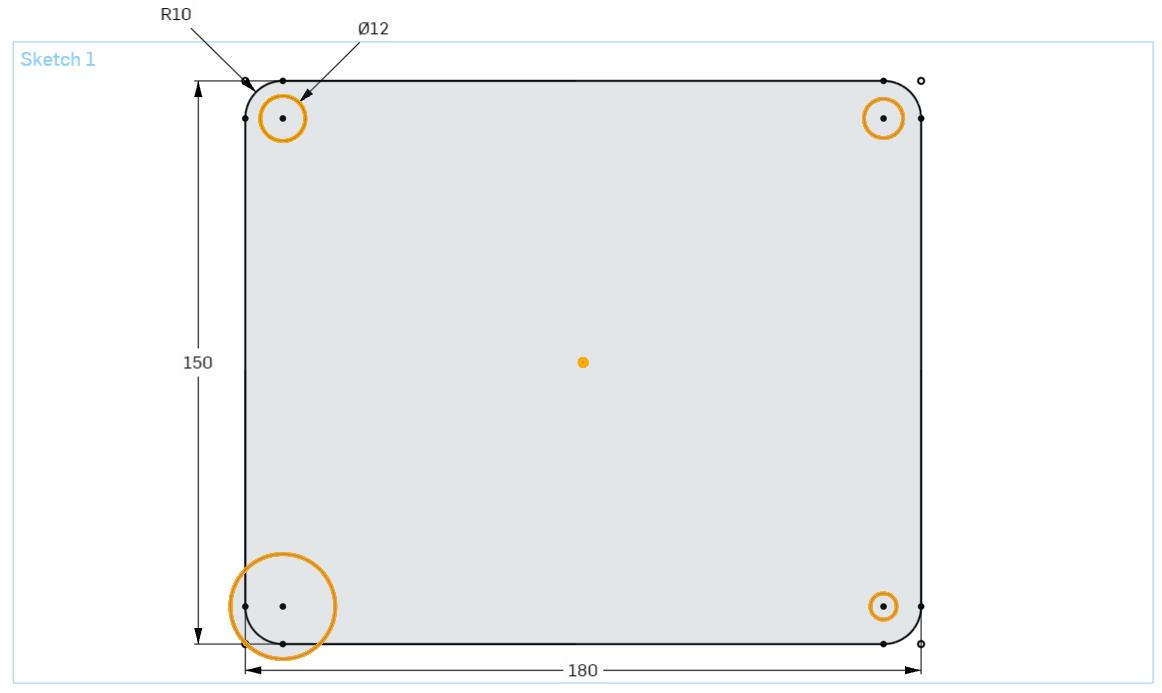
In both cases, the origin is inadvertently selected. Click it to remove it from the selection set. With all four holes selected, add an equal relation:
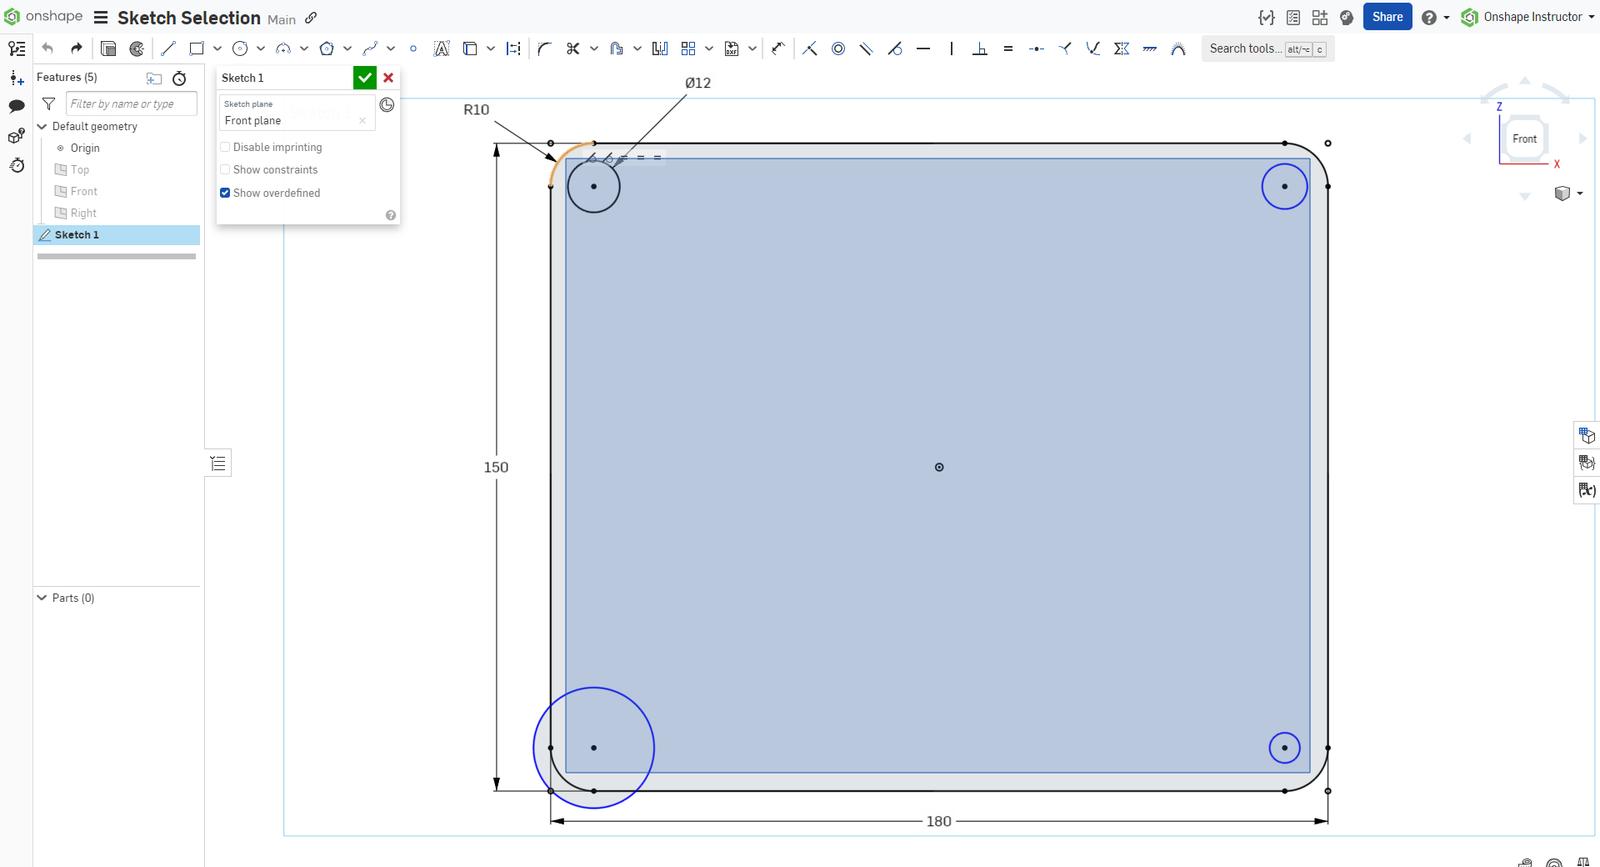
Watch the video below for more:
This Tech Tip has shed light on the use of box and drag selections in Onshape, illustrating how you can efficiently select desired sketch entities in your CAD projects. By mastering these techniques, you'll enhance your productivity and streamline your sketch editing process in Onshape.
The Onshape Learning Center
Take self-paced courses, get technical briefings, or sign up for an instructor-led training session.
Latest Content
- Blog
- Becoming an Expert
- Features
- Data Management
How Onshape's Repair Tool Fixes Broken References
01.29.2026 learn more
- Blog
- Startup
How Hardware Startups Can Cut Costs, Find Funding, and Scale in 2026
01.28.2026 learn more
- Blog
- Customers & Case Studies
Future Joinery Systems: Bridging the Gap Between Architecture and Manufacturing with PTC’s Onshape
01.23.2026 learn more


