
2:27
In a previous Tech Tip, we talked about how to save time in Onshape using the Create Selection feature, which is especially useful in certain design workflows. For more complex workflows, an alternative to the Create Selection tool may be necessary to refine your selection.
Today's Tech Tip will show you how to use the Window Select tool to be more productive in Onshape.
Create Selection vs. Window Select
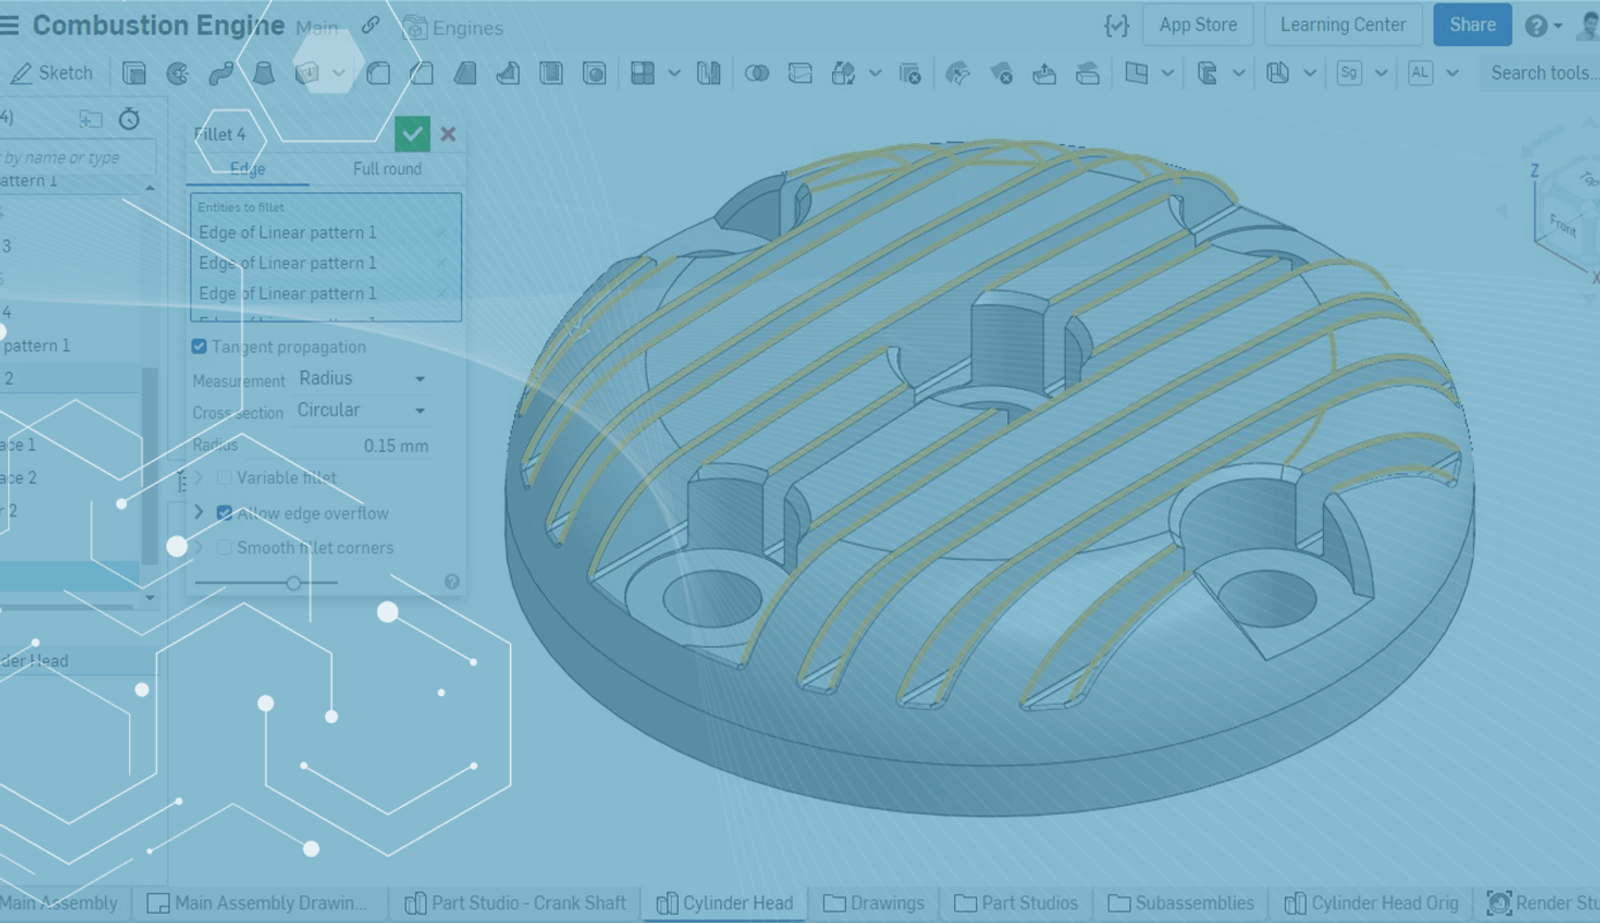
The Create Selection tool speeds up feature creation by allowing you to quickly select a lot of faces or edges for reference in a feature. In the example below, we need to add fillets to all edges that are located on the top face of this cylinder head.
You can either select each edge individually, which would take forever, or use the Create Selection dialog. This command allows you to select edges that are tangent connected, loop/chain connected, equal length, equal radius or parallel. In this case, it is not possible to select the edges on the top face of the model at once when using the Create Selection tool.
This is where the Window Selection tool can be really helpful: It allows you to select all entities that are enclosed by the selection window or all entities that cross the bounding box of the selection window, including ones hidden behind the visible geometry.
Let's take the previous example of creating Fillets.
Create a Fillet, but instead of selecting the edges individually or using the Create Selection tool, which would require time and patience, first, change the view to the corresponding side from where you can grab all of the edges you want to select. Then click and drag from right to left, like the example below. The selection window will appear in yellow and will capture all entities that the selection window touches.
Important: When you drag the box from right to left, entities that the box touches will be selected, but if you drag the box from left to right, only entities that fall entirely within the box are selected. This behavior can be used in Sketches, Part Studios and Assemblies. Depending on the complexity of the design and quantity of entities surrounding the desired selection region, either of these window selection options may prove more efficient than the other.
Using Window Selection
When trying to project all entities belonging to a face onto the sketch plane, the Use Command tool will only project the outer boundary and all internal entities need to be selected individually. Using the Window Selection technique while your model is rotated perpendicular to the sketch plane lets you select all entities, both external and internal, at once.
Practice using this Window Selection technique to become more precise with your selections, save time and boost your productivity.
See it in action in the video below:
Interested in learning more Onshape Tech Tips? You can review the most recent technical blogs here.
Latest Content
- Blog
- Becoming an Expert
- Assemblies
Built to Scale: Why Large Assemblies Don’t Slow Down in Onshape
07.16.2026 learn more- Blog
- News from Onshape @ PTC
- Artificial Intelligence
Onshape Labs: AI in CAD Guided by Designers, Driven by Innovation
07.15.2026 learn more- Blog
- Evaluating Onshape
- Data Management
- Collaboration
- Artificial Intelligence
How the Most Underrated CAD Feature Improves Design Workflows
07.09.2026 learn more