
2:05
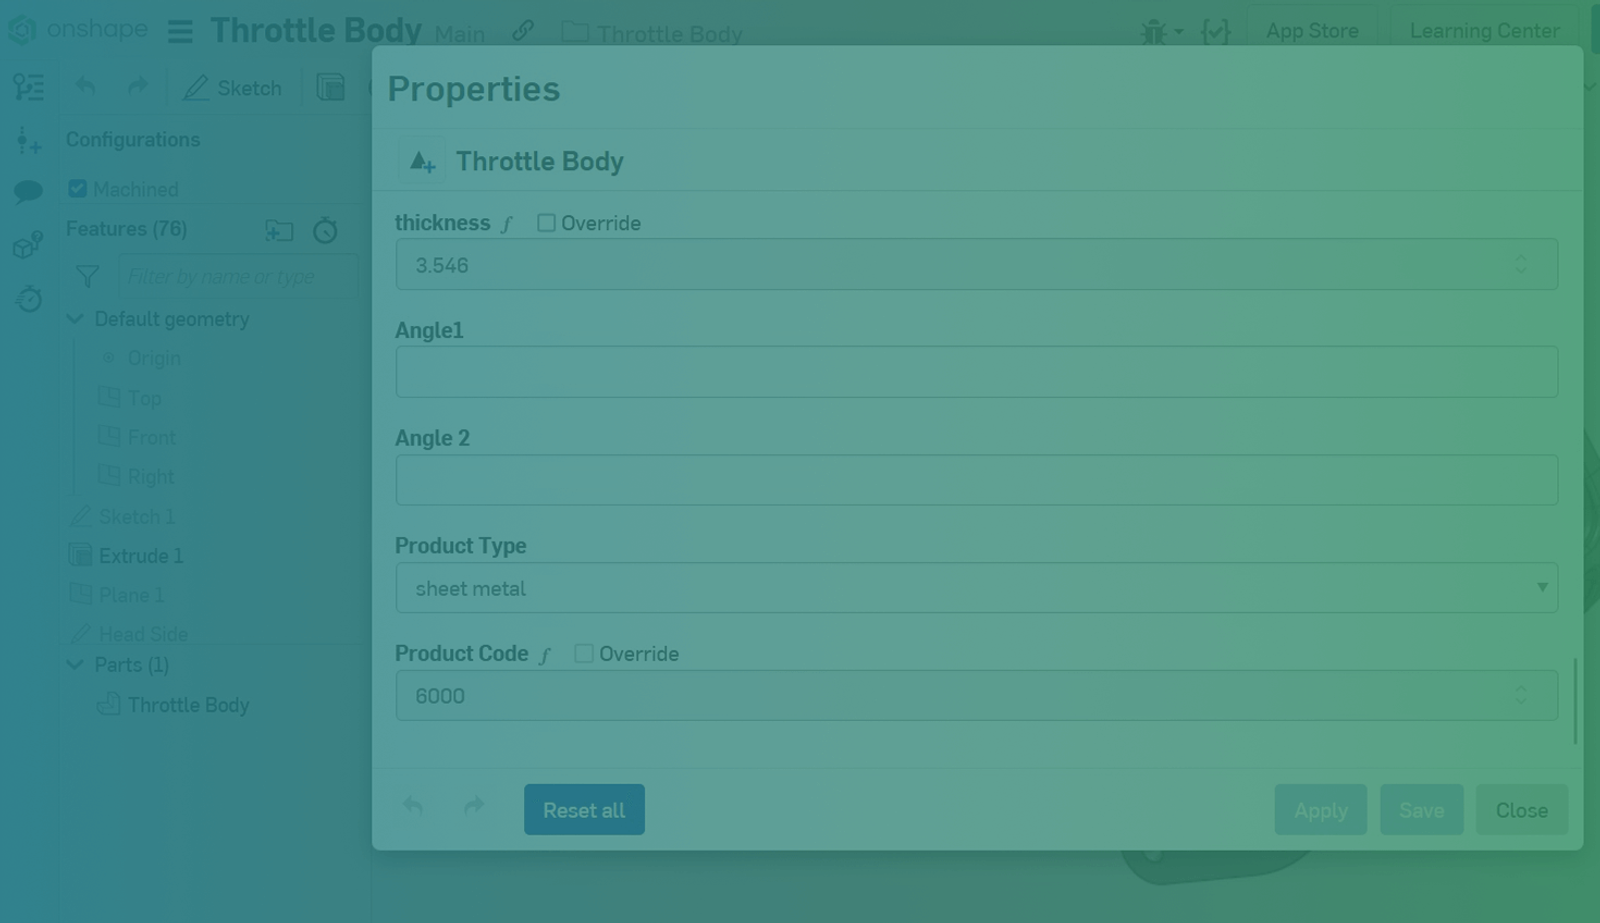
When communicating with outside systems such as an ERP system, it is sometimes necessary to write a value to a property that isn’t ideal for user selection. For example, you may have a bunch of product types (sheet metal, tubing, and weldment) that are associated with an external ERP system as a specific type code (6000, 7000, 8000).
A user would have difficulty choosing the correct code if they didn’t have the product types memorized.
This Tech Tip will focus on using a computed part property to automatically fill in the appropriate code to match the product type.
Set Up Custom Properties
Set up two custom properties. The first property is a list for product type. Add in the options weldment, tubing, and sheet metal.
Make sure it is editable in the workspace and assign the part category. After you save the property for the first time, Onshape generates an ID. Save the ID for use in the Feature Studio later.
The second property is a Double type. It must also be editable in the workspace, but also check the option to edit only with the API. This will prevent anyone from trying to manually override the computed part property.
Create a Feature Studio
In a new document, create a Feature Studio. Change the import to include computedPartProperty.fs and properties.fs. These are smaller libraries than common.fs, which will make the program more efficient.
Start typing “computed” and allow Onshape to autocomplete with a computed part property definition.
Change the default function declaration to return a number instead of ValueWithUnits. Inside the function, use the getProperty function to get the product type selection’s value. Set entity to part, propertyType to PropertyType.CUSTOM, and customPropertyId to the ID of the product type.
Add if statements to return the appropriate value for each possible value. If necessary, add a default value. Create a version of the document to link to in the property.
Link the Property to the Feature Studio
Go back to the product code property in the company settings. Add the Feature Studio under Computed Part Properties.
Now every time the product type is selected, the text field fills in appropriately with the product code.
This Tech Tip helped you learn how to populate a property’s value based on another property’s selection. Here is a Tech Tip explaining the general use of computed part properties.
Interested in learning more Onshape Tech Tips? You can review the most recent technical blogs here.
Latest Content
- Blog
- Becoming an Expert
- Assemblies
Built to Scale: Why Large Assemblies Don’t Slow Down in Onshape
07.16.2026 learn more- Blog
- News from Onshape @ PTC
- Artificial Intelligence
Onshape Labs: AI in CAD Guided by Designers, Driven by Innovation
07.15.2026 learn more- Blog
- Evaluating Onshape
- Data Management
- Collaboration
- Artificial Intelligence
How the Most Underrated CAD Feature Improves Design Workflows
07.09.2026 learn more