
1:20
To leverage the full potential of Onshape, create and use Custom features and FeatureScript-written tables. Whether you create them yourself or use the power of the Onshape Forums and community, once you have them, you probably want to share them with everyone in your organization. This Tech Tip explains how to do this.
Enterprise Settings
Sign in to your Onshape Domain as an Administrator. From the Documents page, click your user name at the top right and select Company/Enterprise settings. Then click Preferences to open the Preferences settings. Scroll down to locate the Enterprise Custom features and tables section and check Enable Enterprise Custom features:
Part Studio setup for Custom Features
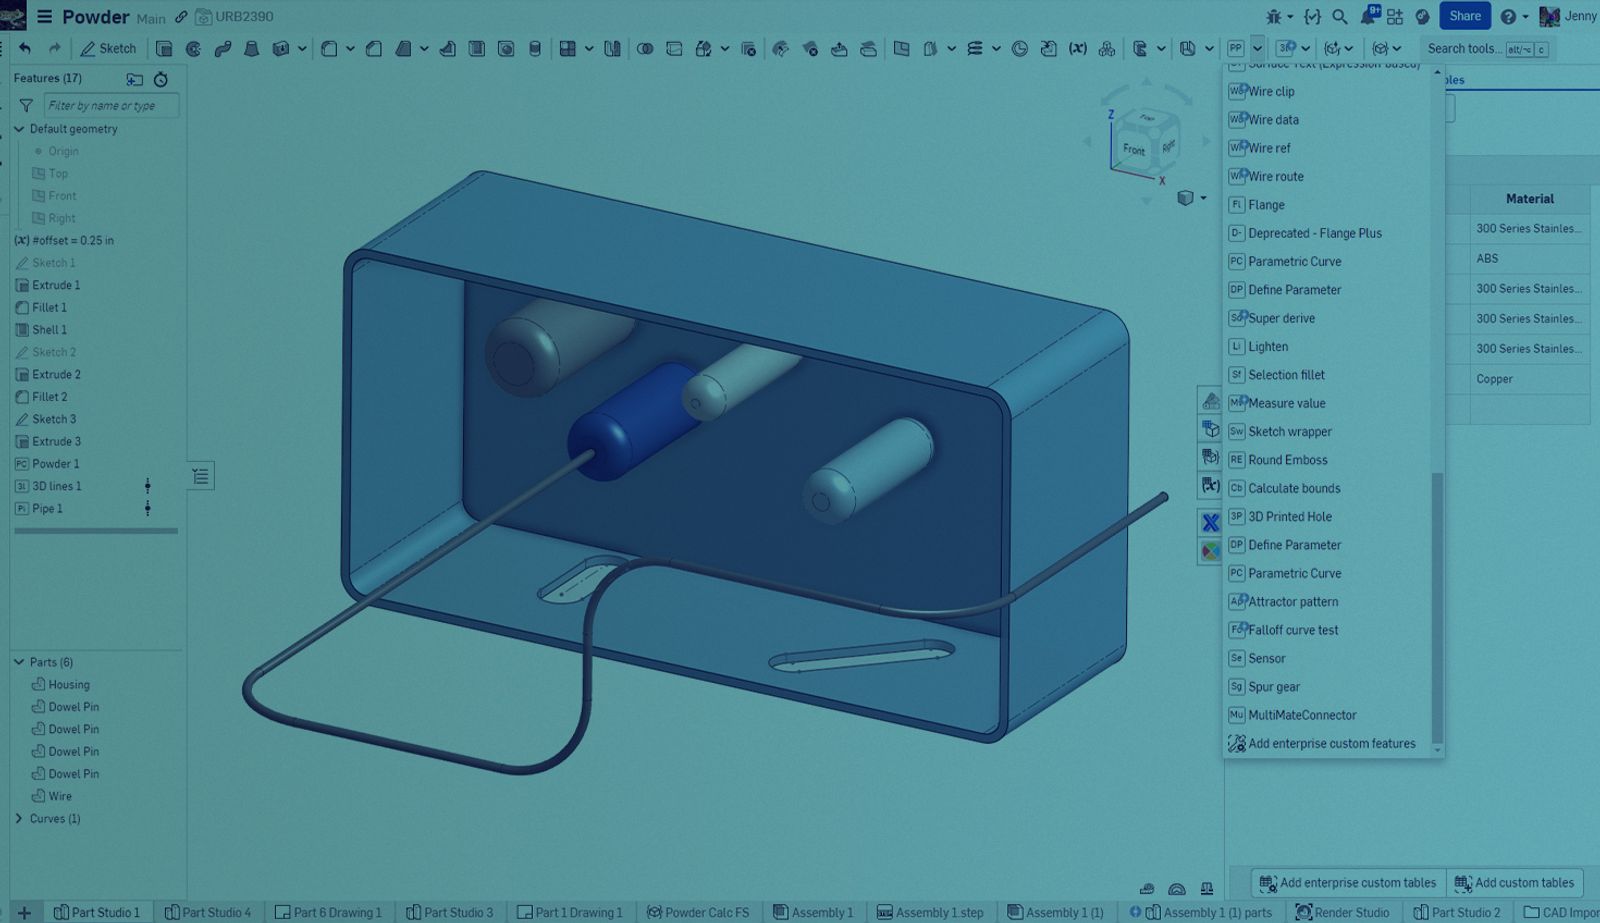
To add a Custom feature for all users, open an Onshape Document and navigate to a Part Studio tab. You will see a new icon () in the upper right corner of the menu bar near Search.
Click that icon, scroll, and select Add enterprise Custom features ().
Add the URLs of your favorite Custom features or browse to find new ones:
Part Studio Setup for Custom Tables
To add a Custom table for all users and open an Onshape Document. Click the Custom tables icon () to open the Custom tables panel on the right.
Add tables using the lower menu:
Select the Add enterprise custom tables icon, then add the URLs of your favorite Custom features or browse to find new ones:
The tables appear in the drop-down menu grouped by type:
Interested in learning more Onshape Tech Tips? You can review the most recent technical blogs here.
The Onshape Learning Center
Take self-paced courses, read articles, or sign up for an instructor-led training session.
Latest Content
- Blog
- Becoming an Expert
- Assemblies
Built to Scale: Why Large Assemblies Don’t Slow Down in Onshape
07.16.2026 learn more- Blog
- News from Onshape @ PTC
- Artificial Intelligence
Onshape Labs: AI in CAD Guided by Designers, Driven by Innovation
07.15.2026 learn more- Blog
- Evaluating Onshape
- Data Management
- Collaboration
- Artificial Intelligence
How the Most Underrated CAD Feature Improves Design Workflows
07.09.2026 learn more