
2:20
The quality of a surface is directly dependent on the curves used to create it. In this Tech Tip, learn how to create a quality sketched curve for complex surface modeling.
Curve Sketch Tools
There are several tools available in Onshape to build curves: Arc, Conic, Ellipse, Spline, and Bezier.
Arcs, Conics, and Ellipse’s have easily controlled curvature so it is simple to develop high-quality surfaces from them.
Spline and Bezier are more complex. They each contain control points that could cause unwanted inflections, pinching, or similarly low-quality surfaces.
Splines Versus Beziers
Splines and Beziers provide very similar curves. It's only when you use visualization tools that it becomes apparent that Beziers make it easier to produce a higher-quality surface.
Splines use a series of control points that lie directly along the curve. They also have spline handles at the start and end points to control the direction and magnitude of the curve at those points.
Beziers are similar to splines, but the control points are placed along the curve’s control polygon that is offset from the curve.
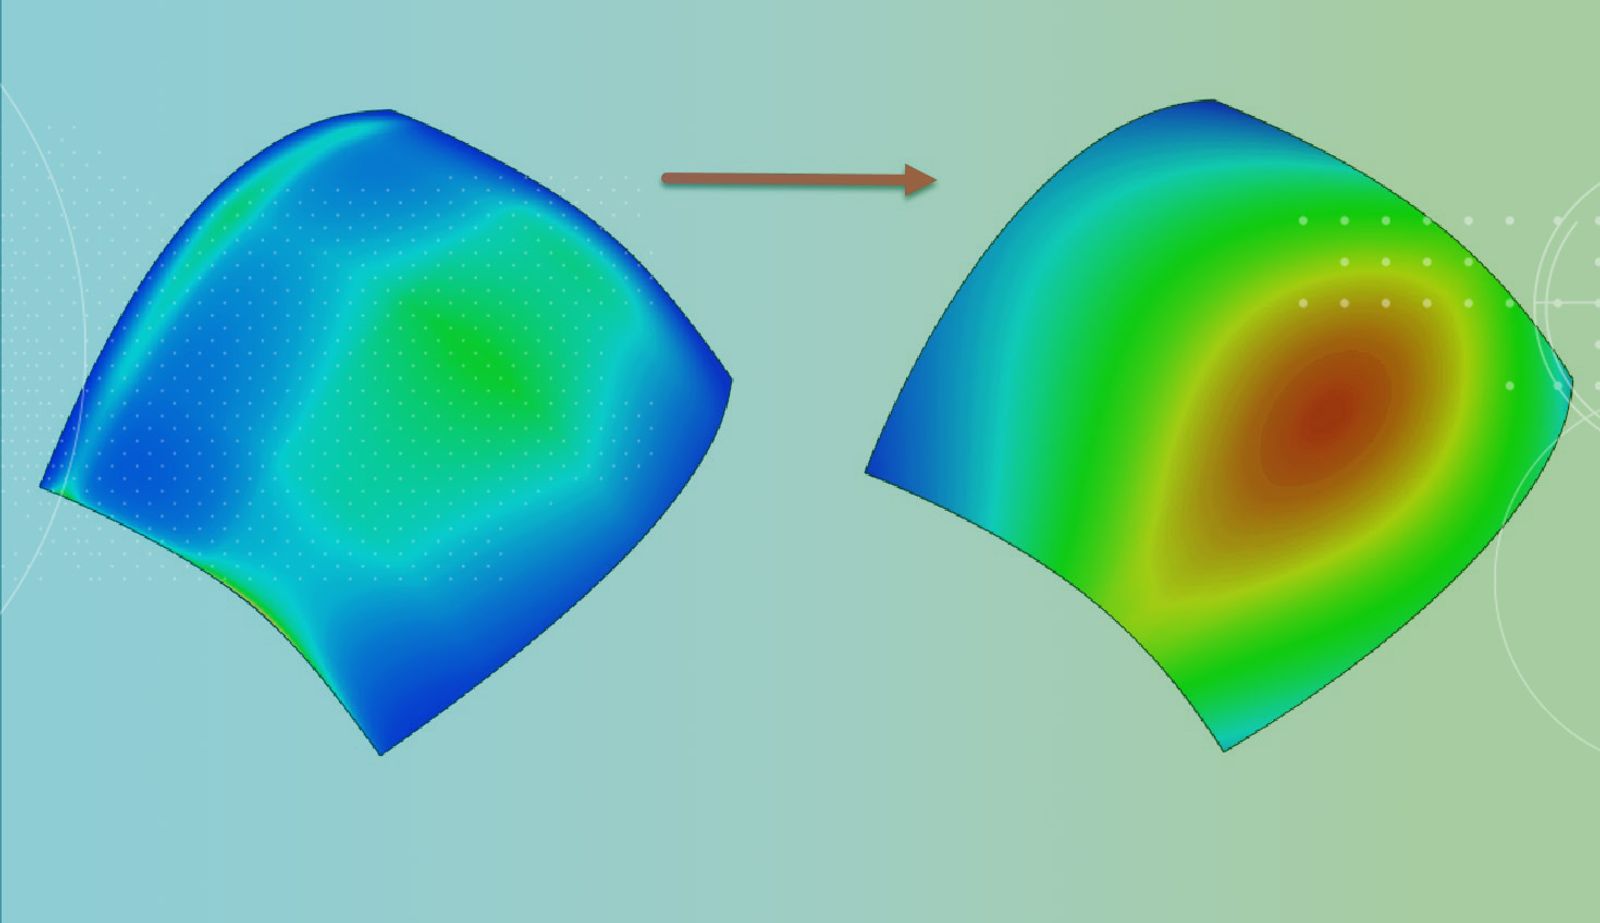
Visually, they look very similar. Right-click on a curve and select Curve/surface analysis. It displays the curvature combs so it is easier to visualize the quality of the curve. The Spline curvature rapidly increases and decreases at the control points while the Bezier maintains smooth and consistent changes in curvature.
Making the Highest Quality Curves
Even though the curvature of a Bezier is much easier to control, there are still some further tips for creating a high-quality curve. Start with as few control points as possible, usually only three (start, peak, and end).
Then add only as many control points as needed to fit the curve. Select the Spline control point sketch tool and select anywhere along the polygon to place a new point.
You can then adjust the points to achieve a better curve.
Additionally, create a consistently spaced and placed set of control points. Below are a few examples of curves with poorly placed control points. The first has a zig-zag between the first and second points. The second has control points positioned above and below the curve. The control points will counteract each other and cause unintended inflection points. The last one doesn’t have good spacing between control points. The indicated point’s spacing compared with the others is drastically different.
Watch the video below for more on creating high-quality curves.
This Tech Tip helped you learn how to create high-quality sketched curves. For more on sketching, check out this Tech Tip on sketching 10 CAD Sketch Tips for Onshape Power Users.
For more information on surfacing, check out the Onshape Surfacing Design self-paced course in the Onshape Learning Center.
Interested in learning more Onshape Tech Tips? Review the most recent technical blogs here.
The Onshape Learning Center
Take self-paced courses, read articles, or sign up for an instructor-led training session.
Latest Content
- Blog
- Evaluating Onshape
- Arena PLM Connection
The Cloud-Native CAD-PDM-PLM Workflow That Finds Problems Before They Cost You
06.11.2026 learn more- Blog
- News from Onshape @ PTC
- Artificial Intelligence
- Robotics
How Multi-Agent Orchestration Between Onshape and NVIDIA Improves CAD-to-Simulation Workflows
06.01.2026 learn more- Blog
- Evaluating Onshape
- Robotics
- Aviation, Aerospace & Defense
- Collaboration
- Integrations
- Arena PLM Connection
- Data Management
Why the Best Hardware Teams Have Started Talking Like Software Engineers
05.28.2026 learn more