
3:22
If you spend a fair amount of your day designing, this blog post is for you. Constructing sketches quickly and efficiently is critical to any serious engineering work. So let’s take a look at 10 sketch tips that can help you get the most out of sketching in Onshape.
Tip #10: Left-Click Drag
Left-click dragging on sketch geometry while in certain sketch features can be really useful. For example, when you are offsetting sketch geometry, if you left-click drag a piece of sketch geometry (as opposed to just left-clicking) it will automatically select the entire chain of sketch geometry.
Tip #9 Linear Sketch Patterns
Linear Sketch Patterns are powerful in Onshape and can handle certain situations that feature patterns cannot. For example, do you want to delete a single instance within a pattern? This is possible with a sketch pattern, but not so with a feature pattern. Another example is that in a linear sketch pattern, the distance dimension between instances can be deleted and replaced with something that better reflects your design intent.
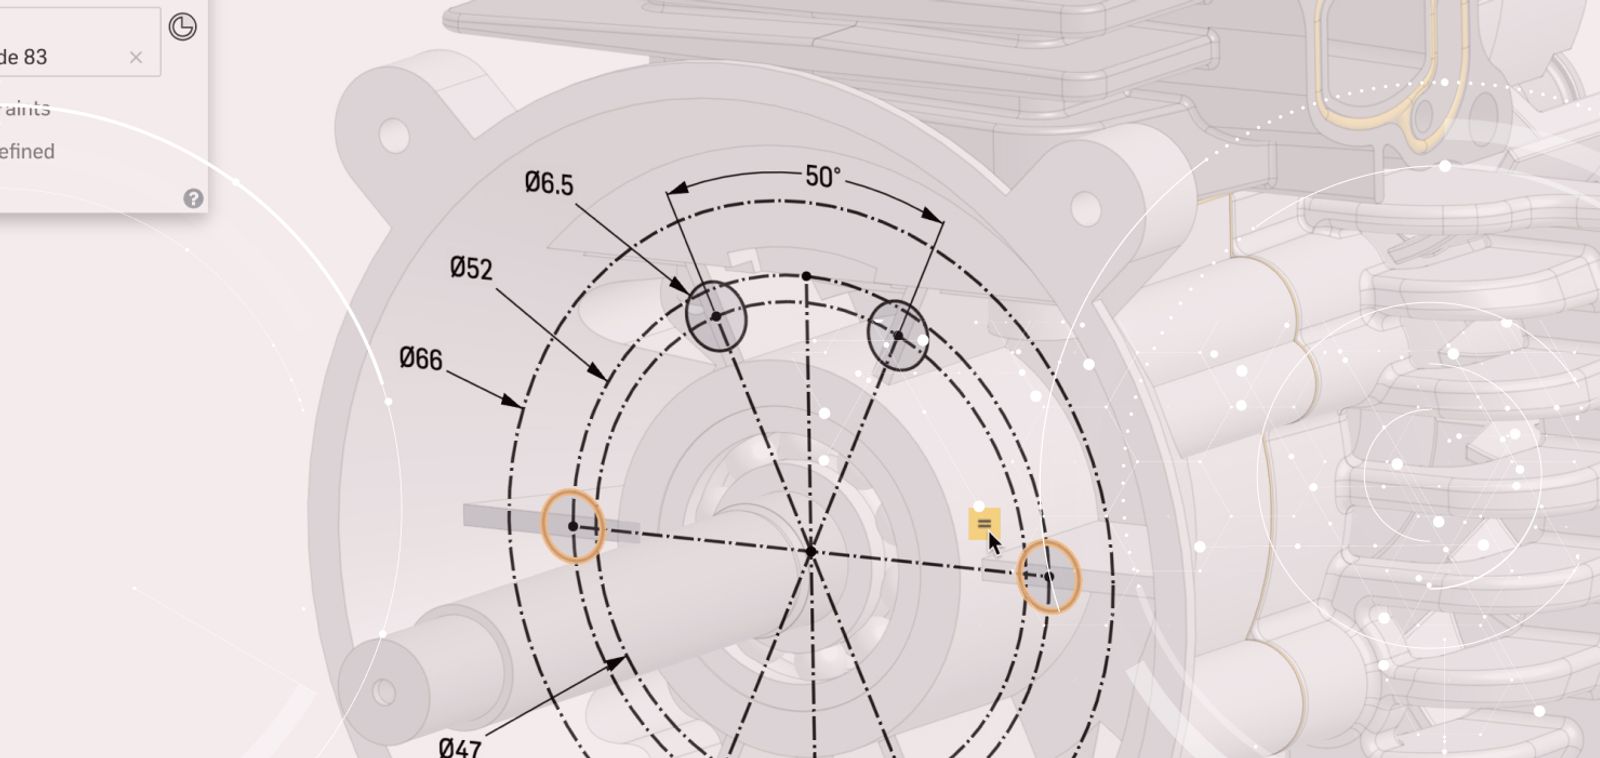
Tip #8: Select Constraints First
Most Onshape users constrain a sketch by selecting each piece of sketch geometry and selecting the constraint from the toolbar. So for example, if you had four circles and four arcs that you wanted to be concentric with one another, you would click the “Concentric” constraint in the toolbar four times. But if you select the constraint from the toolbar first, that constraint will stay active and you can create multiple constraints without going back to the toolbar for each one.
Tip #7: Window Select
Window-selecting sketch geometry is one of the most effective ways to select large amounts of sketch geometry at once. One common question we get is “Does it make a difference if I drag from left to right or right to left? The answer is “Yes.” Dragging from left to right will select only what is fully encompassed in the window. Dragging from right to left will select everything that is touching the window.
Tip #6: Dimension As You Sketch
You can add dimensions on the fly as you are sketching by typing in a number and hitting “Enter” immediately after placing sketch geometry.
Tip #5: Waking Up References
You can wake up a reference to nearly anything while sketching by simply moving your cursor over that thing. This can be useful when you want to constrain sketch geometry, but automatic inferences are not appearing. Waking up the reference and constraining it as you sketch saves you the time you would spend coming back and doing it later.
Tip #4: Using “Shift” to Lock Constraints on Screen
Have you ever found it difficult to select a constraint from the graphics? Just hold down the “Shift” key on the keyboard and it will lock all constraint icons on the screen, making them easier to select. The Shift key also has a number of non-sketch related uses in Onshape.
Tip #3: Dimension to the Inside or Outside or Arcs/Circles
Do you want your dimension to reference the outside or inside of an arc or circle, instead of the center? Just left-click on the arc/circle where you want the dimension to come from. Onshape is smart enough to recognize which quadrant of the arc/circle was selected and give you the appropriate dimension.
Tip #2: Slots
Onshape has a dedicated slot feature just for sketching, and it can handle more situations than you might expect. For example, you can create slots around arcs, splines, and even squares and rectangles.
Tip #1 : Keyboard Shortcuts
The single biggest tip for improved efficiency while sketching in Onshape is to learn the keyboard shortcuts. There are many keyboard shortcuts that are useful while sketching, but some of my personal favorites include “N” for normal, “Q” for construction, “L” for line, and “U” for Use.
Interested in taking a closer look? Watch the recorded webinar below.
So that’s it! Try these tips out in your next sketch and get things done faster.
Latest Content
- Blog
- Becoming an Expert
- Assemblies
Built to Scale: Why Large Assemblies Don’t Slow Down in Onshape
07.16.2026 learn more- Blog
- News from Onshape @ PTC
- Artificial Intelligence
Onshape Labs: AI in CAD Guided by Designers, Driven by Innovation
07.15.2026 learn more- Blog
- Evaluating Onshape
- Data Management
- Collaboration
- Artificial Intelligence
How the Most Underrated CAD Feature Improves Design Workflows
07.09.2026 learn more