
1:21
Often in detailing you need to rotate a view. This could be necessary for many reasons, including drawing reuse to speed up the drawing creation process or just because the way the part was modeled may not work for detailing.
Rotate a Single Drawing With View & No Child Views
If a drawing view has no child views – or is not a child view – you can use the View Properties menu to adjust the rotation of the view.
Rotating a View With Dependent Views
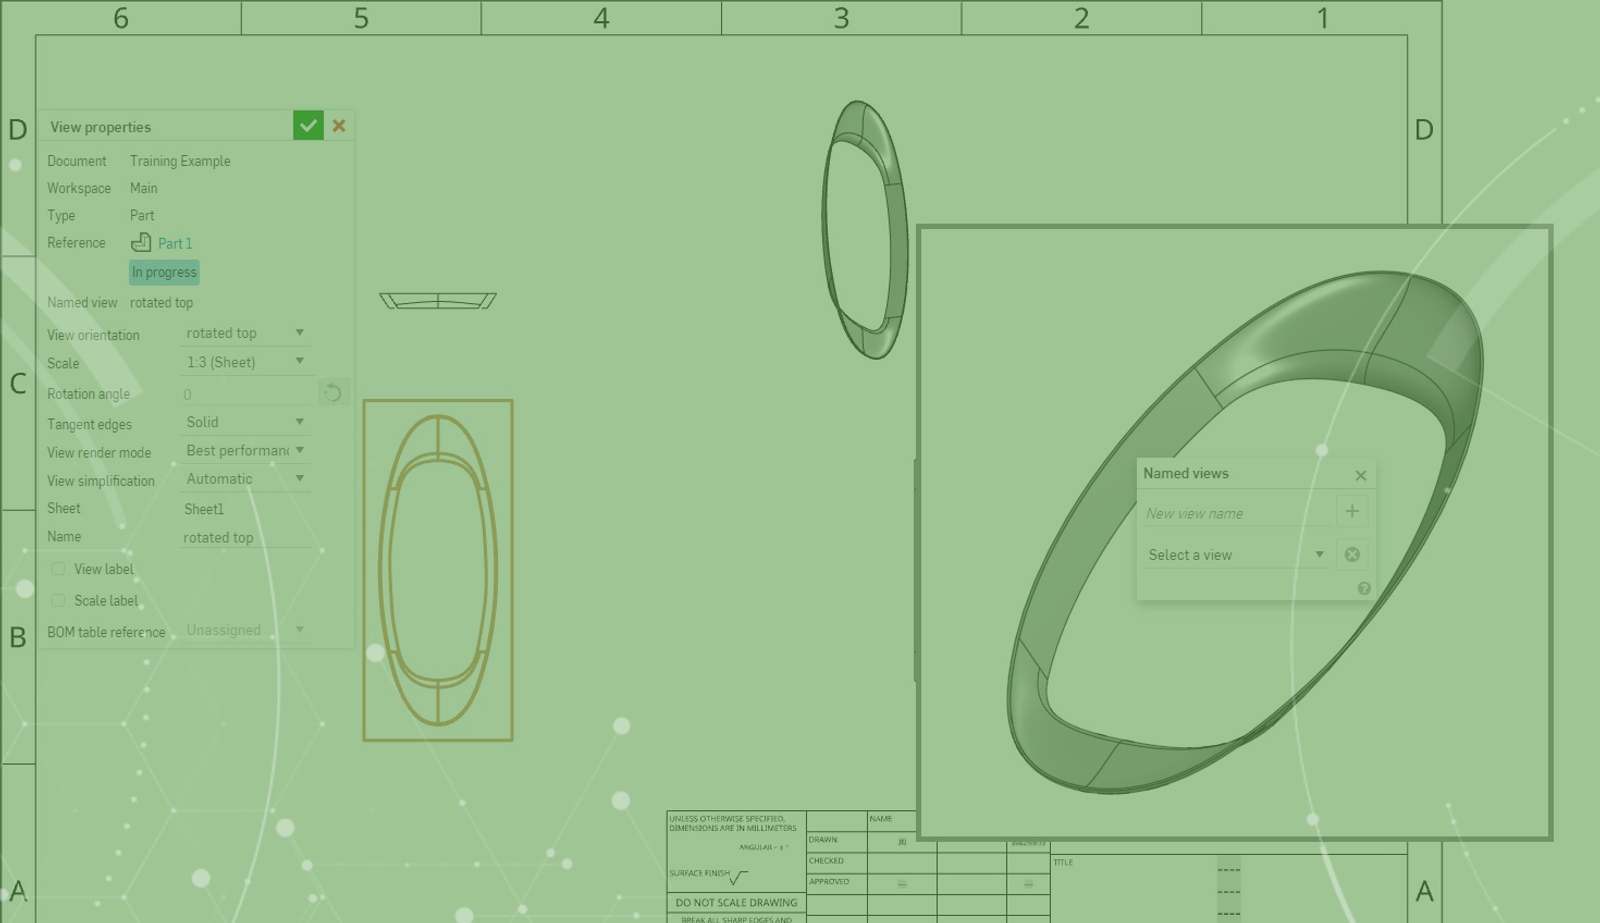
If a view has dependent views, the rotate command in the View Properties menu will be greyed out.
To rotate this view, you must first create a Named Position View in the Part or Assembly studio. In the Part Studio tab, orient the view the way you would like it to appear using the mouse or the view cube and arrow keys.
Once positioned correctly use the Camera and Render Options dropdown to create a new Named View.
Return to the Drawing Tab and then use the View Properties menu to choose the Named View.
Or, you can right-click on the view and choose that named view from the View Orientation dropdown.
All child views will update to the new projected orientation as well.
Learn more about views by watching the video below:
This Tech Tip helped you learn how to rotate a drawing view. We have a great webinar for you to learn more drawing tips! Check it out: Drawing Tips & Tricks.
Interested in learning more Onshape Tech Tips? You can review the most recent technical blogs here.
Latest Content
- Blog
- Evaluating Onshape
- Arena PLM Connection
The Cloud-Native CAD-PDM-PLM Workflow That Finds Problems Before They Cost You
06.11.2026 learn more- Blog
- News from Onshape @ PTC
- Artificial Intelligence
- Robotics
How Multi-Agent Orchestration Between Onshape and NVIDIA Improves CAD-to-Simulation Workflows
06.01.2026 learn more- Blog
- Evaluating Onshape
- Robotics
- Aviation, Aerospace & Defense
- Collaboration
- Integrations
- Arena PLM Connection
- Data Management
Why the Best Hardware Teams Have Started Talking Like Software Engineers
05.28.2026 learn more