
1:35
Thanks to a recent update, you can now organize your Feature List with folders. This was one of the most highly-requested improvements of 2018. Let’s take a closer look.
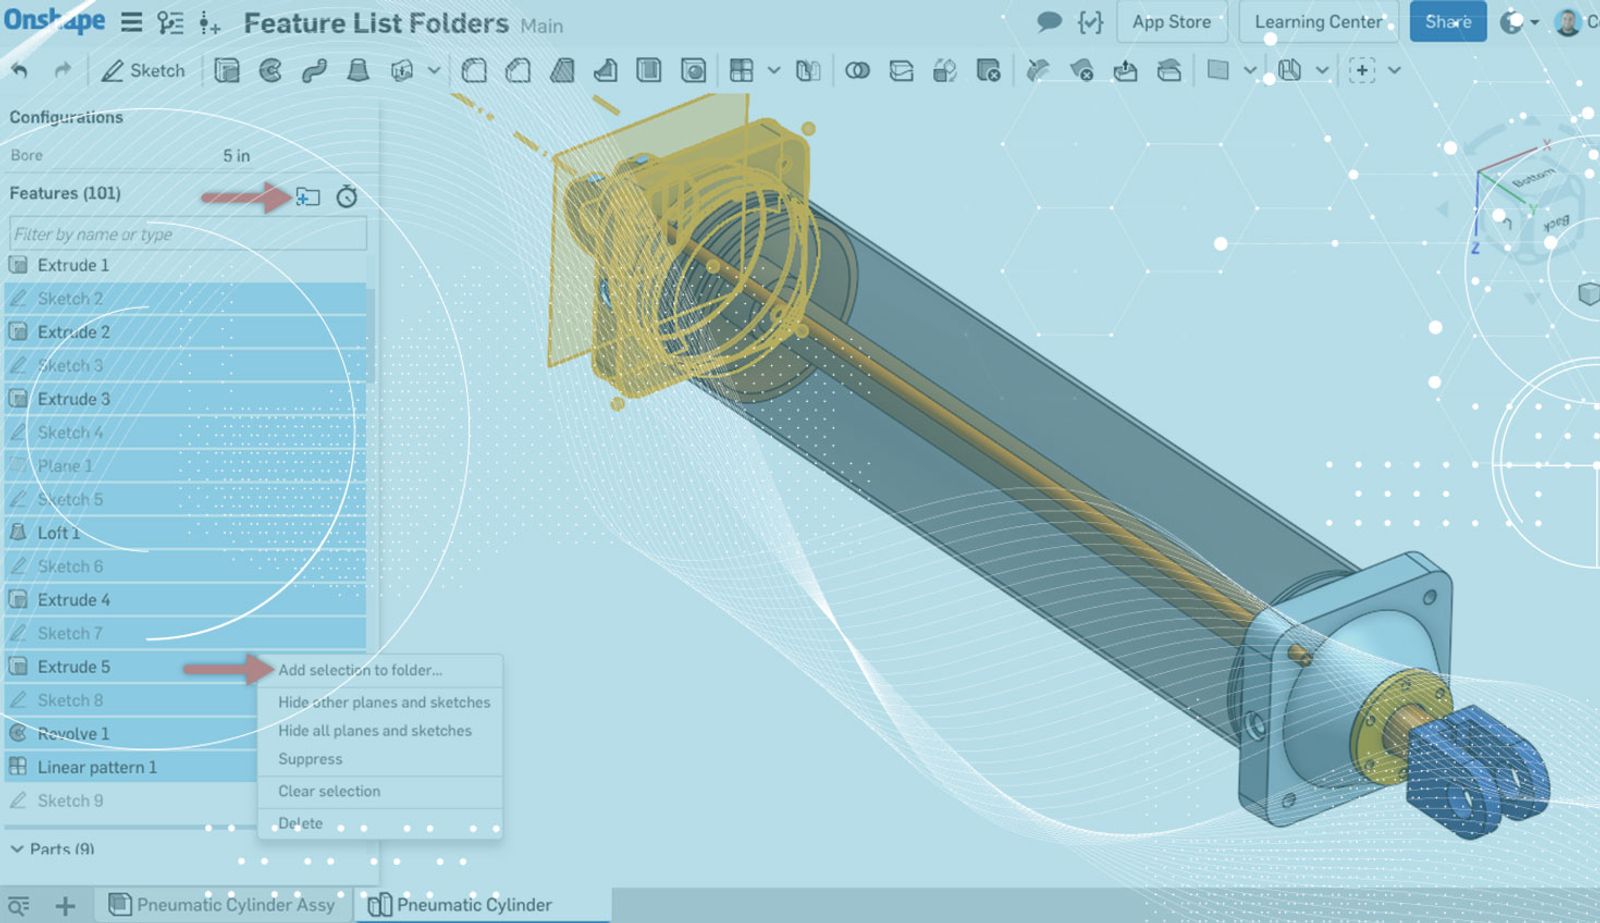
The first step is to select the features that you want to store in a folder. This can be done by simply left-clicking them from the Feature List, or by shift-selecting a number of sequential features.
After you have the features selected, you have two options for creating the folder. You can select the folder icon in the top right corner of the Feature List. Or you can right-click and choose the option to “Add selection to folder.”
Then type in a name and click the green check. Now these features will be stored in a folder that can be expanded or collapsed at anytime.
So now that we’ve covered creating folders, let’s go over some tips for working with folders. First, features can be dragged in and out of folders by dragging them into the Feature List.
Second, the features inside the folder can be re-ordered. In fact, the entire folder can even be re-ordered within the Feature List by left-click dragging. Keep in mind, the same rules of regeneration still apply. If you drag a feature (or folder) below features that are dependent on it, they will fail to regenerate.
The last tip for working with folders is how to remove them. When you right-click a folder, you will have two options that allow you to remove the folder, “Unpack folder,” and “Delete.”
“Unpack folder” will remove the folder and move its contents back into the Feature List. “Delete” will delete the folder and the features within it.
For a more detailed explanation of Feature List folders in Onshape, check out the video below:
So that’s it. Start the new year off right by getting your Feature Lists organized!
Latest Content
- Blog
- Becoming an Expert
- Assemblies
Built to Scale: Why Large Assemblies Don’t Slow Down in Onshape
07.16.2026 learn more- Blog
- News from Onshape @ PTC
- Artificial Intelligence
Onshape Labs: AI in CAD Guided by Designers, Driven by Innovation
07.15.2026 learn more- Blog
- Evaluating Onshape
- Data Management
- Collaboration
- Artificial Intelligence
How the Most Underrated CAD Feature Improves Design Workflows
07.09.2026 learn more