
1:39
In this Tech Tip, you will gain introductory knowledge of how to use textures and blends in
Onshape’s newest capability, Render Studio!
Note: Initially, Render Studio will be offered as a beta capability as the experience and tuning of the offering is optimized. During this beta period, Onshape Professional and Enterprise users will automatically be given access to Render Studio.
Adding Textures to a Material
Textures help you define the 3D aesthetic of objects in rendering. These textures add a layer of visual complexity to the model, creating a greater sense of what the object “feels” like. You can easily add a texture to the volumes you work within Render Studio as shown below.
Blending Materials in Render Studio
Blending techniques will allow you to mix multiple materials and add another aesthetic layer to them. Some examples might be to paint metal with car paint, color a liquid or create a hue in glass. These blends allow you to exponentially grow your palette within the Render Studio.
Blend Colors in Render Studio
Instead of trying to nail the perfect hue of color by using the color wheel, you might want to mix two known colors to create a targeted result. With the color blend option, it is easy to create two color choices where there was only one before.
Other Blends and Resources
By searching Render Studio for blends, you will find a texture blend and a few more advanced options. Play around with them!
If you are looking for new textures, materials and fun rendering content select “additional resources” in the help center. Here you will find resources like Poly Haven.
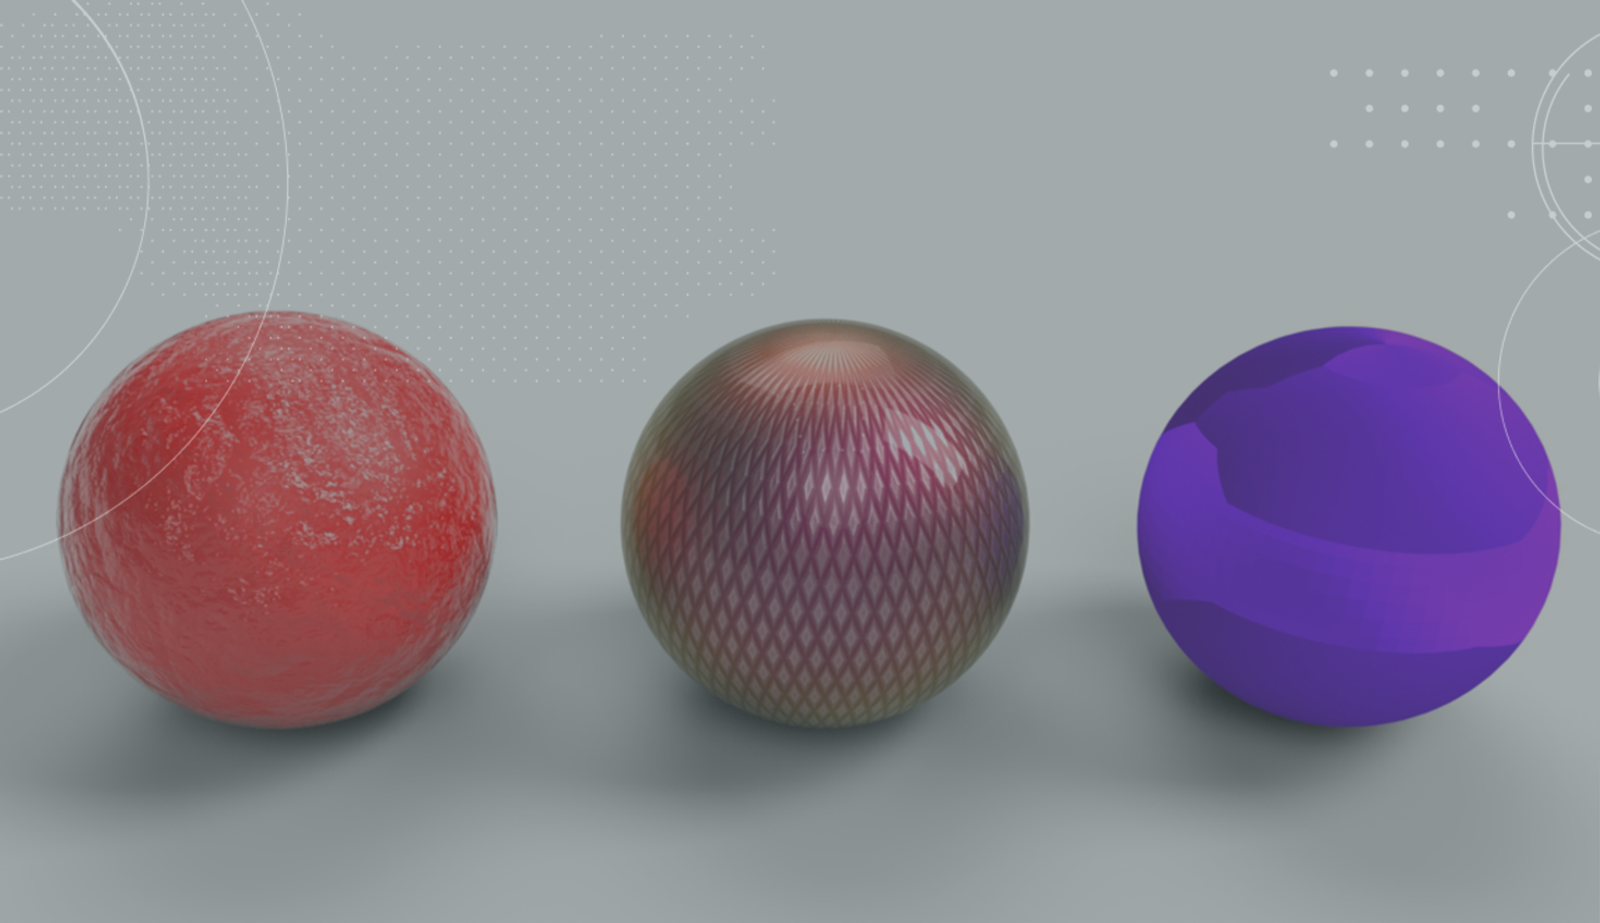
With these resources, I was able to make a variety of textures and blends below. Check out the variety and the options available!
Find out more about Render Studio textures and blends by watching the video below:
Interested in learning more Onshape Tech Tips? You can review the most recent technical blogs here.
Latest Content
- Blog
- Evaluating Onshape
- Data Management
- Collaboration
- Artificial Intelligence
How the Most Underrated CAD Feature Improves Design Workflows
07.09.2026 learn more- Blog
- Evaluating Onshape
- Collaboration
With Cloud CAD and PDM, Flexible Design for a Summer Coolcation
07.02.2026 learn more- Blog
- Artificial Intelligence
AI in Mechanical Design: The Fourth Generation of Transformation
06.25.2026 learn more