
3:45
As Onshape users generate design data, sometimes valuable model properties need to be defined to produce successful results. This can easily be managed using Onshape’s dynamic Bill of Materials (BOM).
Today’s Tech Tip is focused on how to get the most out of the Bill of Materials in an Onshape Assembly and offers several lessons on BOM manipulation.
Viewing the BOM Table
All Onshape Assemblies have a BOM table on the far right of the graphics area below the View Tools icon.
In the BOM panel, you can select how to view the information through the BOM Type dropdown:
- Flattened view provides a simple list of all parts from all levels of your BOM listed together with no indication of subassemblies.
- Structured view is the most common type of BOM that represents your finished design, and where you can see the parent-child relationships of the assemblies/subassemblies.
When viewing in the Structured format, if any subassembly exists, you can see the parts included in the subassembly by double-clicking cells with a caret.
The item numbers assigned to the subassemblies and parts reflect the order of the instances in the Instances List. If you reorder the instances in the list, the BOM table will update to reflect the new order as shown below:
Sorting BOM Table Items
BOM table items can be sorted by columns. Simply double-click on the header to toggle sort states. The values are sorted numerically and then alphabetically in ascending order. Click a second time to sort in descending order.
Note: Table data can only be sorted one column at a time.
Editing Appearance and Material Properties
Editing properties in a BOM can save time and provide a way to ensure you’re always displaying the most recent and accurate property values of your choosing.
Onshape BOMs include a default set of properties as columns: Item Number, Quantity, Part Number, and Description. You can display additional model properties at will according to the properties defined for your account.
Let's say I want to assign a material and appearance to a specific part. All I have to do is simply click the “Add Column” dropdown menu in the upper-right corner of the BOM table and select the “Material / Appearance” properties to insert from the list of properties. “Material / Appearance” columns are added at the far right side of the table. Simply double-click in the property cell and add the data you wish, as shown in the following video:
Note: This data is saved for a specific part, in the specific property, and is available throughout your Document and company account.
Once you have edited the Bill of Materials format, you can save that as a template and use it. Learn more about How to Create BOM Templates in Onshape.
Exclude or Include Items from a BOM
Sometimes it’s required to exclude a component or subassembly from the BOM.
The easiest way is to right-click the component’s row in the BOM table and then select “Exclude from BOM”. The part or subassembly is removed completely from the table but it still exists in the Assembly.
To display the item that’s being excluded, simply choose the “Show Excluded” option from the menu at the top right of the table, and it can be included again by right-clicking the part or subassembly and then choosing “Include in BOM”
You also might want to choose how to list a subassembly in a BOM. Learn How to Manipulate BOM Behavior in Onshape.
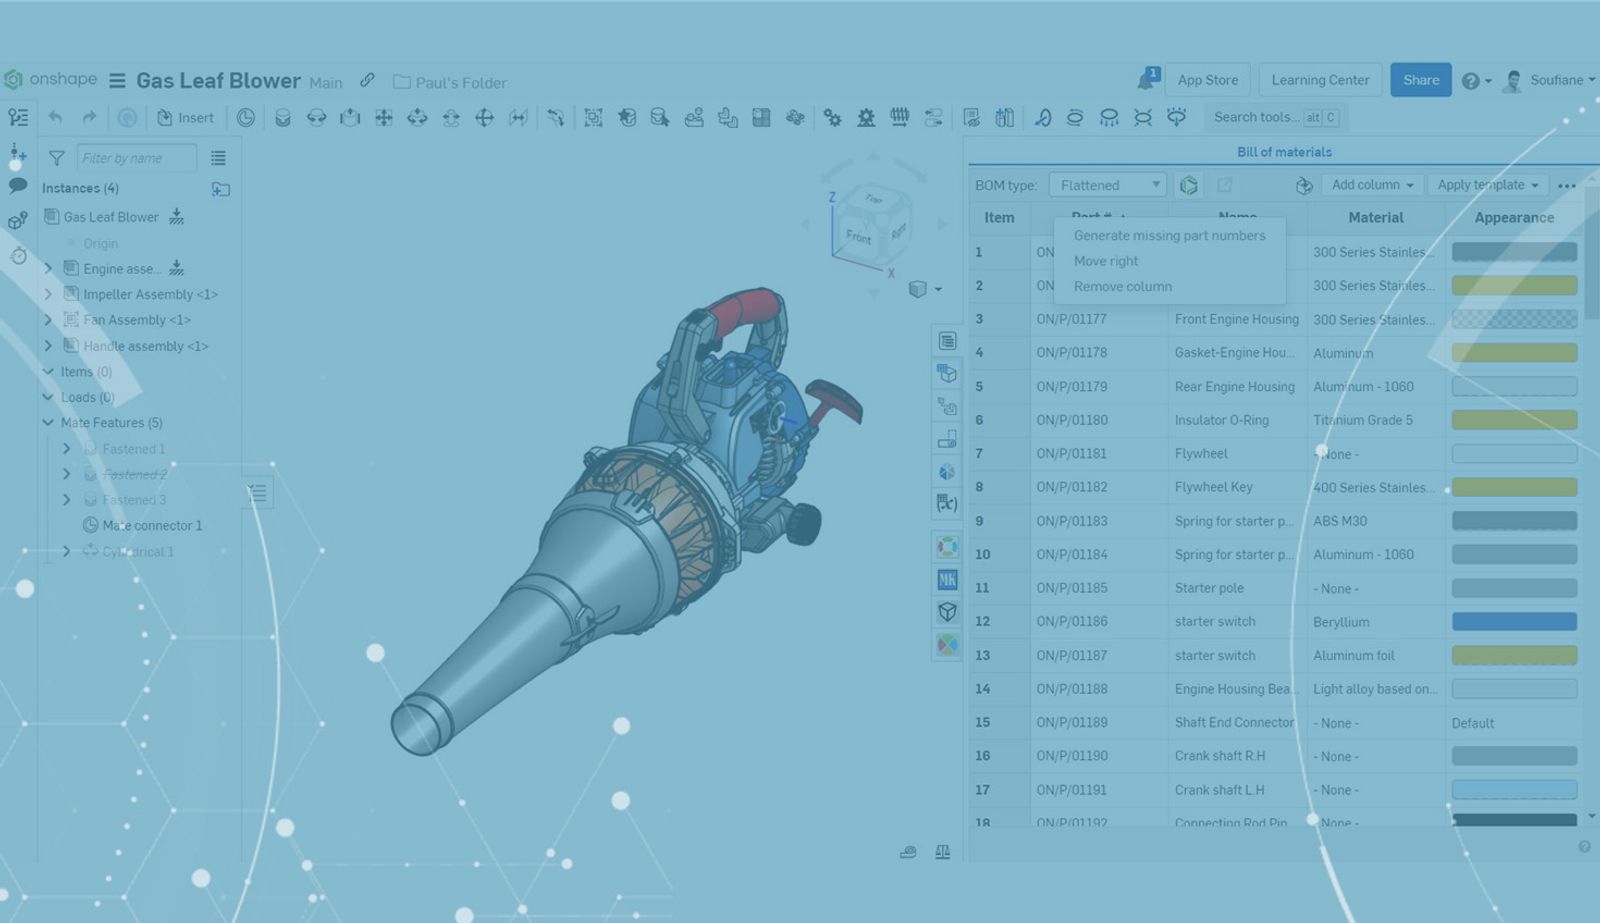
Generating Part Numbers
Did you know that you can generate part numbers for parts in the BOM table that are missing part numbers?
Simply right-click the Part Number header and select “Generate Missing Part Numbers”.
A part number for a particular part can also be generated individually by right-clicking the Part Number cell of the part and select “Generate Next Part Number”.
Note: This only works if automatic part numbering is turned on in the Release Management settings.
Export a Multi-Level BOM
If you want to export the entire BOM table, switch the BOM view to Structured and click the three-dot menu at the top-right of the table. Make sure to choose the “Expand All” option before you export to CSV.
Note: If subassemblies are not expanded, the entire BOM will not be exported.
Refer to the video below for all the tips in one spot! Check it out.
For more on BOMs and Onshape Tech Tips, check out the most recent technical blogs.
Latest Content
- Blog
- Evaluating Onshape
- Arena PLM Connection
The Cloud-Native CAD-PDM-PLM Workflow That Finds Problems Before They Cost You
06.11.2026 learn more- Blog
- News from Onshape @ PTC
- Artificial Intelligence
- Robotics
How Multi-Agent Orchestration Between Onshape and NVIDIA Improves CAD-to-Simulation Workflows
06.01.2026 learn more- Blog
- Evaluating Onshape
- Robotics
- Aviation, Aerospace & Defense
- Collaboration
- Integrations
- Arena PLM Connection
- Data Management
Why the Best Hardware Teams Have Started Talking Like Software Engineers
05.28.2026 learn more