2:02
In a July 2020 update, we added a major new piece of functionality for companies using Onshape Professional or Onshape Enterprise. This new functionality we call “Categories” and it is all about organizing and efficiently displaying your metadata. Categories gives your company a tremendous amount of control over when and how your company’s properties are displayed. Let’s take a look.
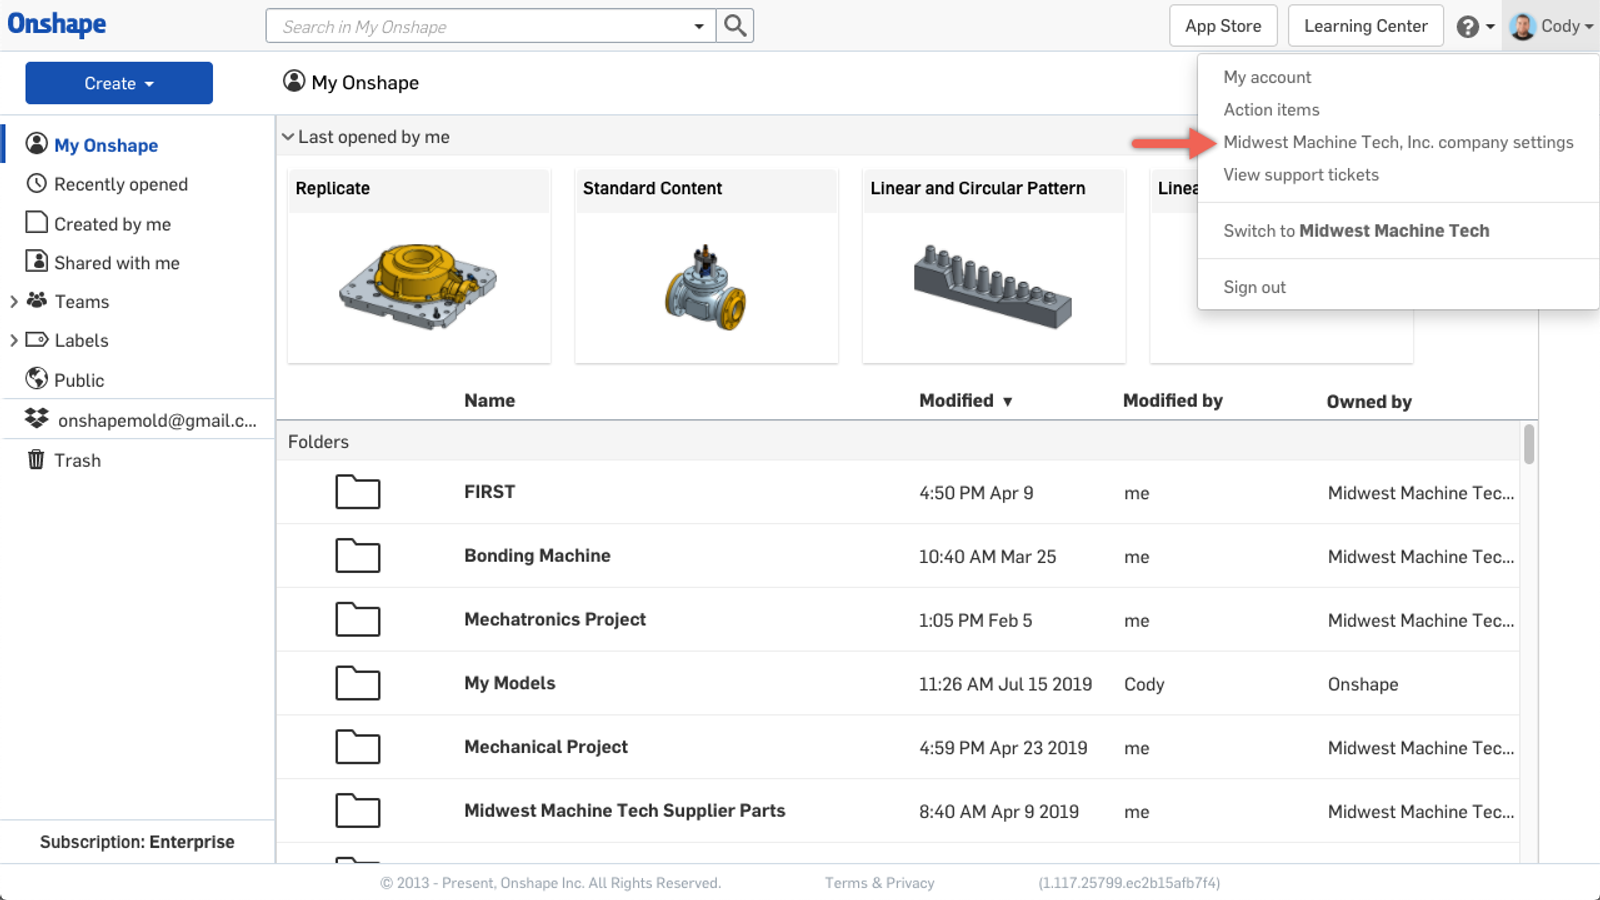
To create a “Category”, as an admin or owner of your company, click your user name in the top right corner and choose “Company Settings.”
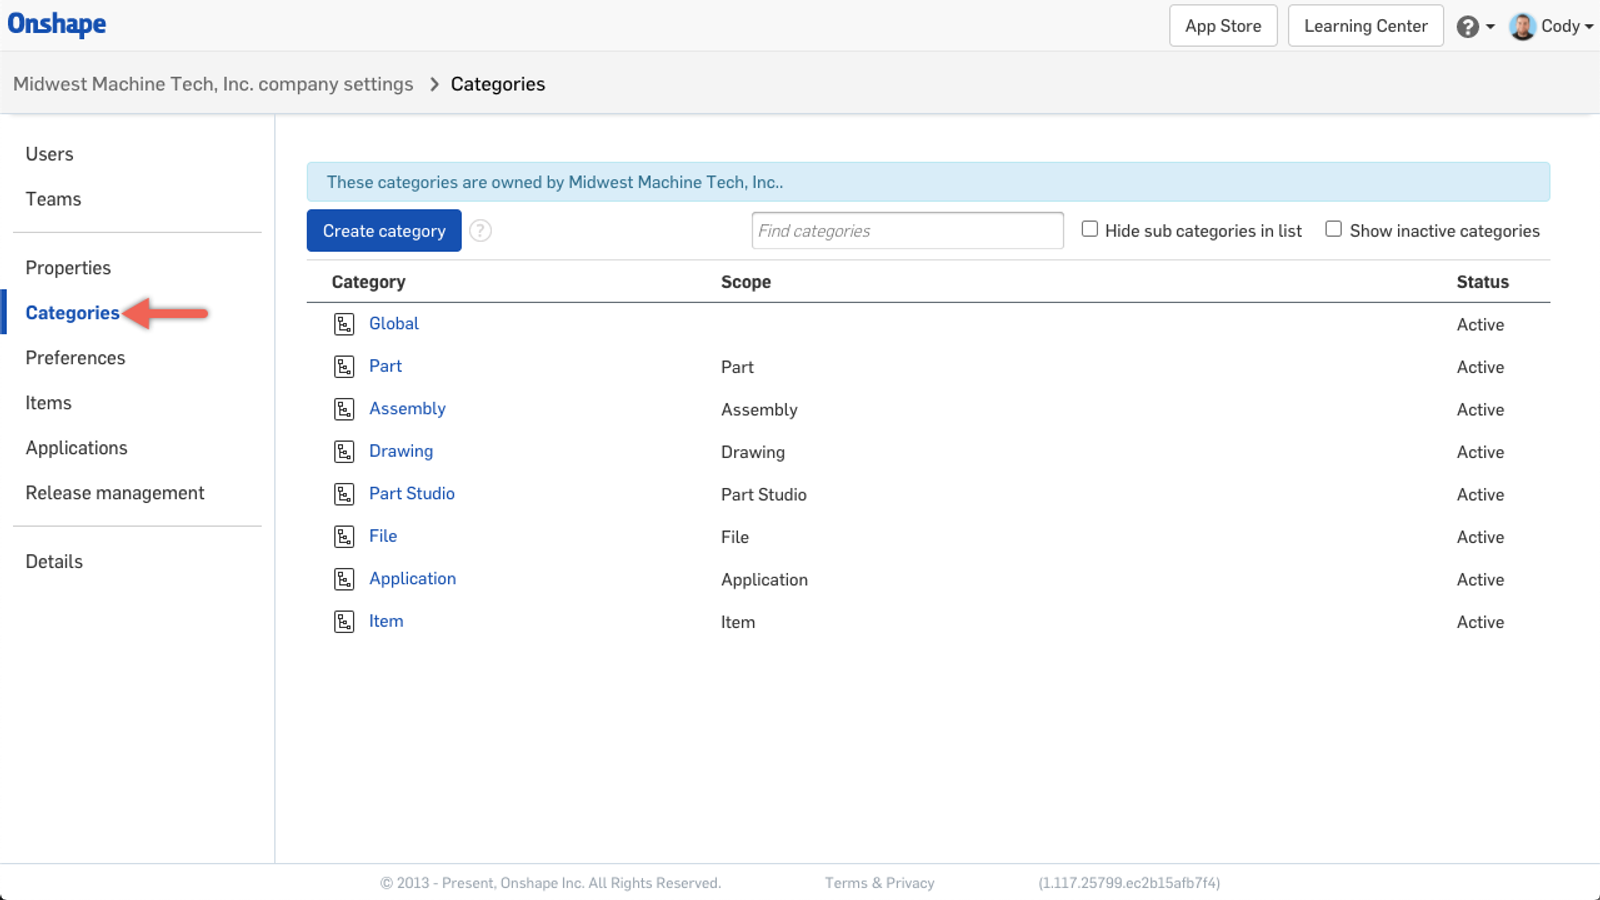
Then on the left hand side, you will see an option for Categories.
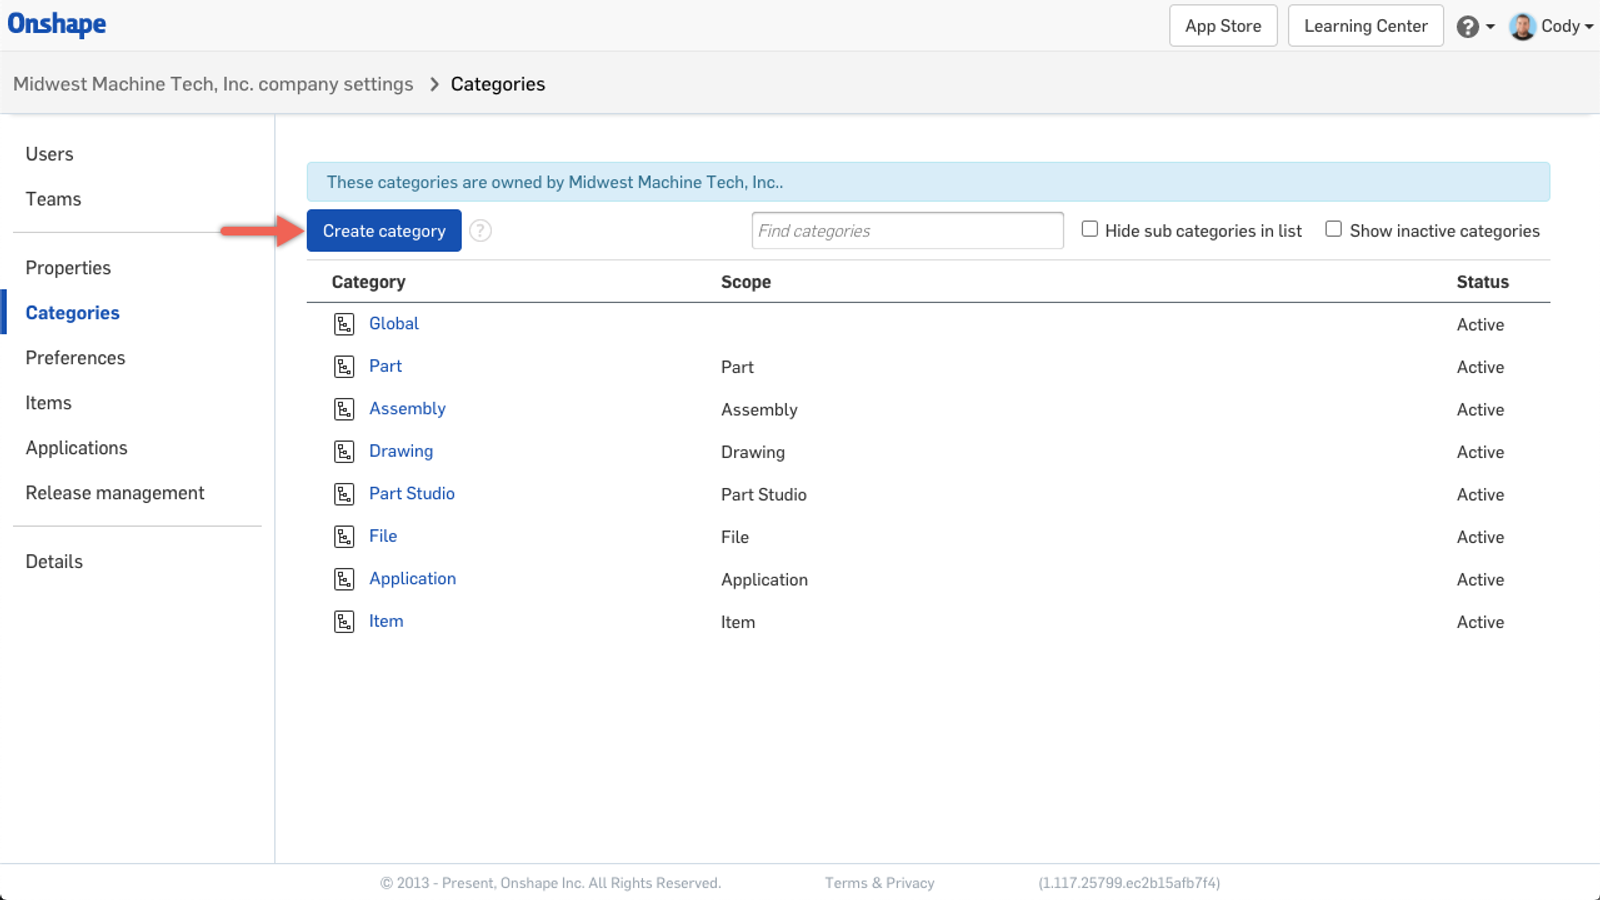
To get started creating a new “Category” simply click “Create category.”
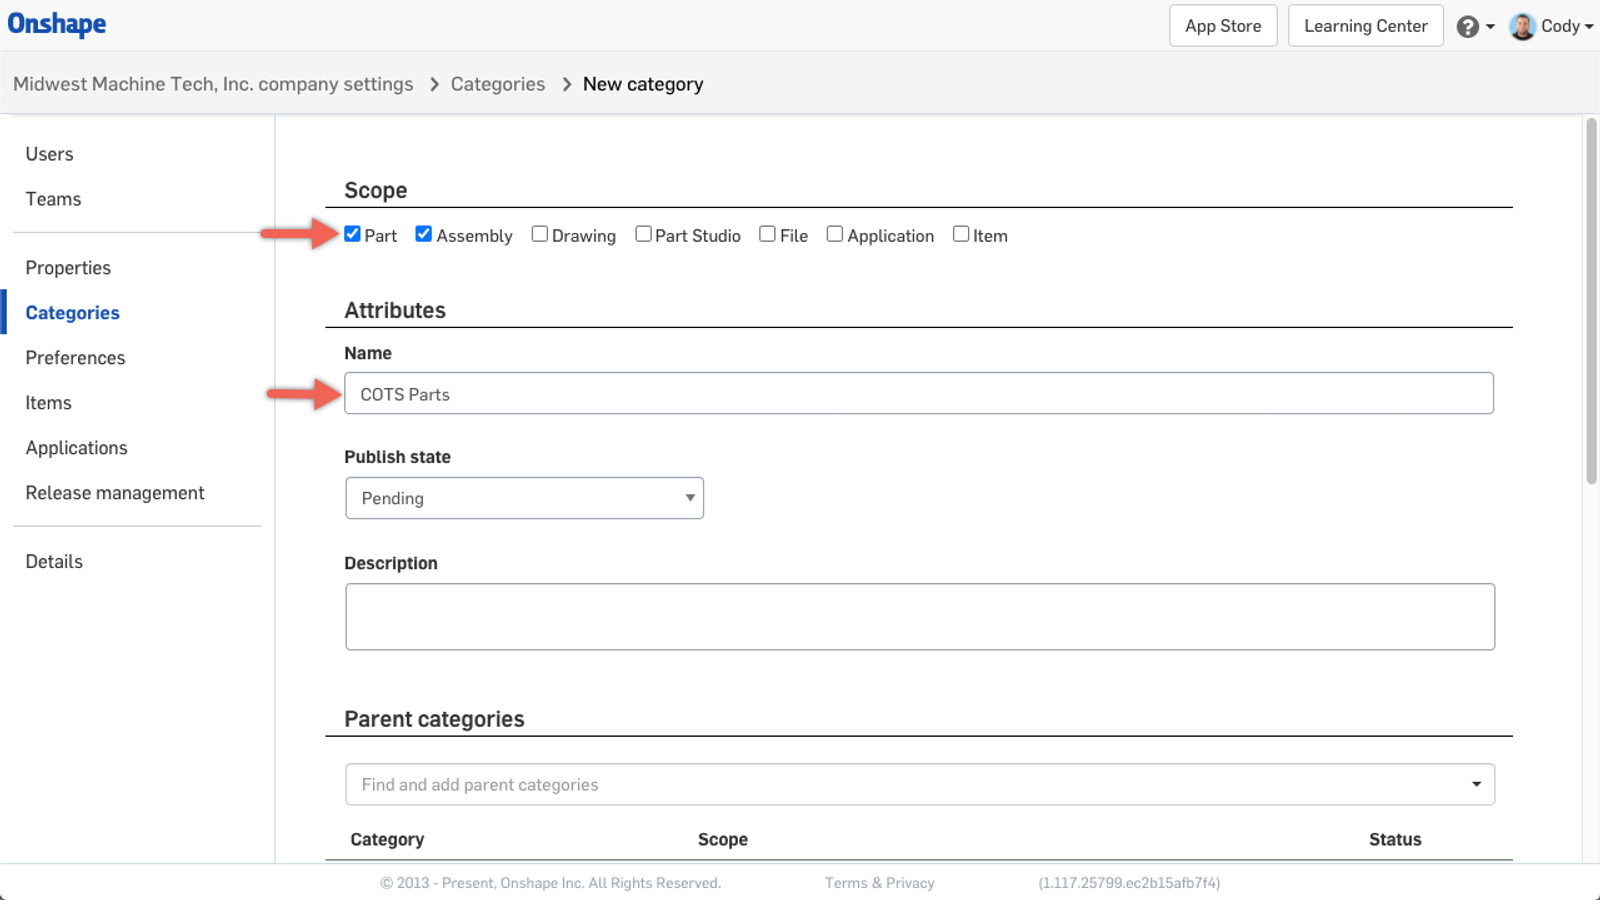
The first step is to start by defining the scope of the category. In our example, we want to build a category for commercial off-the-shelf parts. And we want to define the scope of our category to be only “Part” and “Assembly.” Next, give the new category a name.
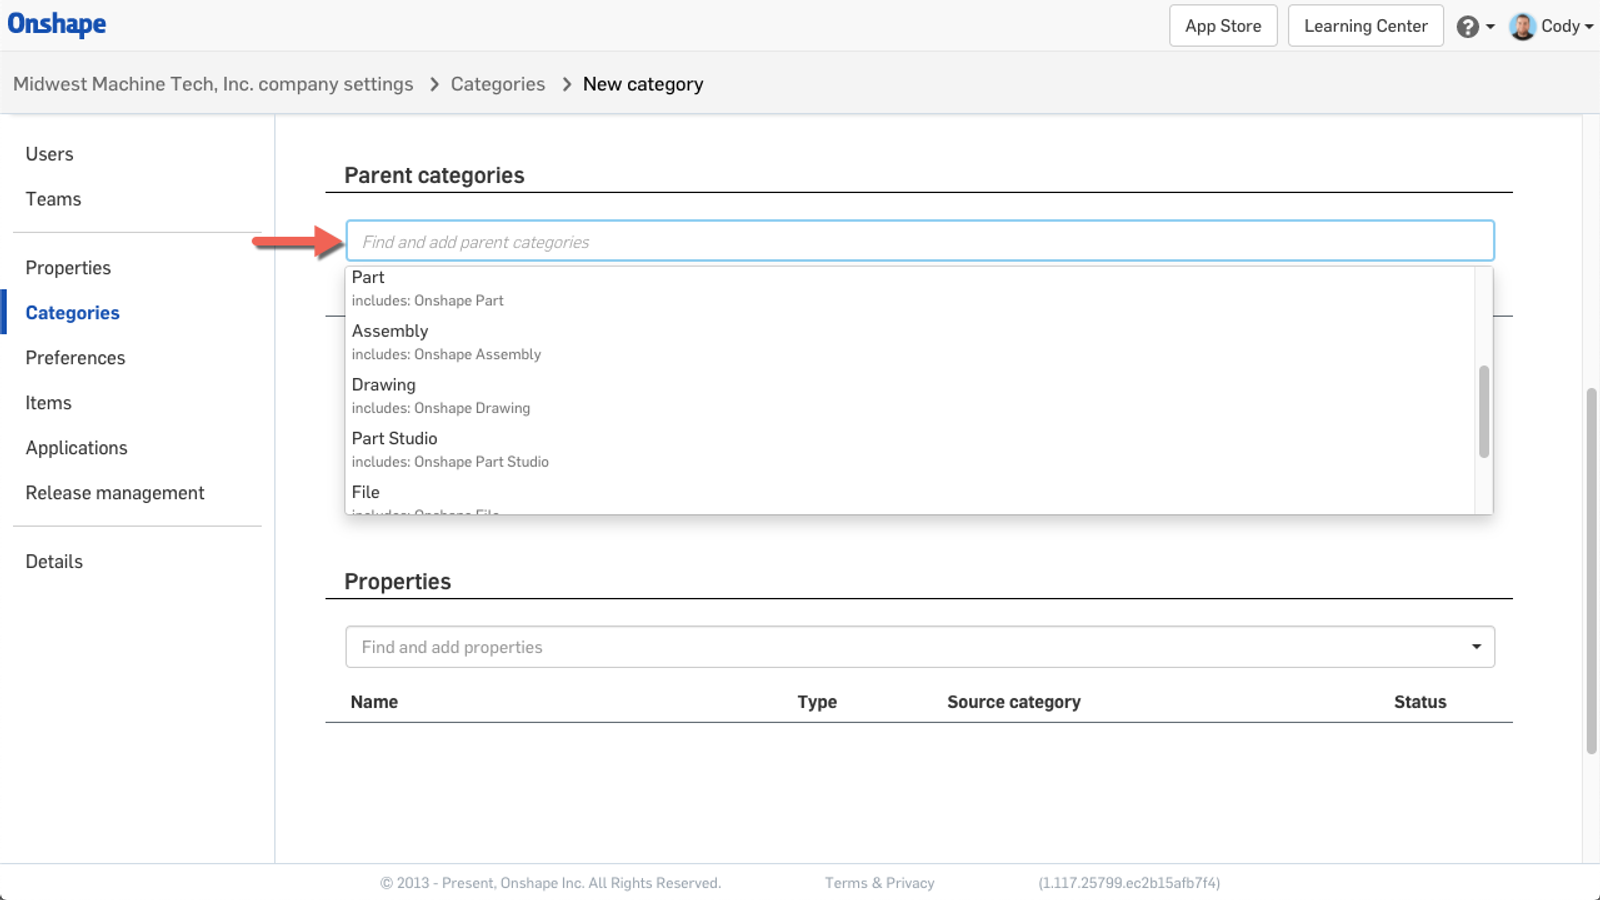
Optionally, you can then define a parent category. This can be especially useful when you want your category to inherit the properties of another category. An example would be a “Sheet Metal Parts” category that had a parent category of “Part”. This would allow you to inherit all of the normal part properties from the part category, but also give you a sheet metal part sub category to put custom properties that are sheet metal specific.
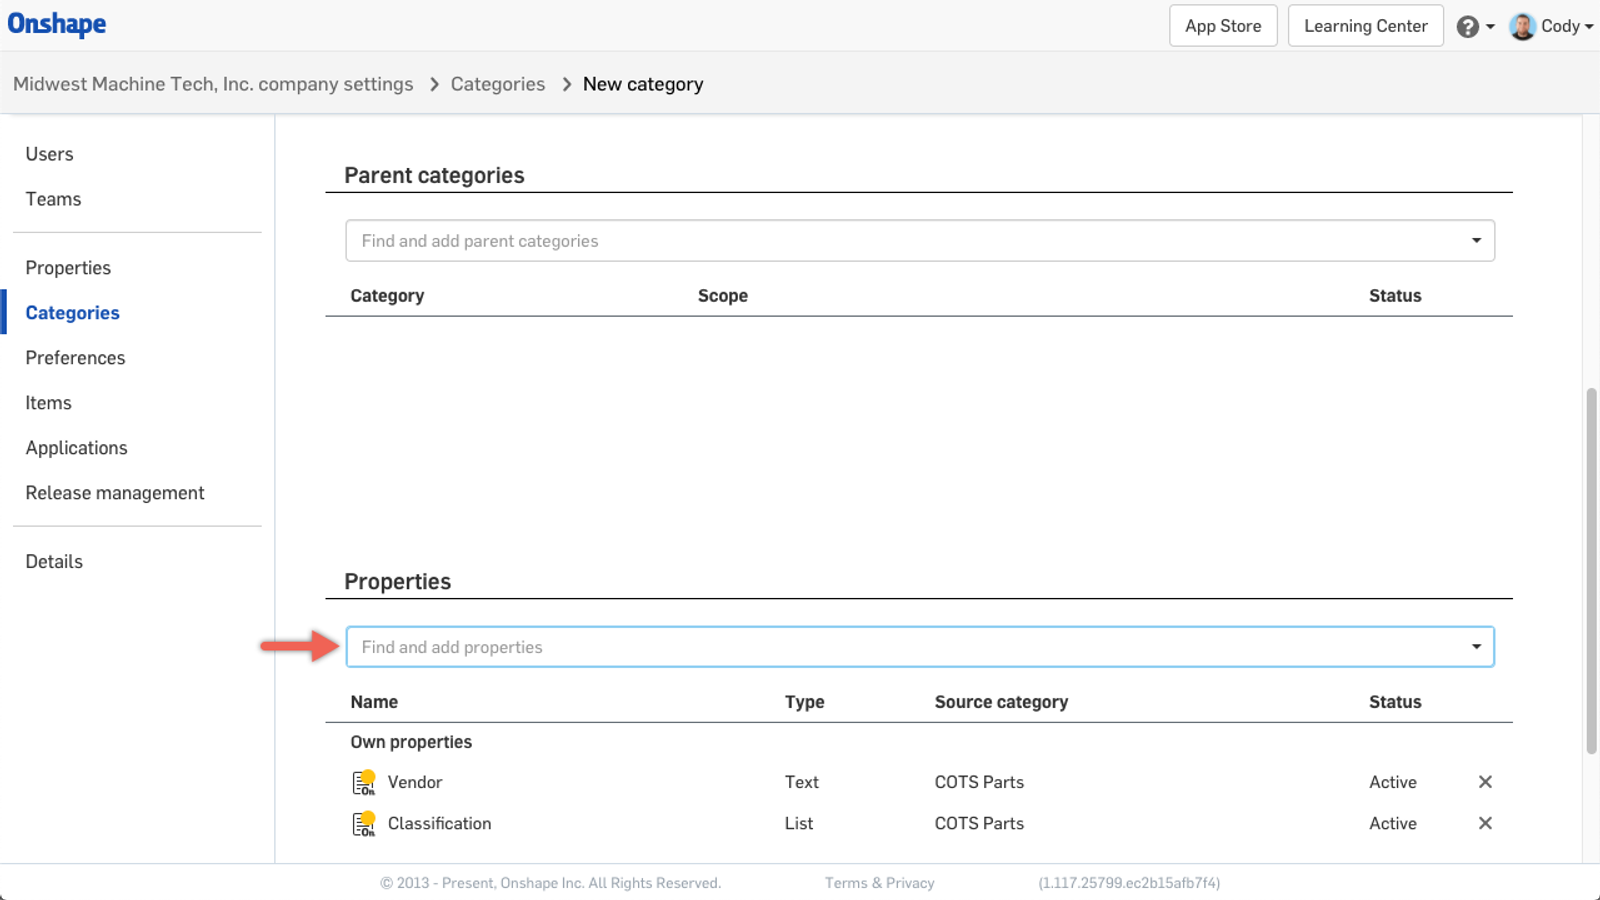
The final step is to add the custom properties you want associated with your category. These will be the properties displayed when anyone in your company chooses that category.
As a final step, set the publish state to “active” and click “Create” at the bottom. Your category will now instantly be accessible to everyone in your company.
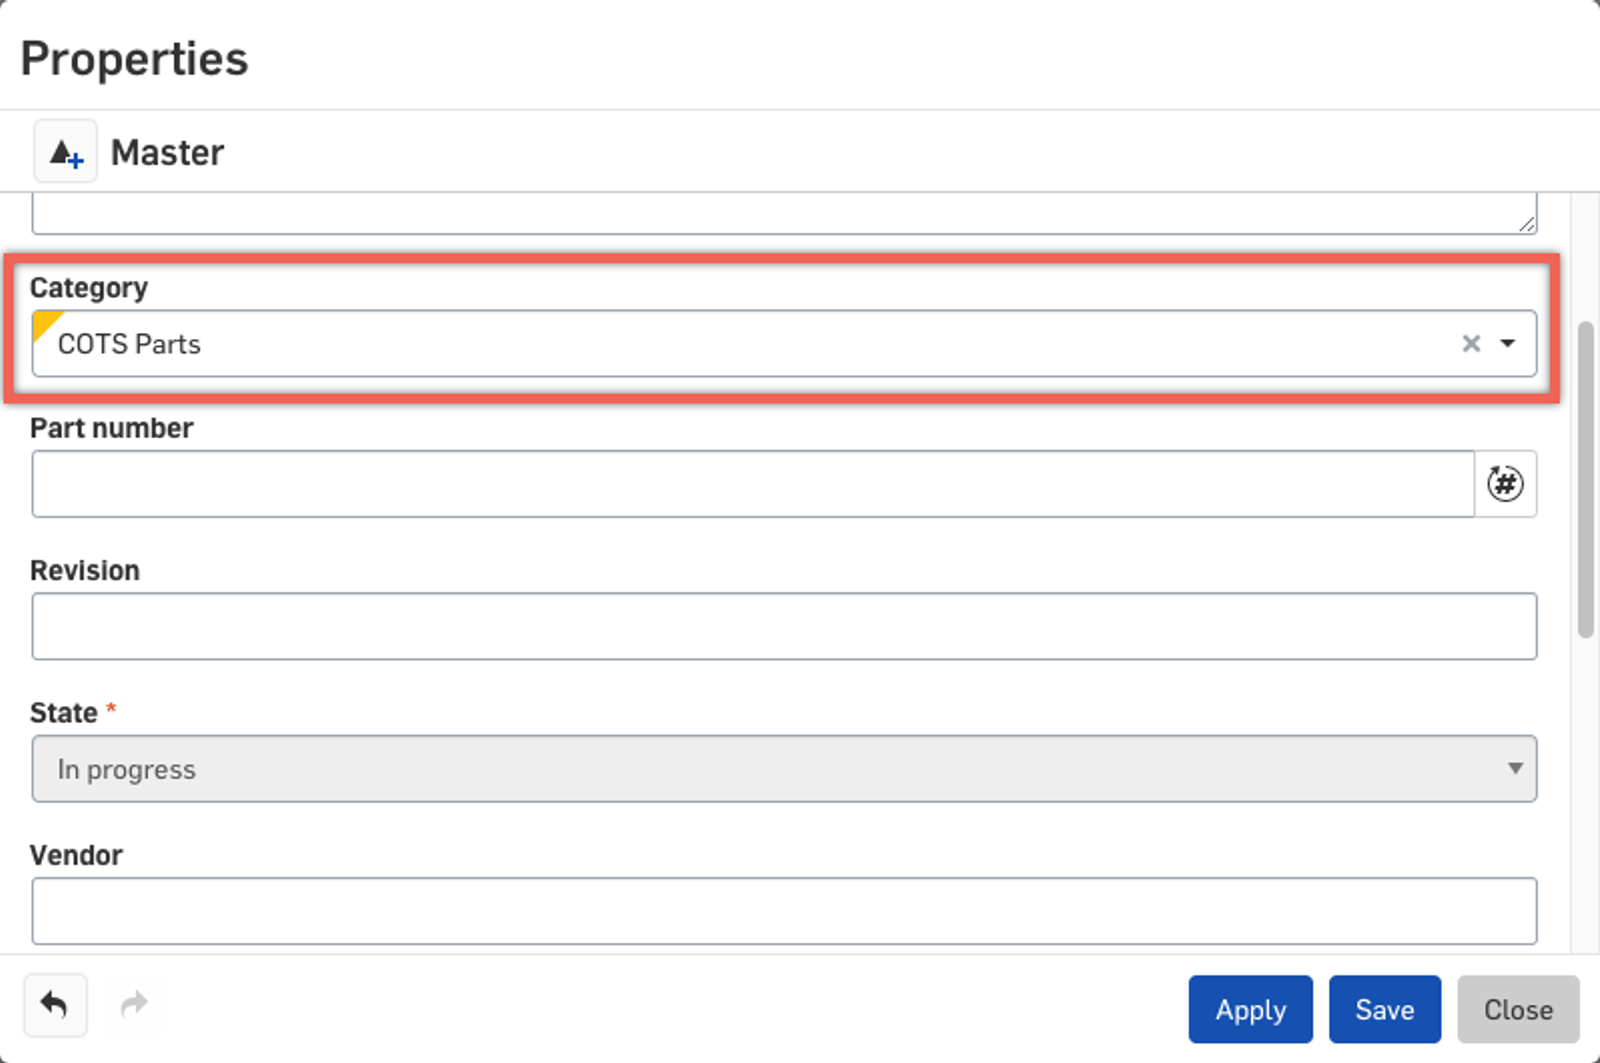
Now, when any user edits “Properties” they will see an option to change the “Category.” After selecting a category, they will see only the properties that are in that Category and those that are defined in the “Global” Category.
If you want to edit the “Global” Category (or any of the other categories that are created by default), simply open the default Category, make any changes necessary, and click “Save changes” when done.
So that’s it! Categories has an infinite number of use cases so hopefully this introduction will get you started. Head to the Onshape Learning Center for more on Categories or ask for a demonstration from one of our team members.
The Onshape Discovery Program
Learn how qualified CAD professionals can get Onshape Professional for up to 6 months – at no cost!
Latest Content

- Case Study
- Robotics
Saga Robotics: Powering the Future of Sustainable Farming with Cloud-Native Onshape
01.05.2026 learn more
- Blog
- Evaluating Onshape
- Simulation
- Rendering
- Surfacing
- Consumer Products
Earlier Validation, Better Outcomes: Onshape’s Approach to Surface Design
02.20.2026 learn more
- Blog
- News from Onshape @ PTC
- Publications
- Configurations
- Data Management
Onshape MBD: Single Source of Truth from Design to Manufacturing and QA
02.23.2026 learn more
- Blog
- Becoming an Expert
- Sheet Metal
Two Views, One Model: Faster Sheet Metal Design in Onshape
02.12.2026 learn more

