
2:14
Custom Features are helpful tools that can extend the capability of Part Studios, automate everyday tasks, and boost your productivity.
Anyone with an Onshape account can create and share Custom Features using FeatureScript. But you can enjoy the benefits of Custom Features without scripting experience.
This Tech Tip explains how to find a Custom Feature and add it to your Shortcut Toolbar (“S” key) for easy incorporation into your workflow.
Add a Custom Feature from a Part Studio
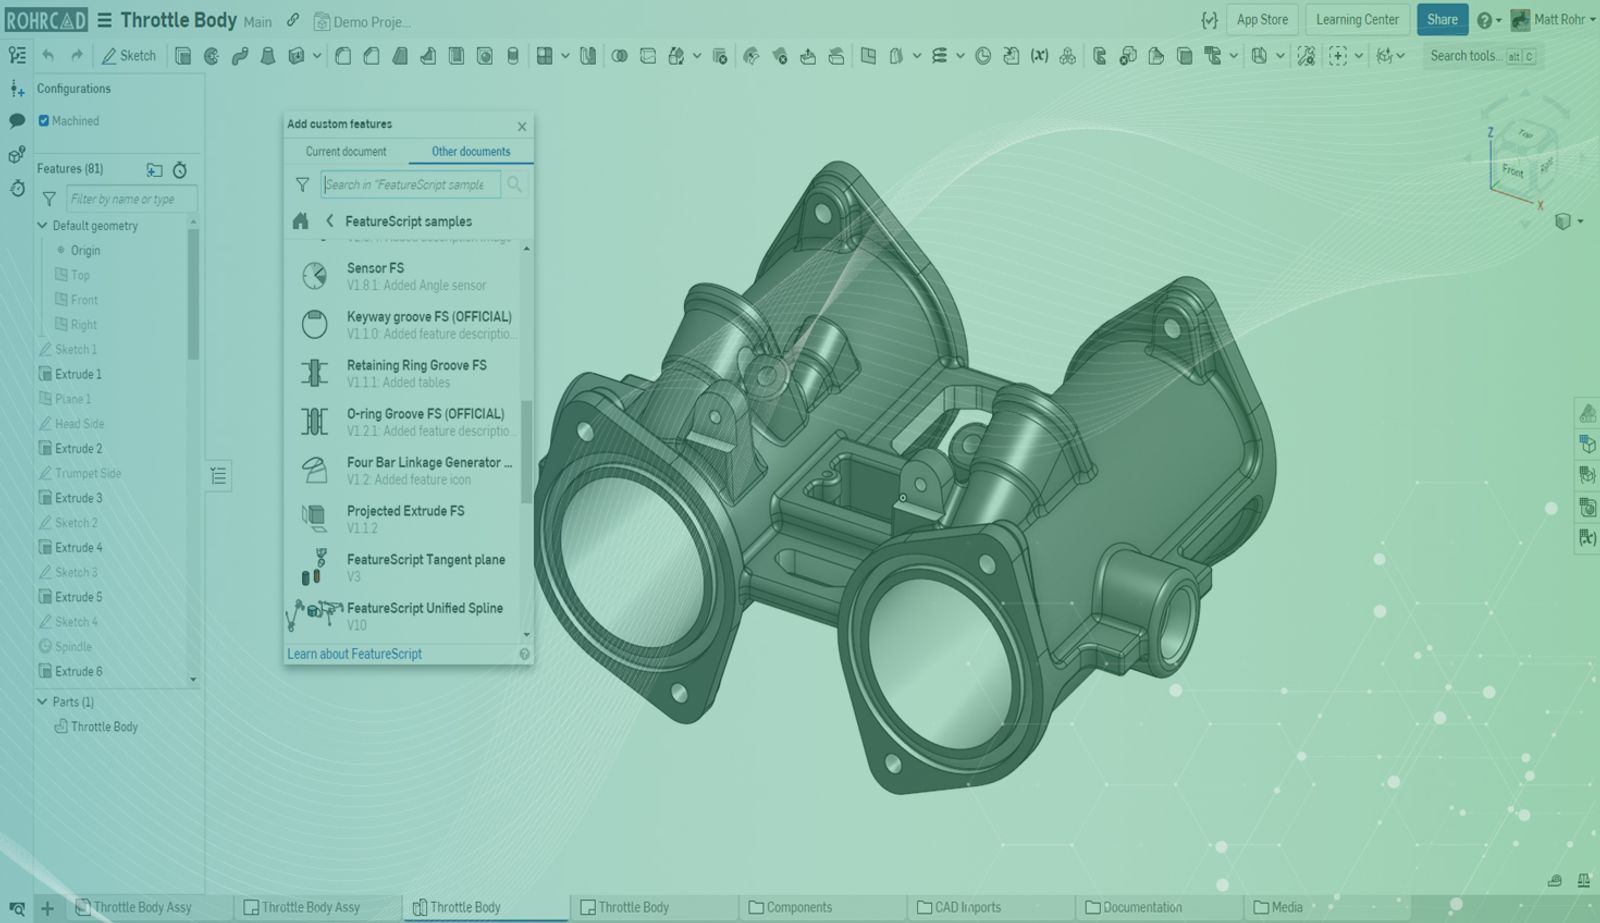
The most straightforward way to search for Custom Features is to click the Add Custom Features icon from the Part Studio toolbar and use the dialog to locate relevant features.
Hint: Press ALT+C to open Search tools, then start typing "Add Custom Features" to find the command quickly.
Using the “FeatureScript spotlight” filter displays Custom Feature examples built by Onshape staff, and the “Community spotlight” filter displays a curated list of Custom Features built by the Onshape community.
Add a Custom Feature from a Document
You can also search for public Feature Studios:
- On the left panel of the Documents page, select Public.
- Expand the advanced search bar by clicking the drop-down arrow in the search.
- Adjust the filters to show Feature Studios containing a specific name and only show results from the latest versions.
After you find a suitable Feature Studio, open the Document to review. Custom Feature documents contain the FeatureScript and example Part Studios. The most useful Custom Features will also contain how-to documentation. If the Custom Feature meets your requirements, add it to your toolbar by clicking the icon at the top of the page.
Searching the public documents dialog may yield numerous results. But entering a URL takes you directly to a specific Custom Feature. The Onshape Forums are an excellent resource for discovering links to features and collaborating with fellow users.
Add the Custom Feature to the Shortcut Toolbar
After adding Custom Features to your Part Studio, personalizing the shortcut toolbar by adding frequently used features is straightforward.
- Click your user name in the top-right and select “My account.”
- Select Preferences on the left side of the screen.
- Scroll down to “Shortcut toolbars” and change the pull-down option to Part Studio.
- Add or remove any Onshape features to the Shortcut toolbar. Custom Features display toward the end of this list.
- Click “Save Shortcut toolbar settings.”
Personalizing the shortcut toolbar with frequently used Custom Features saves time and streamlines design processes. Learn more about personalizing the S-key shortcut with Custom Features by watching the video below:
Interested in learning more Onshape Tech Tips? You can review the most recent technical blogs by heading to our Tech Tips page or YouTube channel.
Latest Content
- Blog
- News from Onshape @ PTC
- Artificial Intelligence
Onshape Labs: AI in CAD Guided by Designers, Driven by Innovation
07.15.2026 learn more- Blog
- Evaluating Onshape
- Data Management
- Collaboration
- Artificial Intelligence
How the Most Underrated CAD Feature Improves Design Workflows
07.09.2026 learn more- Blog
- Evaluating Onshape
- Collaboration
With Cloud CAD and PDM, Flexible Design for a Summer Coolcation
07.02.2026 learn more