1:19
Sketches are, of course, the basis for creating almost any model in Onshape. It often takes more than one sketch and feature to create a specific element of geometry on a model. As a result, we often rely on documenting a piece of geometry with multiple specific dimensions placed on the drawing.
But in some cases, using the sketch itself can be a much cleaner way to communicate the desired result. Take a look at my example below, a power outlet/switch cover plate:
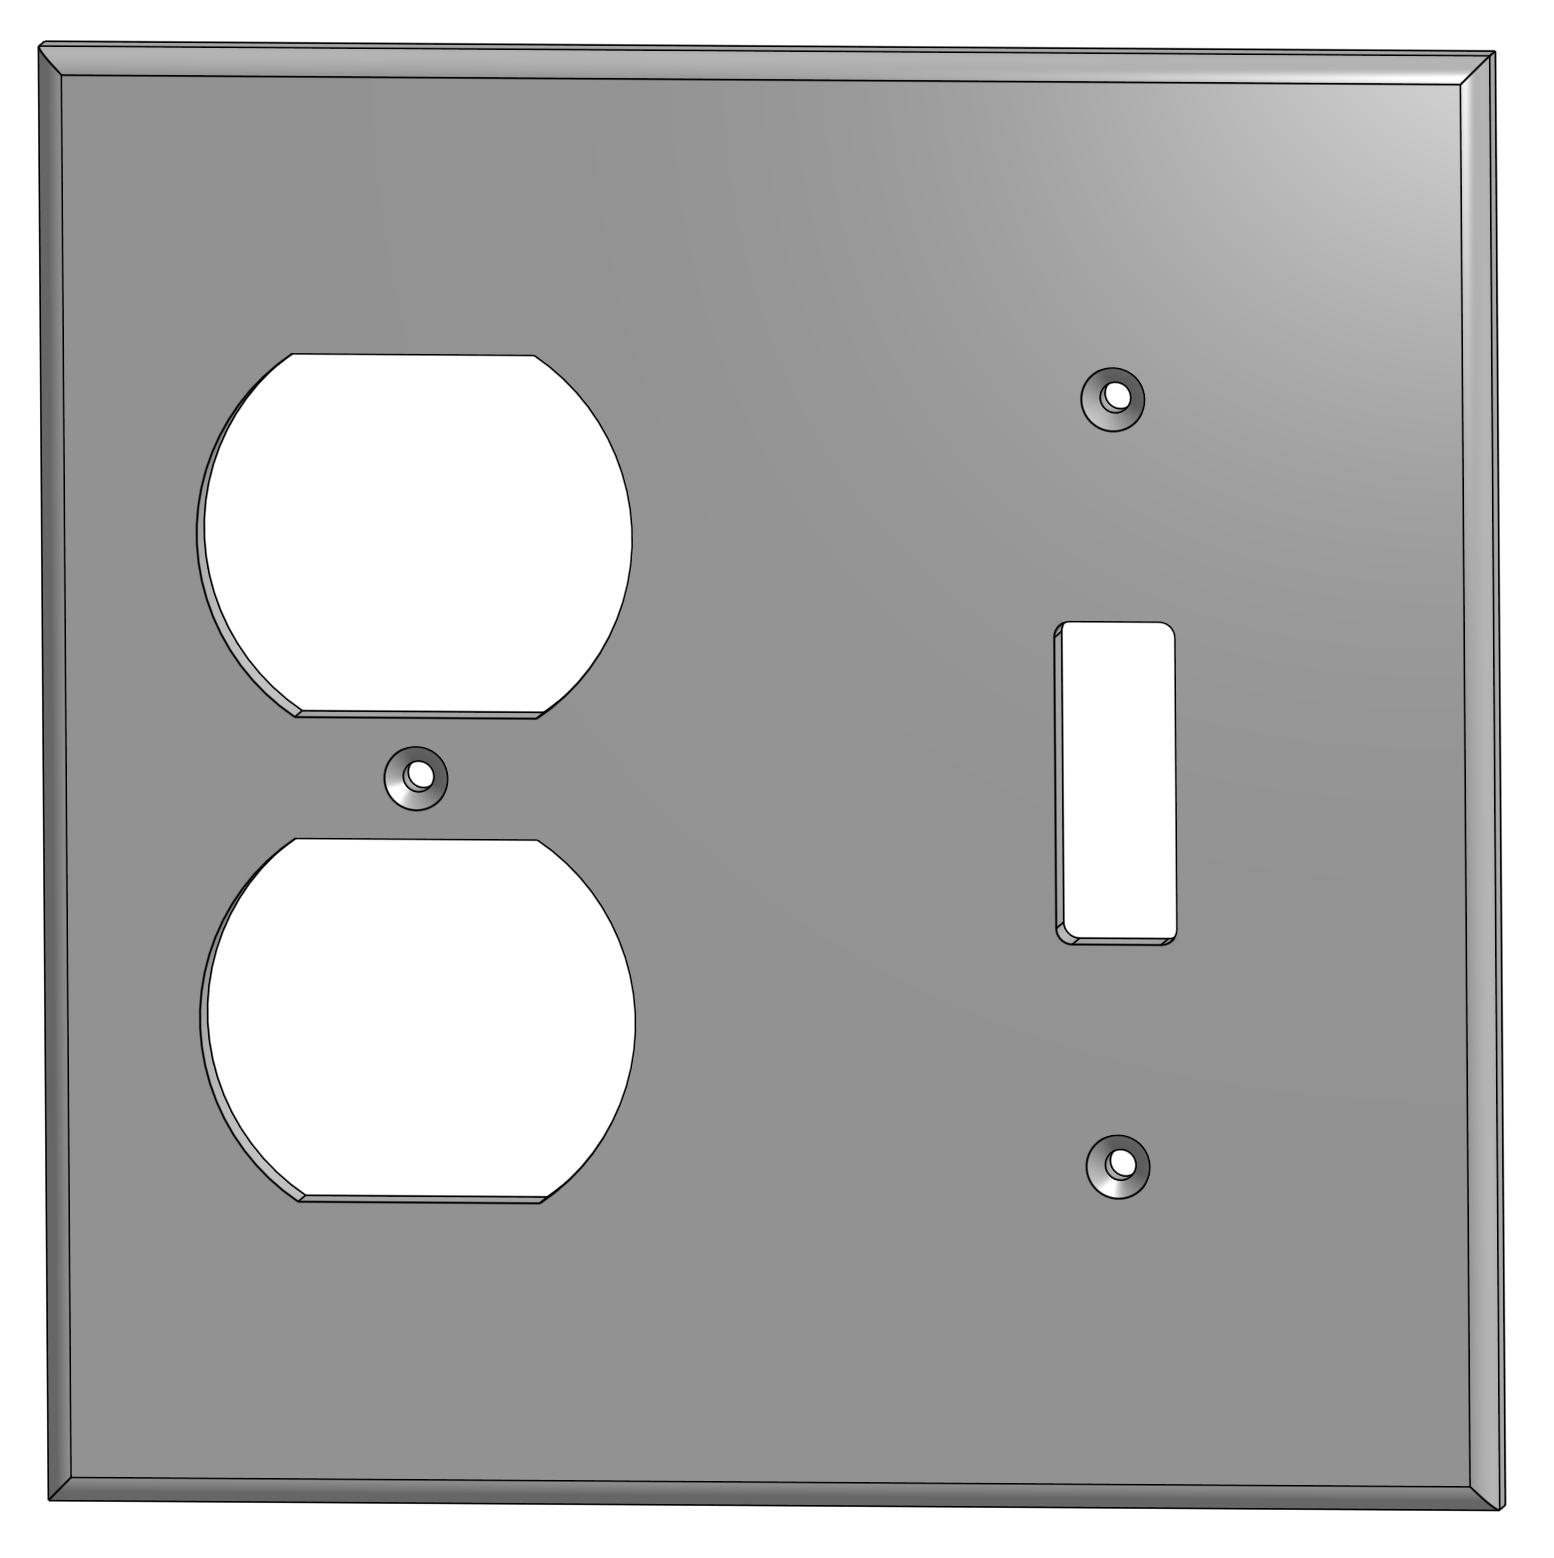
This part is easy to model, and it will be relatively simple to manufacture as well. It’s a single piece of sheet metal cut to size, with a few holes in it, and with the sides rolled slightly so they aren’t sharp.
In fact, maybe we already know that the three larger openings will be cut with custom punches. When this is the case, we really only need to show the center location of the geometry – something that we can easily capture from the sketch.
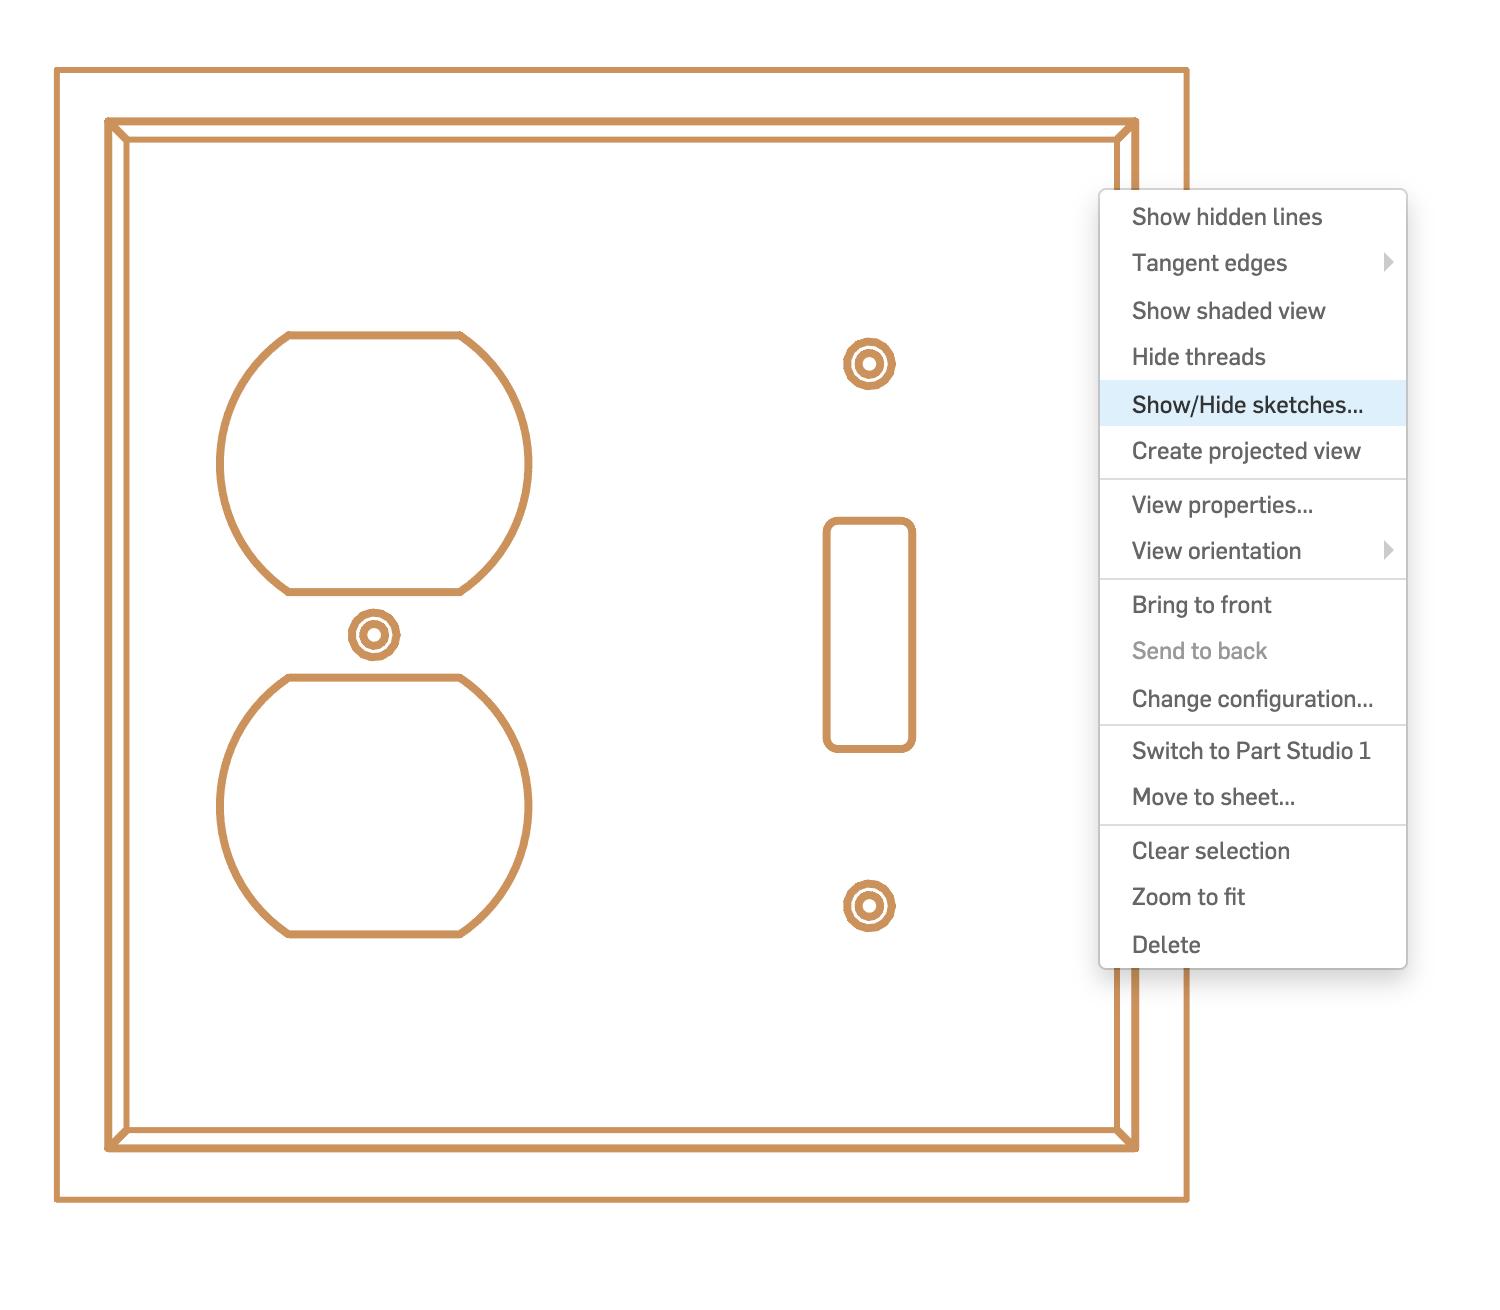
From the drawing view, we can right-click and choose to “Hide/Show sketches.”
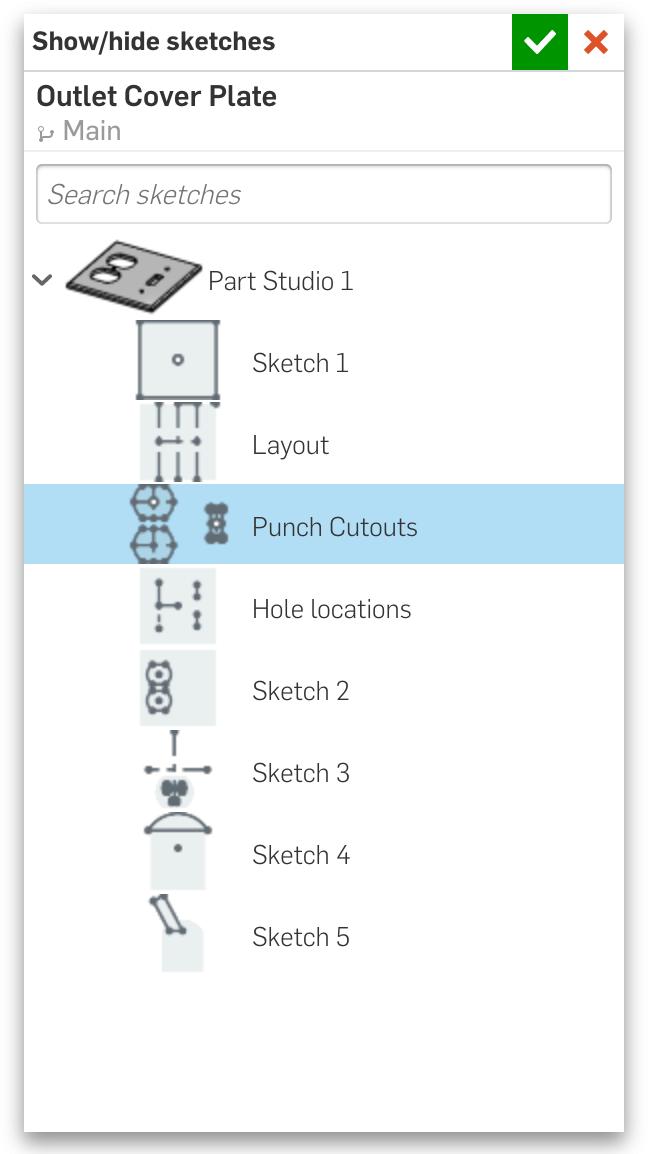
Next, we’ll pick the sketch where we did the layout of our specifically sized punch geometry.
The sketches now show on the drawing view. This makes it much easier to clearly capture the punch center locations.
This tip also can be superhandy for capturing the location point for sheet metal-forming features such as louvers and vents, or even cuts that roll across a bend. You can show sketches on a sheet metal flat pattern exactly the same way.
Latest Content

- Blog
- Aviation, Aerospace & Defense
- Bifurcar y combinar
- Custom Features
- Centro de aprendizaje
- Onshape Government
Why Aerospace & Defense Teams Choose Onshape for Product Development
12.18.2025 Más información
- Blog
- Evaluating Onshape
Cloud-Native CAD 2025 Wins: Revenue Growth, Real-Time Collaboration, Unified CAD-CAM
12.17.2025 Más información
- Blog
- Becoming an Expert
- Ensamblajes
- Simulación
Mastering Kinematics: A Deeper Dive into Onshape Assemblies, Mates, and Simulation
12.11.2025 Más información


