
1:06
Today’s tech tip is useful if you use a lot of custom colors for your parts. It’s common when working with custom colors to apply them to many parts across multiple projects. Let’s take a look at creating custom colors when editing your appearance in Onshape.
We should start with how to edit the appearance of a part. To do this, simply right-click the part in the graphics of a Part Studio or in the parts list of the Part Studio. In the right-click menu options, look for the “Edit appearance for …” option. It’s important to stress that you can only edit the appearance of parts in the Part Studio.
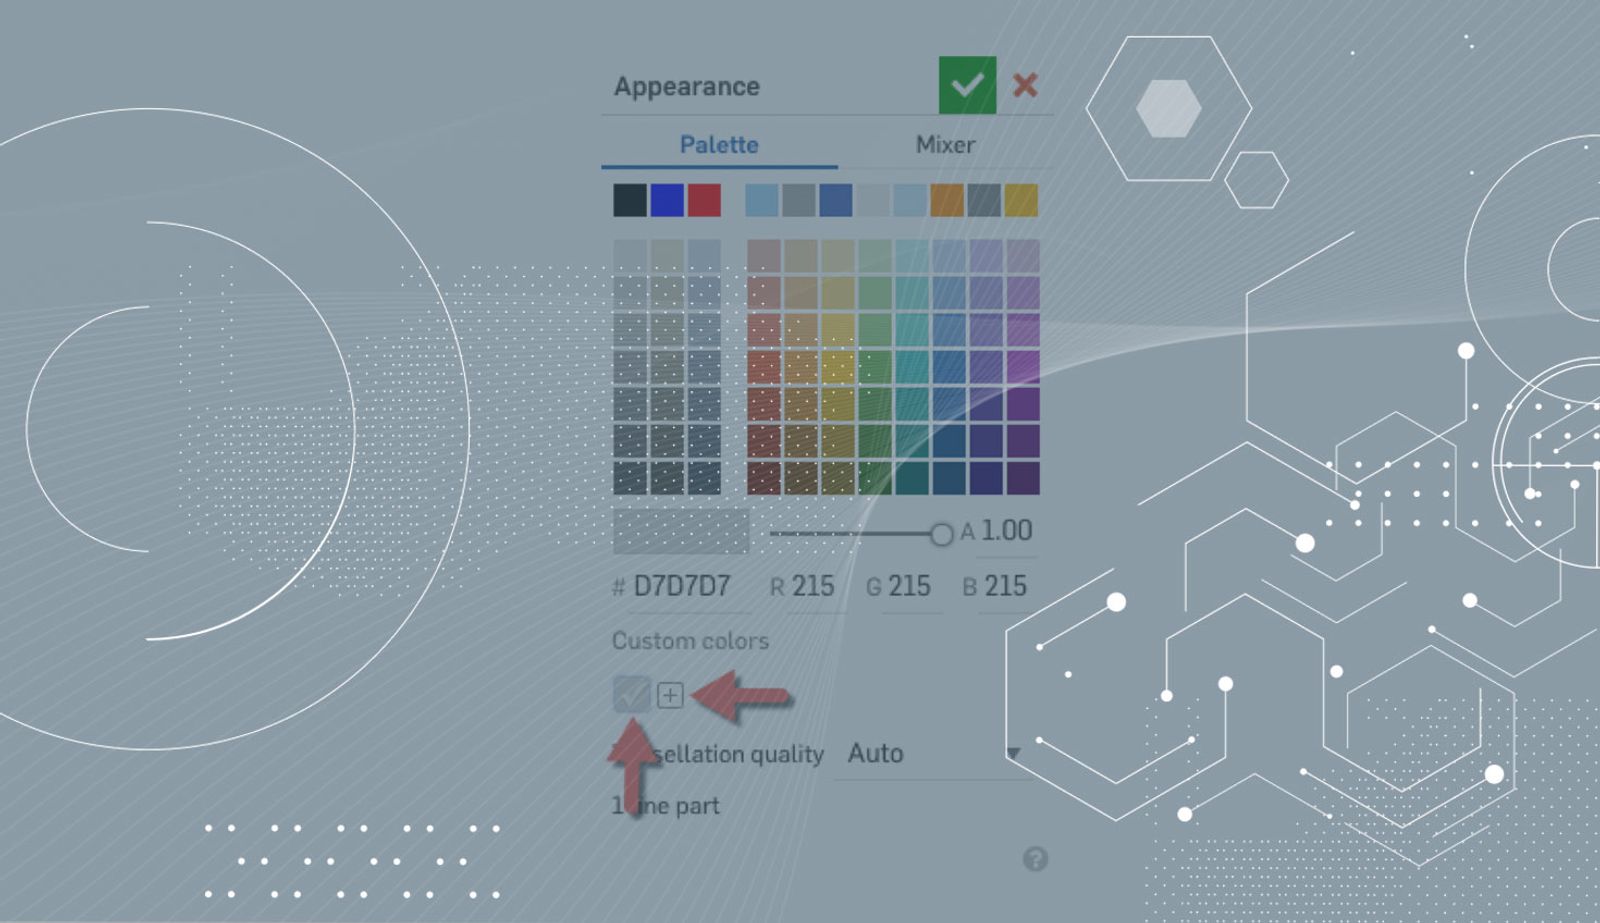
After clicking this, the appearance editor dialog will appear. Here you can type in your custom color information. In the example below, you can see that I am entering in a custom color by typing in its hex color code.
After typing in the custom color information, there is one important last step. If you want to reuse this color in the future, make sure to click the “+” symbol under “custom colors.” This will save that color under the “custom colors” list for reuse in future projects.
That’s it! Now your custom color will be an option whenever you edit the appearance of a part.
Contenu le plus récent
- Blog
- Becoming an Expert
- Ensembles
Built to Scale: Why Large Assemblies Don’t Slow Down in Onshape
07.16.2026 En savoir plus- Blog
- News from Onshape @ PTC
- Artificial Intelligence
Onshape Labs: AI in CAD Guided by Designers, Driven by Innovation
07.15.2026 En savoir plus- Blog
- Evaluating Onshape
- Gestion de données
- Collaboration
- Artificial Intelligence
How the Most Underrated CAD Feature Improves Design Workflows
07.09.2026 En savoir plus