
02:28
When you collaborate with other users in the same Onshape document, unwanted changes can happen. Parts may be hidden, features deleted, or edits made that don’t work out. Suddenly, the design doesn’t look the way you expected.
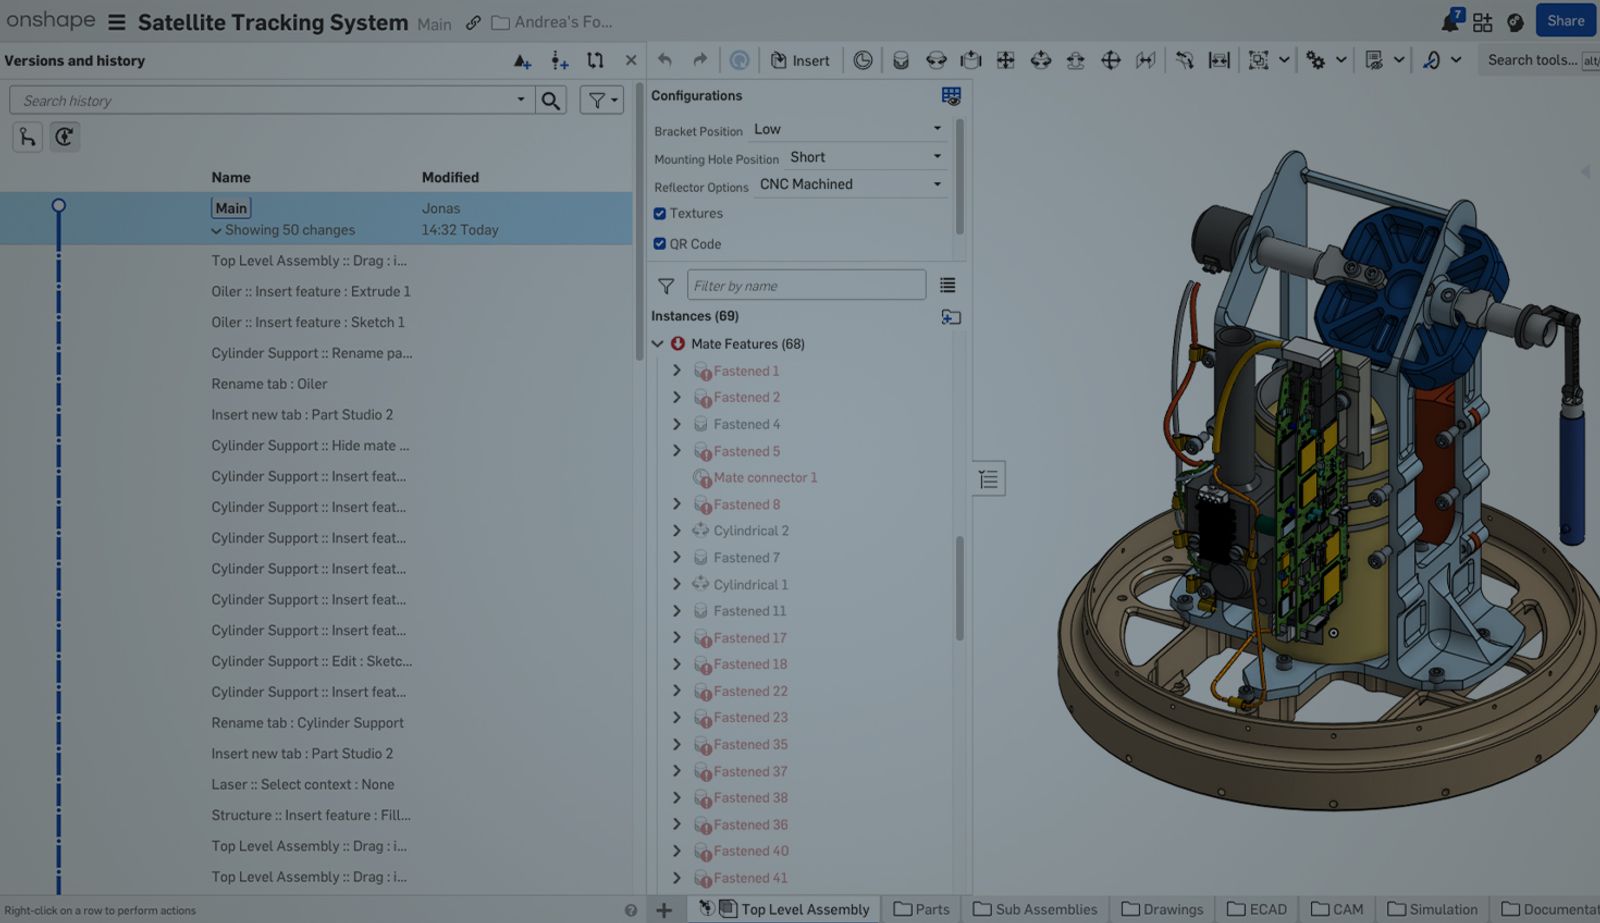
Onshape makes it easy to restore a previous state of your design using the Versions and history panel, but as more changes are added, it could be hard to spot the right point in time to go back to.
This Tech Tip shows how to use the Versions and history filters to quickly find the exact moment before things went wrong and restore your design with confidence.
Leverage Filters in the Versions and History Panel
At the top of the Versions and history panel, there is a search bar and a drop-down menu that lets you filter entries. You can narrow results based on:
- Tab or Tab type
- Who modified the document
- When the change was made
For example, if you think the issue started after someone else made edits, you can filter the timeline to show only changes made by other users. Use the “Modified by” option and set it to “Not me.”
Also, if you know the issue happened recently, you can set a start date so only the most recent changes are shown.
This quickly reduces the list to the most relevant microversions when you are investigating unwanted changes.
Locate the Correct Restore Point in the Timeline
Once filters are applied, the timeline becomes much easier to read. The list is narrowed down to show who made each change and when it happened.
Scroll through the filtered history and look for the first change that introduced the problem. This is usually the earliest point where the design started to go in the wrong direction.
Select that microversion to preview the design at that moment.
Now comes the key step: Clear the search filters. The full timeline comes back, but your selected microversion stays highlighted!
From here, simply select the microversion right before it. This is the last known good state of your design.
Restore the Design with Confidence
With the correct microversion selected, you can restore it using Restore to Main at the top of the graphics area.
What’s important is that you don’t always have to restore the whole document. Onshape lets you choose whether to restore:
- The entire document
- Only the specific tabs that contain the unwanted changes.
This means that if, in the meantime, you have made other edits in different tabs that you want to keep, you can preserve them. This level of granularity helps you fix issues precisely and keep your design moving forward.
Collaboration and Version Control in Onshape
This Tech Tip showed how to leverage the Versions and history panel to find the right restore point after unwanted changes. If you often work with shared documents, there are many more tools that can help you stay in control of your designs.
If you want to go deeper into document management workflows, check out the Branching & Merging and Document History courses in the Onshape Learning Center.
The Onshape Learning Center
Take self-paced courses, read articles, or sign up for an instructor-led training session.
Neuester Inhalt
- Blog
- Kunden und Fallstudien
- Verbindung zum Arena PLM
The Cloud-Native Workflow Behind Coco’s Next-Gen Delivery Robot
05.14.2026 Mehr Infos- Blog
- Mobil- und Browser-Clients,
- Enterprise
- Commercial (Pro/Standard)
3 Signs Your CAD Can’t Keep Up With Your Distributed Teams
05.13.2026 Mehr Infos- Blog
- Evaluating Onshape
- PCB Studio
- Integrationen
- Zusammenarbeit
- Konsumgüter
- Elektronik
- Medical Tech
- Robotertechnik
How Onshape and Altium Are Erasing the ECAD-MCAD Divide
04.30.2026 Mehr Infos