
00:00
This Tech Tip covers how to add non-frame-generated parts to your weldments and cut lists in Onshape. Once added, these items act like any other frame member in your weldment and can be included in drawing cut lists, balloon callouts, and be called out with weld symbols.
Cut Lists with Non-Frame Members
While creating frames and weldments in Onshape, you may want to add design elements that are not created from the Frame feature. This is important as not every design element can be automatically created from the Frame feature. This includes gussets, end caps, brackets, mounting plates, and more.
This impacts your design in a few ways. You may want to include these parts with the Composite part created when you add the Cut list feature to the design. This can simplify the design process and feel similar to how you would design your weldment in other design tools. You may also want these additional items to appear on the Cut list in both the Part Studio as well as on any drawings of the weldment.
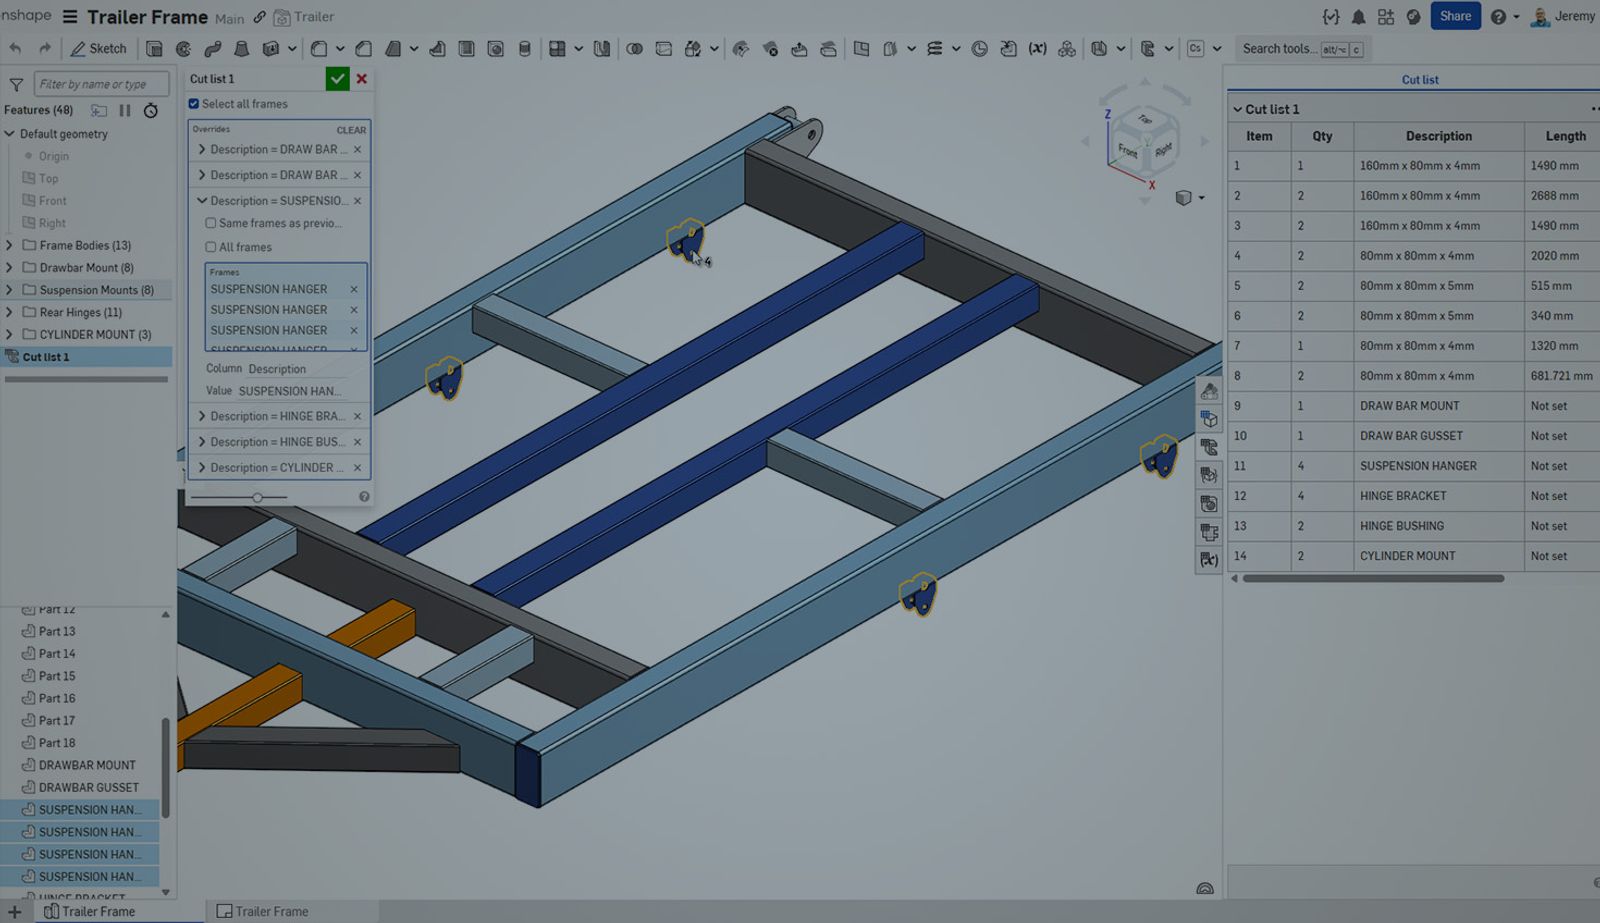
The good news is that these items can be added while creating the Cut list feature in the Part Studio. When you create the Cut list feature, it automatically collects properties like Length, Description, and the Angle of the Frame elements in your design.
However, you can manually choose to add additional properties, and more importantly, additional parts from the Part Studio to include in the Cut list using the Add Column Override button found at the bottom of the Cut list dialog.
When selected, this option allows you to select additional Frames and specify a Column property and a value for the selected elements.
You can choose additional Parts that are not Frame members to include in the weldment. Once these parts are selected, specify both a property in the Column field that is part of the Cut list template and a Value. It is important to ensure that the property name precisely matches the template’s property name, including case sensitivity. Then include the value for this property to appear on the Cut list.
Once you press okay, two things will happen. Any of the parts selected are now included in the Composite part that is created, meaning all of the weldment members can be inserted as a single item into any assemblies. Additionally, the added items now appear in any Cut lists, including the Part Studio and any Drawings where they are added.
It is important to remember that once these items are added to the weldment, they can be detailed like any other weldment member. This includes being called out with Cut list item Balloons, and having weld symbols added to define how these components are welded to the rest of the structure.
Looking to get started with Frames in Onshape for the first time? Check out this Learning Center lesson that takes you from creating Frame profiles to drawing creation.
Adding non-frame parts to your weldments in Onshape is a built-in capability that keeps your designs organized and your documentation complete. Whether you’re detailing gussets, brackets, or custom plates, this approach ensures everything shows up where it should, from cut lists to balloon callouts.
Friends Don’t Let Friends Use Old CAD!
Know a colleague who could benefit from our cloud-native, fully-featured collaborative design platform?
Latest Content
- Blog
- Evaluating Onshape
- Electronics
- Integrations
- PCB Studio
How Onshape PCB Studio Pulls 3D Component Models Straight from Altium 365
05.21.2026 learn more- Blog
- Evaluating Onshape
- Collaboration
- Data Management
What’s the Difference Between File-Based and Cloud CAD?
05.20.2026 learn more- Blog
- Customers & Case Studies
- Arena PLM Connection
The Cloud-Native Workflow Behind Coco’s Next-Gen Delivery Robot
05.14.2026 learn more