1:08
Today’s tech tip is a simple navigation tip. When you are in an assembly, one of the most common actions is to navigate to a Part Studio or subassembly within that assembly. There are various ways to navigate a complex Document, including scrolling across the tabs along the bottom and using the Tab Manager to search. But the fastest way to navigate to a Part Studio or assembly from the top level is to use “Switch to.” Let’s take a look.
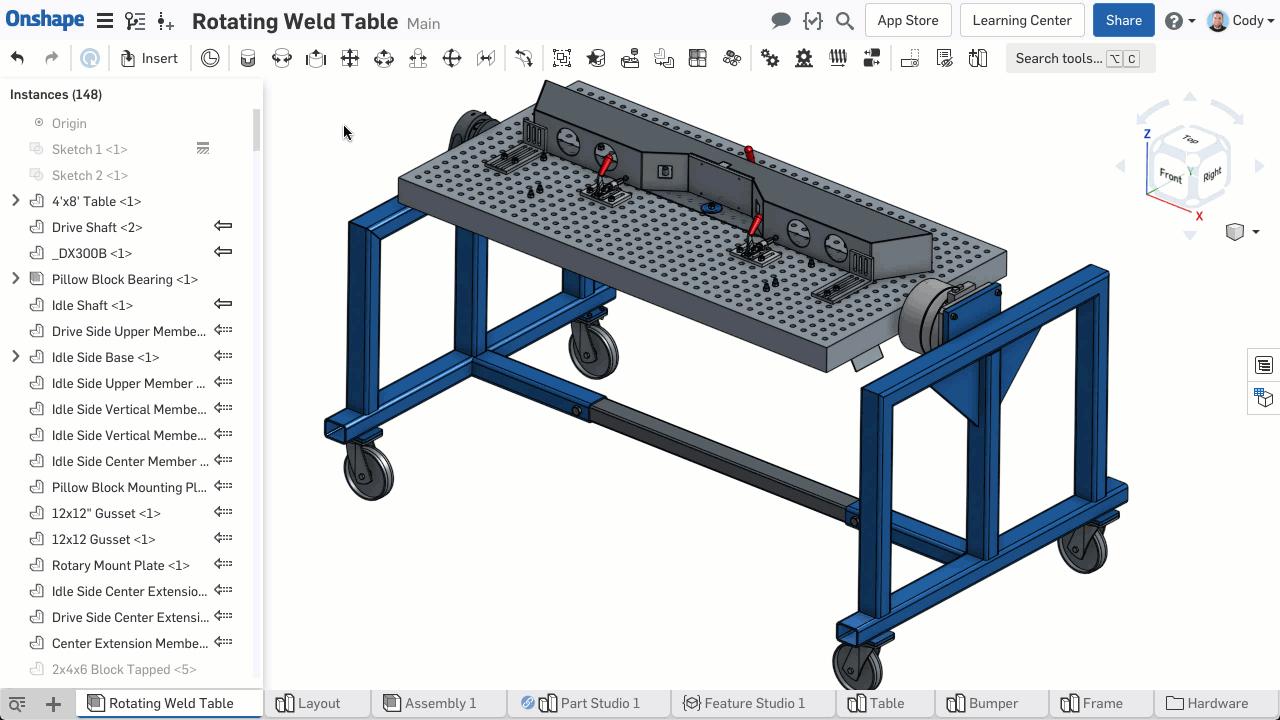
Take the example in the screenshot below:
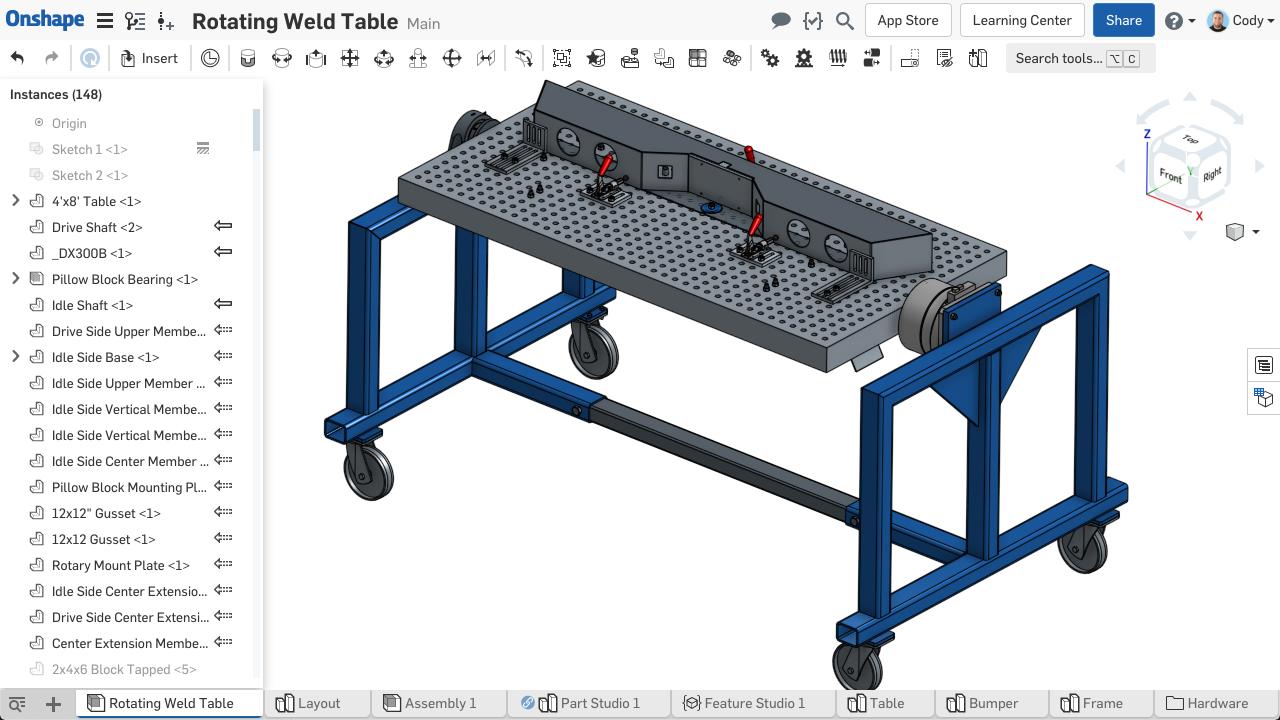
Here, I am looking at the top-level assembly and I want to open the Pillow Block Bearing subassembly:
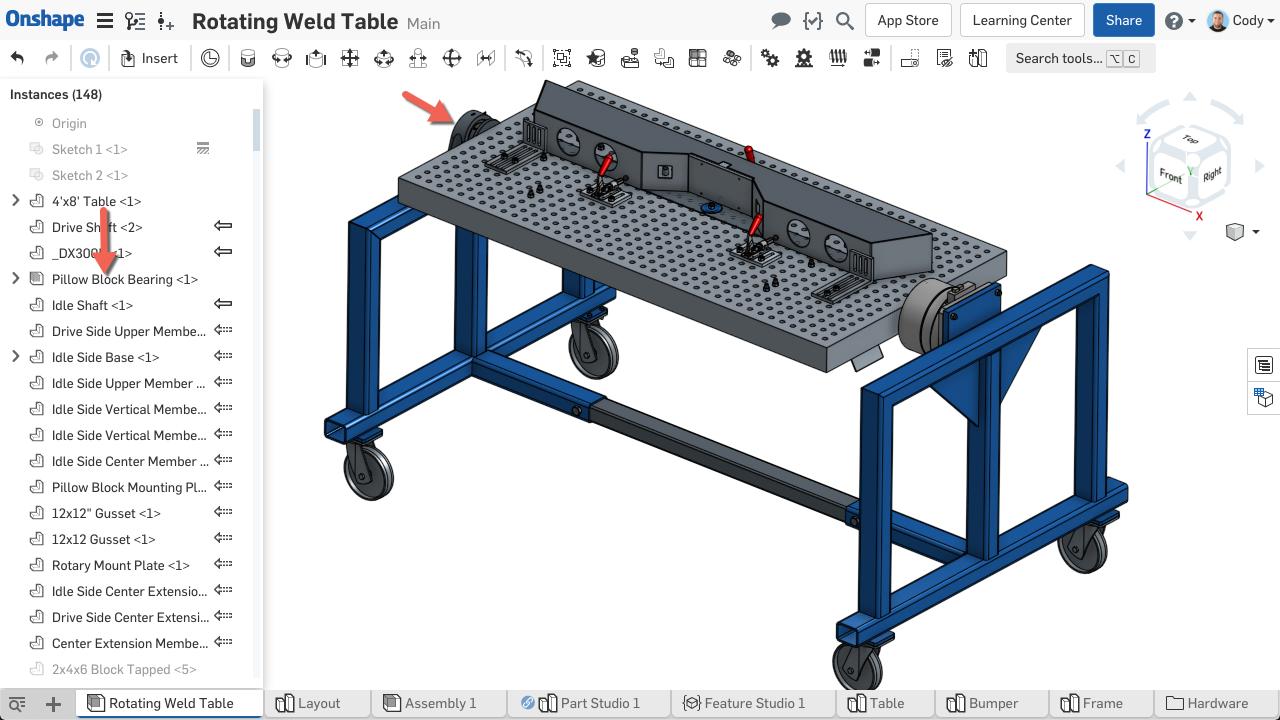
The easiest way to do this is to right-click the subassembly from the instance list or the graphics, and you will see the option to “Switch to.”
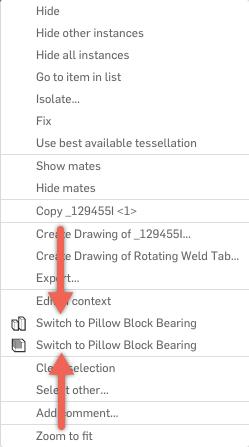
In the screenshot above, you can see that I have two options to choose from, the Part Studio or the assembly. If you right-click from the graphics, you will be given the option to choose whether you want to open the Part Studio associated with the part you have right-clicked, or the assembly that part is in.
Note: If you switch to an assembly by right-clicking a part in the graphics, Onshape will automatically highlight that part in the subassembly.
So that’s it! Hopefully, this tip will help you navigate your assemblies more effectively.
Latest Content
- Blog
- Becoming an Expert
- Assemblies
- Simulation
Mastering Kinematics: A Deeper Dive into Onshape Assemblies, Mates, and Simulation
12.11.2025 learn more
- Blog
- Evaluating Onshape
- Learning Center
AI in CAD: How Onshape Makes Intelligence Part of Your Daily Workflow
12.10.2025 learn more
- Blog
- Evaluating Onshape
- Assemblies
- Drawings
- Features
- Parts
- Sketches
- Branching & Merging
- Release Management
- Documents
- Collaboration
Onshape Explained: 17 Features That Define Cloud-Native CAD
12.05.2025 learn more


