2:51
Imagine you’ve created a model of a successful product. It’s been released – it’s out there; perhaps even in production already. But then – based on some user feedback or maybe you just wake up with a new idea – you modify it. Your new change happens to make the product better in every single way.
What we’ve just described is certainly a new revision to a part, but of a special type. The new revision supersedes the old. We don’t want to use the old revision of the part ever again. In Onshape, we can handle this process through a Release Management flow called Obsoletion.
What Is Obsoletion in Onshape?
Obsoletion is a part of Onshape’s Release Management tools. It’s a simple way to mark that a previous revision has been superseded by a newer one, and no longer for use. Parts that have been obsoleted are clearly listed in the Where Used and Revision History data. They maintain all references and version history (nothing will be deleted), but have two important behaviors worth mentioning:
- An obsoleted part revision is deliberately blocked from being inserted into any new assemblies. Even though the obsoleted revisions still exist, they are simply absent from the “Insert” and “Update Linked Document” dialogs. This means that no user can reference that part in a new design, even by mistake.
- Any assembly or drawing containing a reference to a part that has been obsoleted will indicate this upon attempting to release.

These behaviors clearly reinforce to all users that the obsolete part should not be used, and needs to be updated with the newer revision.
How to Obsolete a Part
The Obsoletion process is very simple, and can be completed before or after the new revision has been issued.
- Navigate to the element you wish to obsolete. If it’s a part, right-click on it from the parts list in the Part Studio. If it’s an assembly, right-click the assembly tab. Select “Revision History”.
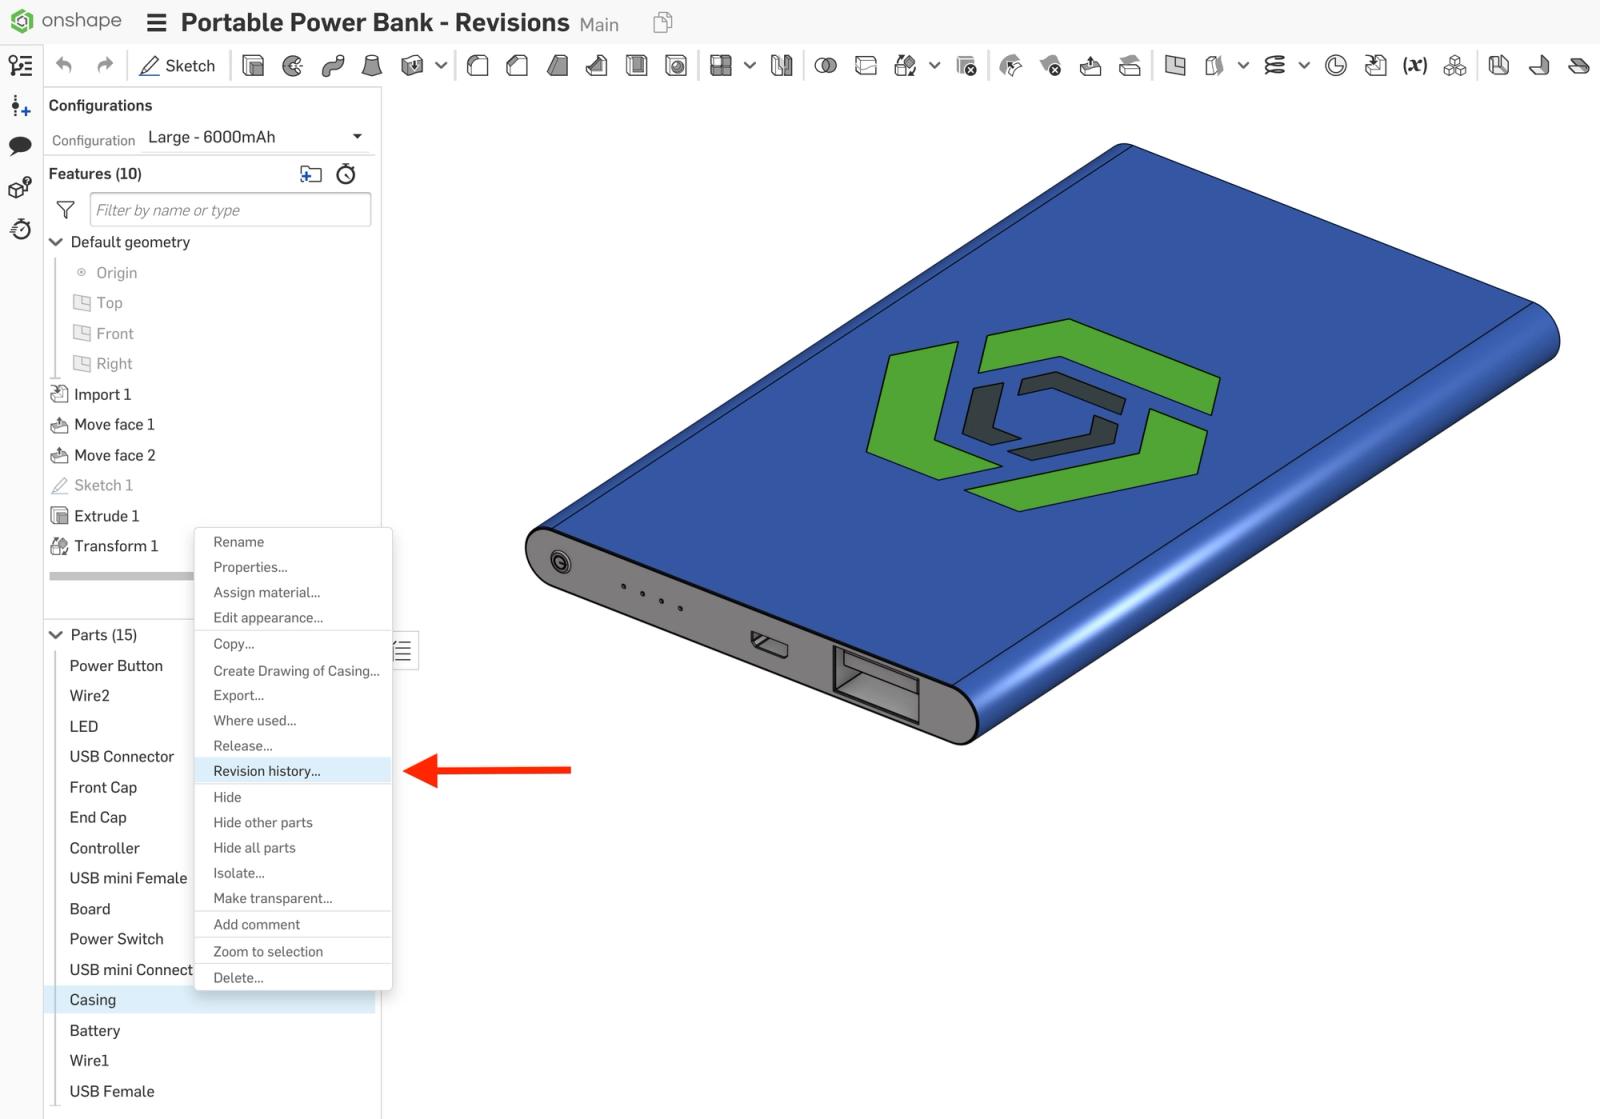
- Find the revision you’d like to obsolete and click the “Obsolete Revision” button.
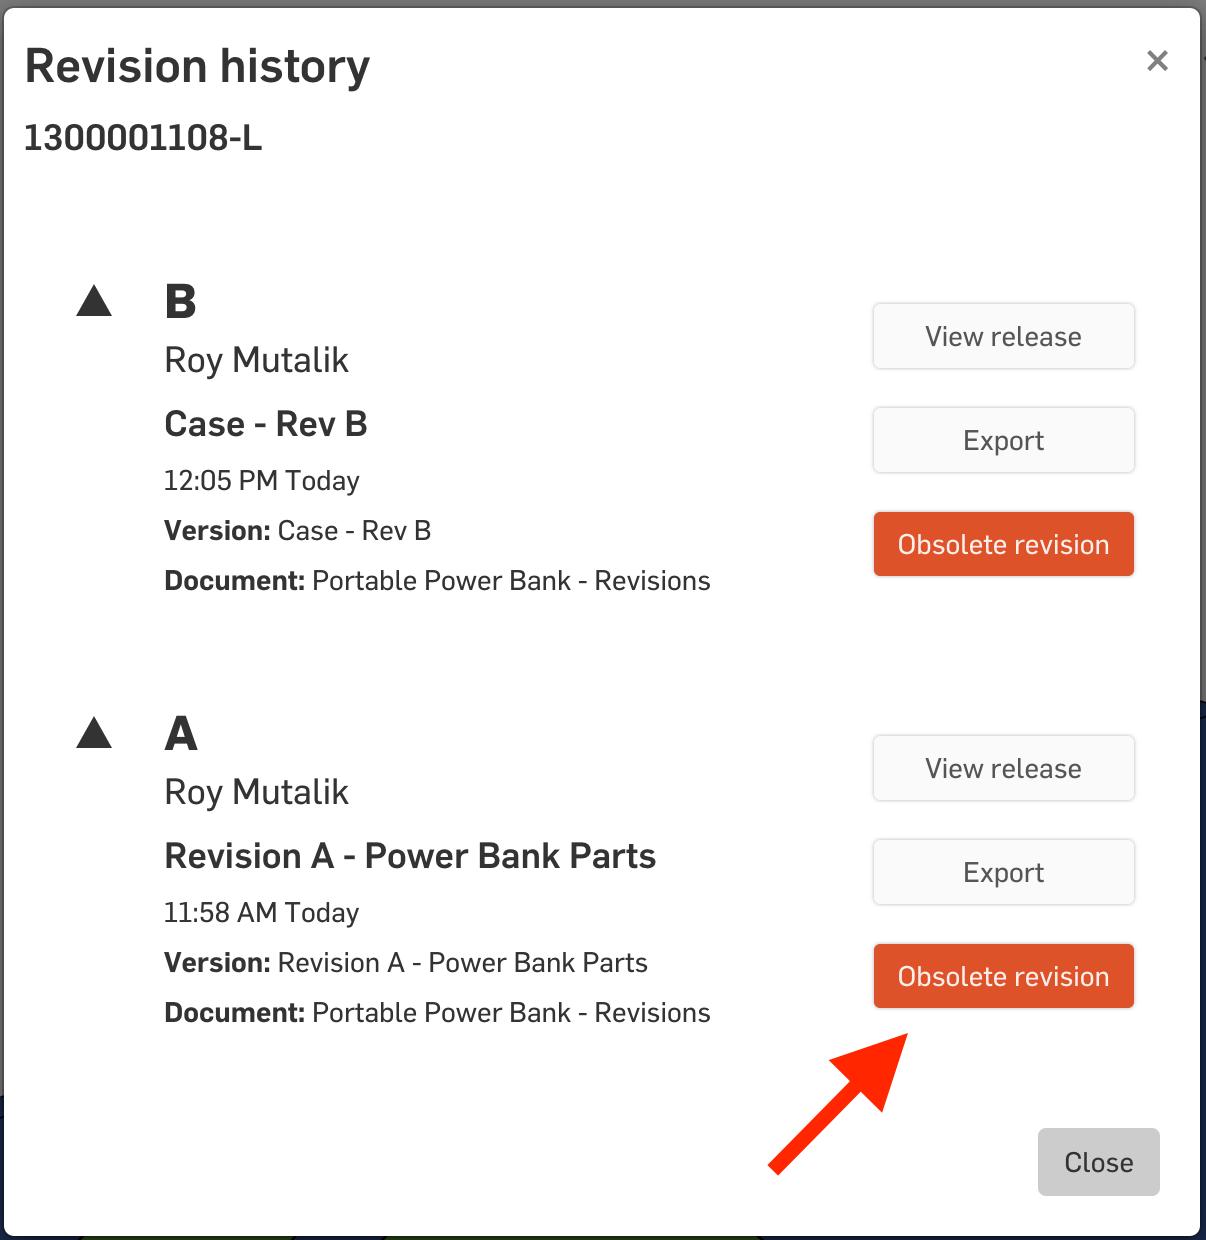
The “Obsoletion” dialog will appear. Fill out the appropriate fields, and select “Obsolete”.
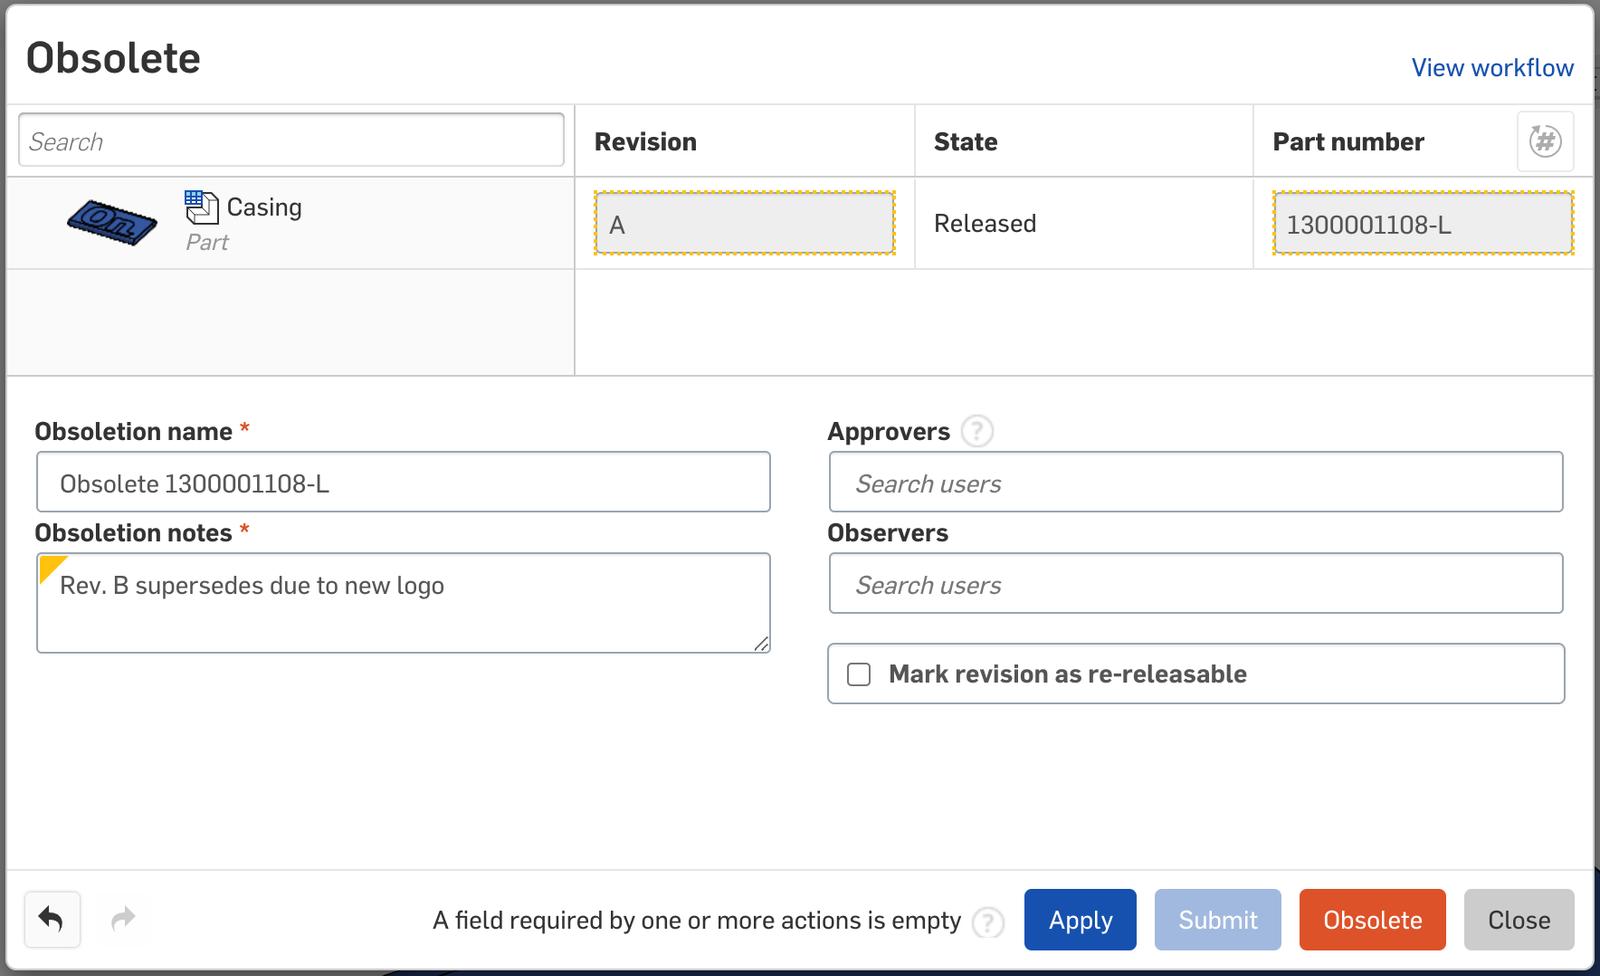
Note: similar to a release workflow, if approvers are required, the obsoletion will need to be approved before it takes effect.
That’s it! Your previous revision has now been obsoleted and will exhibit the behaviors mentioned above. Notice if you bring back up the “Revision History” from step 1, you’ll clearly see that the revision is obsoleted as well, with the option to view the “Obsoletion” dialog.

To see this process live, please take a look at the video below:
Using Obsoletion Workflows
The above process showed how to manually obsolete a single part on an as-needed basis. However, in some organizations any new release always supersedes the previous one. When this is the case, there is an option in the Release Management settings to automatically obsolete the previous revisions upon the approval of a newer one.
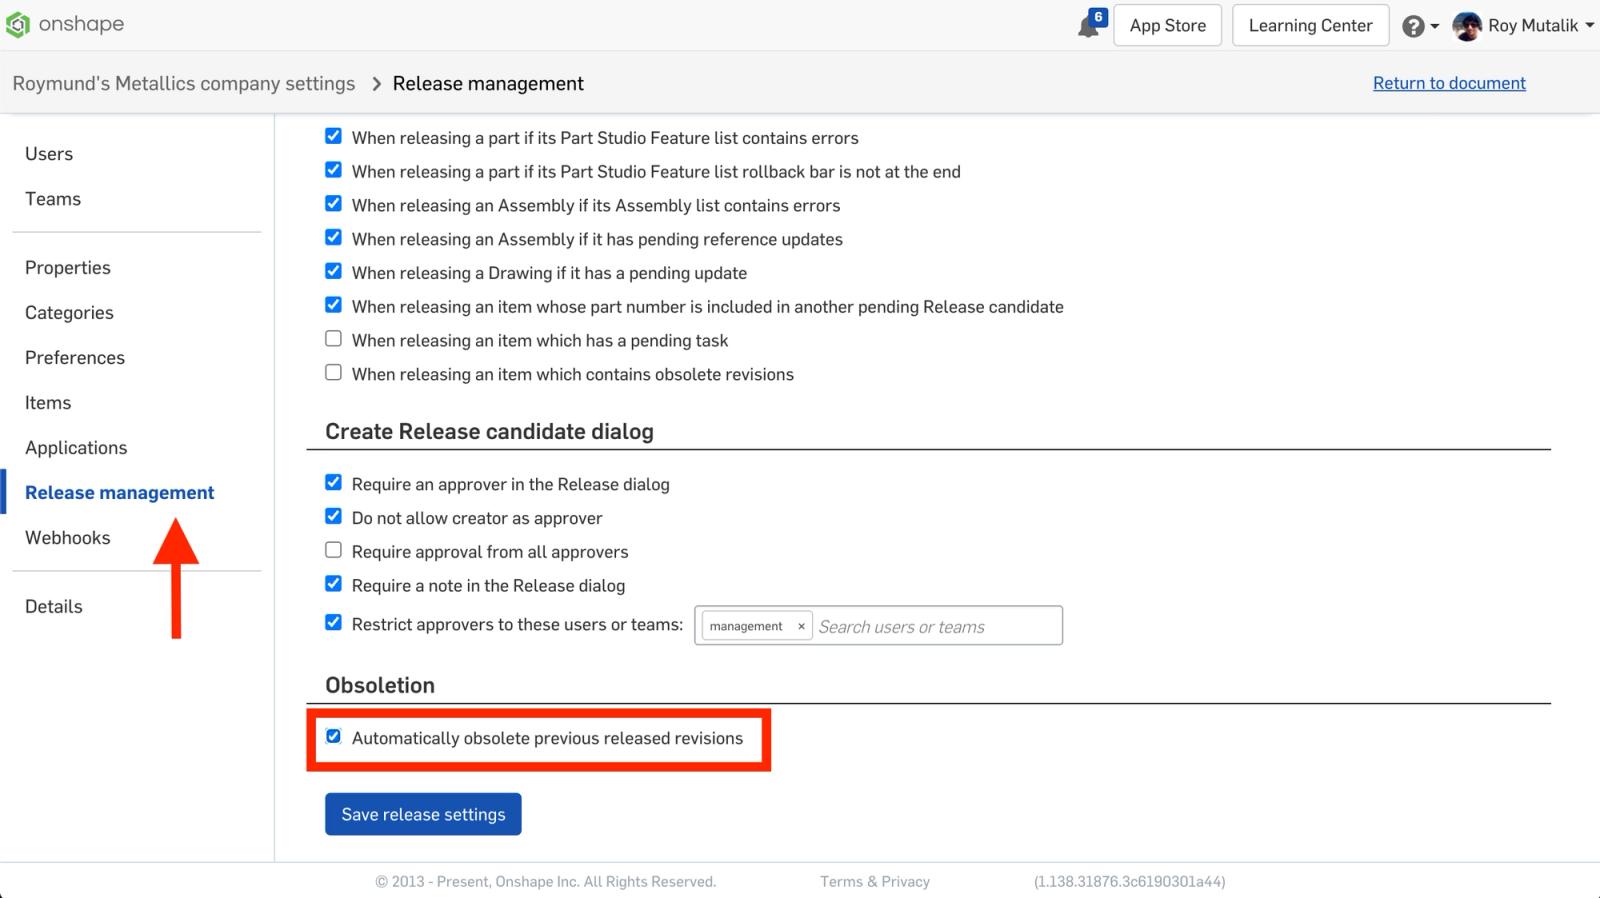
Finally, if you are using Onshape Enterprise, your Obsoletion workflows are fully configurable just like a Release workflow. This allows you the flexibility of multiple approvers, additional metadata fields, and much more.
Want to learn more about Onshape Release Management? Check out some of our Data Management Tech Briefings or consider attending a live, instructor-led Release Management class.
Interested in learning more Onshape Tech Tips? You can review the most recent technical blogs here.
Latest Content
- Blog
- Becoming an Expert
- Features
- Data Management
How Onshape's Repair Tool Fixes Broken References
01.29.2026 learn more
- Blog
- Startup
How Hardware Startups Can Cut Costs, Find Funding, and Scale in 2026
01.28.2026 learn more
- Blog
- Customers & Case Studies
Future Joinery Systems: Bridging the Gap Between Architecture and Manufacturing with PTC’s Onshape
01.23.2026 learn more


