
2:08
CAD share permissions differ from platform to platform, but Onshape makes giving, changing, and removing permissions to other users, teams, and the entire company an easy process.
In this Tech Tip, learn how to change and remove permissions.
Assessing Where Were Share Permissions Given in Onshape
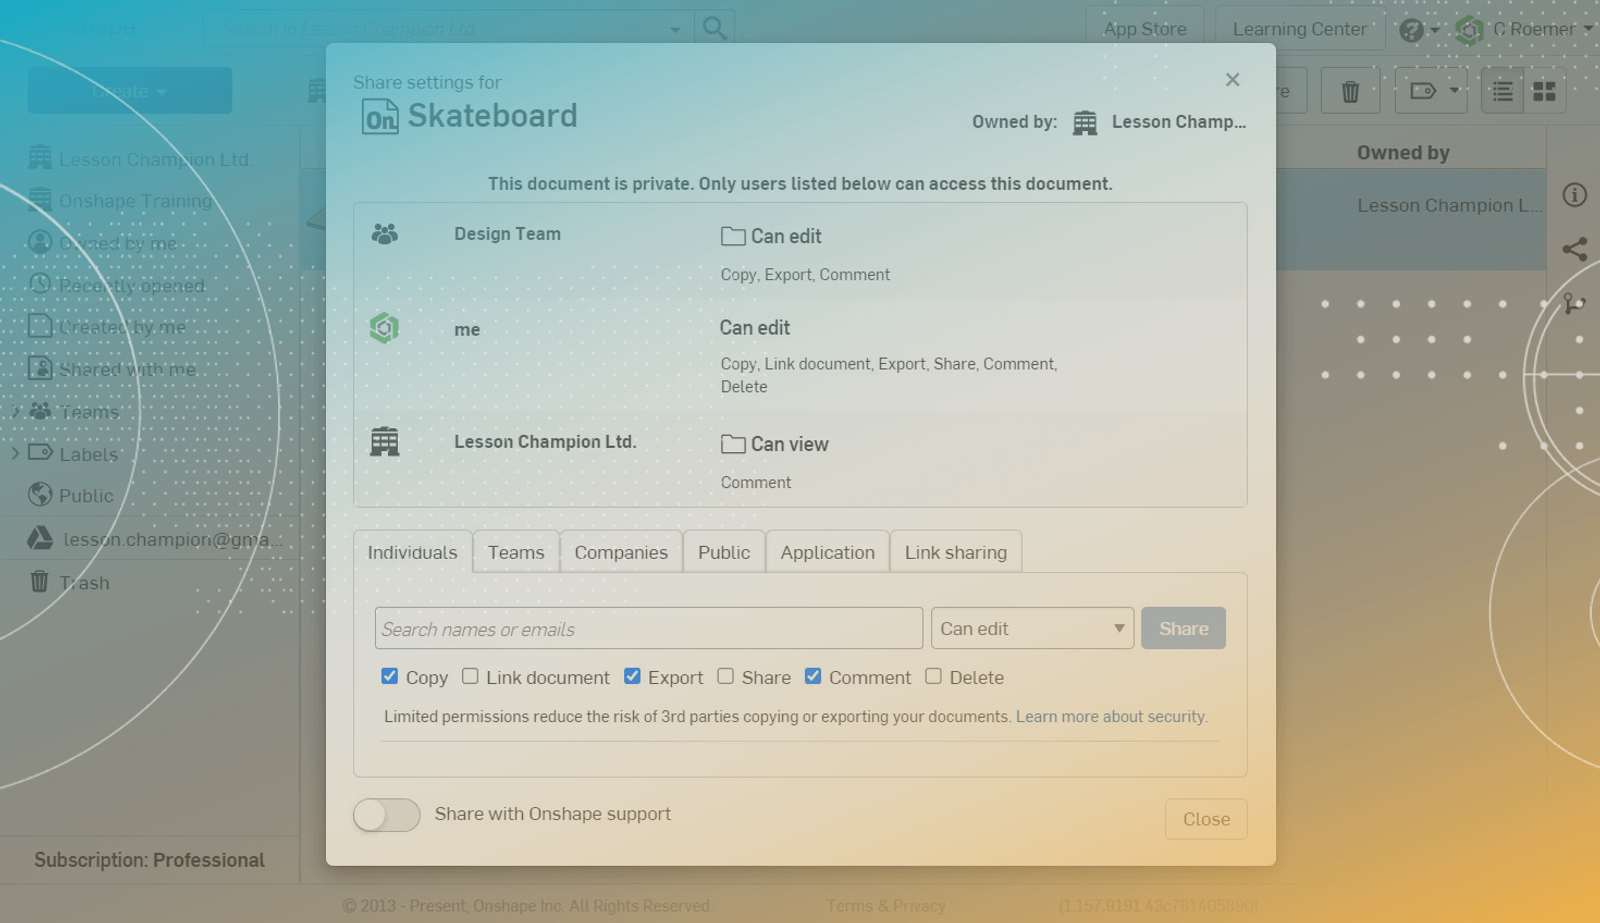
The first step to change or remove Share Permissions in Onshape is to assess where permission has been given. There are two locations to give access permissions with Onshape’s Share dialog: either from the top-level folder or from the Document itself.
When looking at the Share dialog of a Document, if permissions are given from the top-level folder this is indicated with a folder icon next to the permission set. The top-level folder is the folder located on your main Documents page. Permissions with the folder icon will need to be adjusted from the top-level folder.
When looking at the Share dialog of a Document, if the permissions lack a folder icon, the permission was given from the Documents Share dialog. These permissions can be adjusted from the Document Share dialog where you will see both a pencil and an “X” icon.
Changing or Removing Share Permissions in Onshape
Once you have assessed where the permission was given and have opened the correct Share dialog to access the permission settings, you can then either change or remove the permission set.
To change the permission set, select the pencil icon next to the permission set you wish to modify.
Selecting the pencil icon expands the permission options available for modification, such as:
- You can switch the permission set back and forth from “Can edit” to “Can view” with the drop-down list.
- Add additional permissions from within the permission set by checking the box next to the permission.
- Remove existing permissions from within the permission set by clearing the check box next to the permission.
Accept your changes by selecting the “Update” button.
To remove the permission set entirely, select the “X” next to the permission set. There is no dialog after this action confirming the removal – it is immediate.
Take a look at the video below for more on this topic:
Share Permissions in Onshape
There are two locations to give access permissions with Onshape’s Share dialog; from the top-level folder, or from the document itself. If you are looking for in-depth information about how to Share your documents, check out this Tech Tip on How to Share Your Onshape Documents.
Interested in learning more Onshape Tech Tips? You can review the most recent technical blogs here.
Latest Content
- Blog
- News from Onshape @ PTC
- Artificial Intelligence
Onshape Labs: AI in CAD Guided by Designers, Driven by Innovation
07.15.2026 learn more- Blog
- Evaluating Onshape
- Data Management
- Collaboration
- Artificial Intelligence
How the Most Underrated CAD Feature Improves Design Workflows
07.09.2026 learn more- Blog
- Evaluating Onshape
- Collaboration
With Cloud CAD and PDM, Flexible Design for a Summer Coolcation
07.02.2026 learn more