
1:47
The sketch Constraint manager in Onshape is a powerful tool that provides a clear, visual way to understand and manage complex sketch constraints. It helps identify and resolve constraint issues quickly, ensuring sketches are well-defined and behave as intended.
Accessing the Constraint Manager
To open the Constraint Manager:
- Open a sketch for editing.
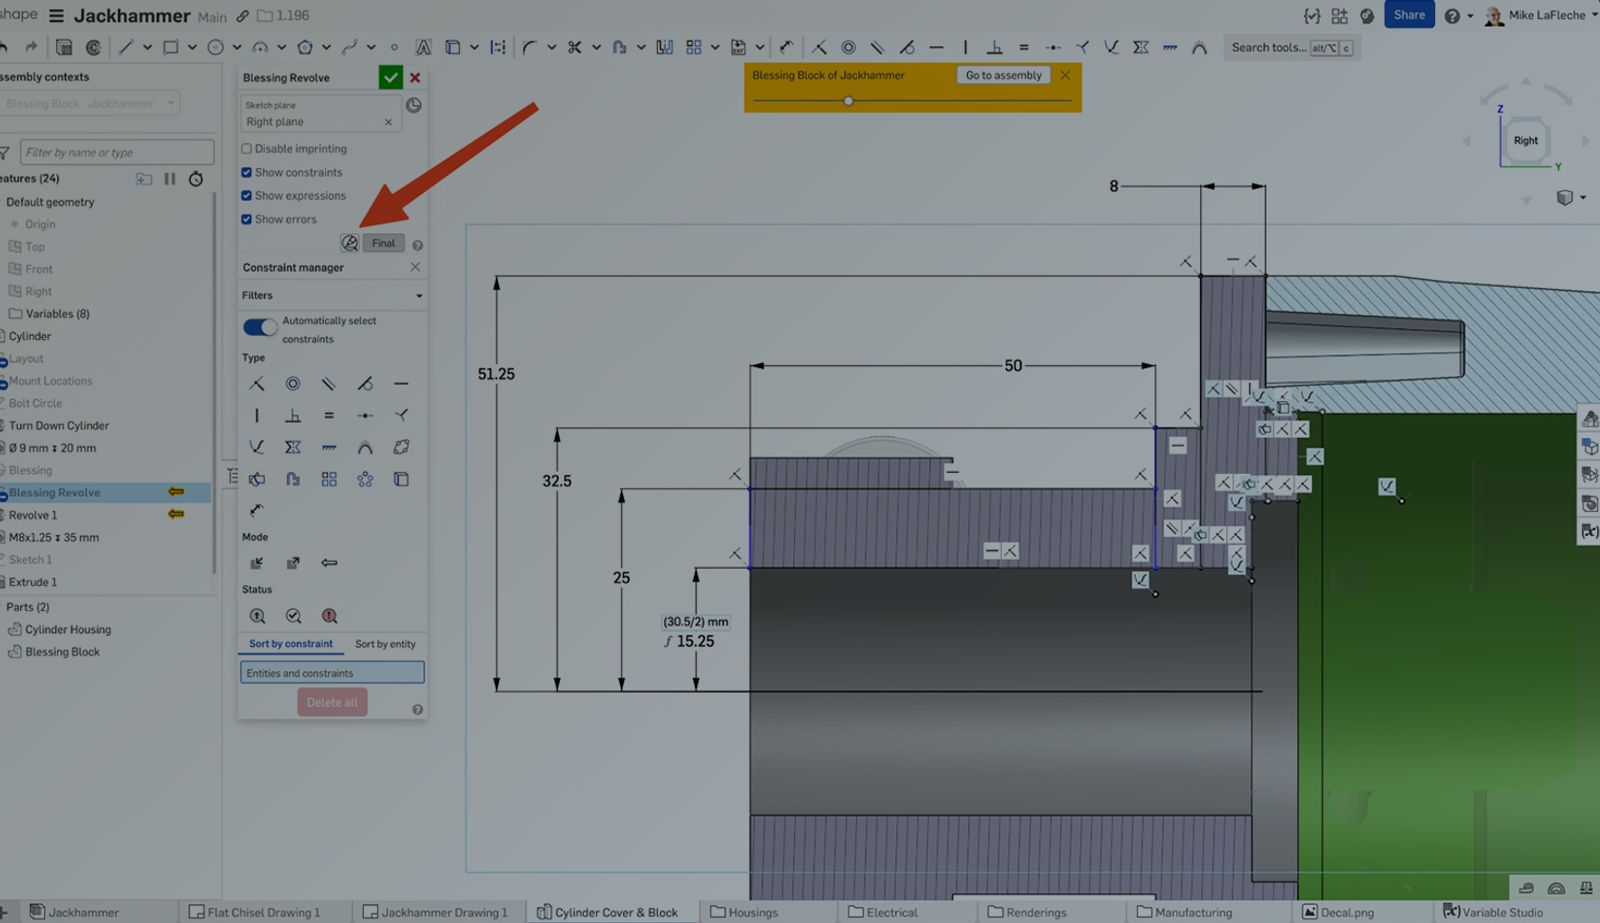
- Click the Show sketch diagnostic tools icon.
- Select Constraint manager from the menu.
The Constraint manager dialog opens, where all sketch constraints and dimensions can be viewed, selected, filtered, and edited.
3 Ways the Constraint Manager Enhances Your Workflow
1. Quickly Identify and Resolve Constraint Conflicts
When a sketch is over-constrained or has conflicting constraints, the Constraint manager highlights these issues:
- Conflicting constraints: Shown with a white symbol on a red background
- Under-constrained entities: Shown in blue
- Fully constrained entities: Shown in black
Problematic constraints can be isolated and addressed efficiently when filtering constraints by Error status.
2. Manage External References with Precision
Constraints applied between entities in different sketches are differentiated by a blue background. The Constraint manager can:
- Filter and view external references: Helps to visualize and point out dependencies between sketches.
- Hide external references: Focus on internal constraints.
This is particularly useful in managed in-context editing, where controlling external references is crucial for maintaining design intent.
3. Efficiently Filter and Edit Constraints
The Constraint manager provides flexible filtering options:
- Type: Filter by constraint type (for example, coincident or parallel).
- Mode: Distinguish between driving and driven dimensions.
- Status: Identify solved, under-constrained, or conflicting constraints.
Select constraints directly from the list, highlight associated sketch entities, and delete or modify constraints as needed.
Pro Tips
- Hover over constraints in the Constraints manager to see the entities to which they apply. Related entities are highlighted yellow.
- Use the Zoom to selection feature to focus on specific constraints or entities in your sketch.
- Drag constraint icons to reposition them for better visibility without affecting their function.
By leveraging the Constraint manager, you gain greater control over your sketches, leading to more robust and predictable designs.
Explore the Onshape Learning Center for more insights and robust lessons on working in a cloud-native CAD environment.
The Onshape Learning Center
Take self-paced courses, read articles, or sign up for an instructor-led training session.
Latest Content
- Blog
- Becoming an Expert
- Assemblies
Built to Scale: Why Large Assemblies Don’t Slow Down in Onshape
07.16.2026 learn more- Blog
- News from Onshape @ PTC
- Artificial Intelligence
Onshape Labs: AI in CAD Guided by Designers, Driven by Innovation
07.15.2026 learn more- Blog
- Evaluating Onshape
- Data Management
- Collaboration
- Artificial Intelligence
How the Most Underrated CAD Feature Improves Design Workflows
07.09.2026 learn more