
00:00
Summary
Use curve approximation in Onshape to fix curvature defects and reduce control points in surfaces.
When creating projected curves in Onshape, it’s easy to assume the resulting curve is “good enough” to build surfaces from. You take two sketches, each defined by its own parameters, and project them into 3D space to form a compound curve that combines their constraints. Very often, Onshape produces high-quality curves from this process, especially when you take the time to create quality sketch curves on their respective planes.
In certain cases, when you are projecting sketches with a large number of control points or curvature discontinuities, approximating your projected curve can help.
Spotting a Low-Quality Projected Curve
The model shown below was imported from another CAD system, but this applies to native geometry as well. The profile sketches on the top plane are of good quality, but the upper profile curve on the right plane seems to have some issues. Curve analysis tools show many inflection points in what should be a simple curve, and those become even more apparent in the resulting projected curve.
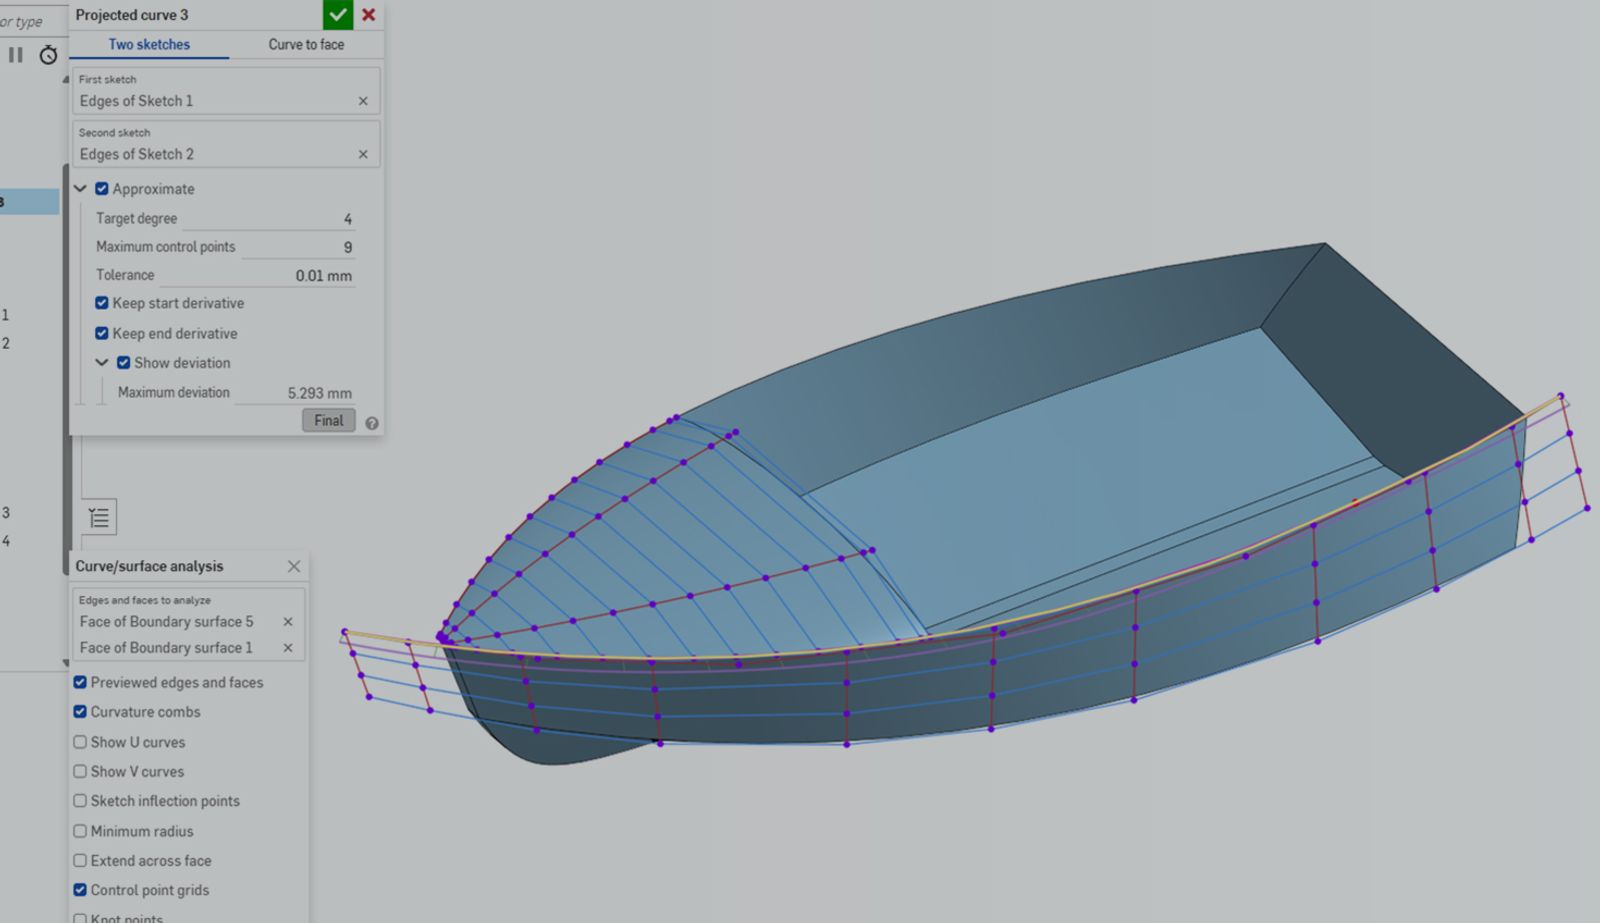
Not all projected curves come out low-quality, though, as you can see from one created from two high-quality sketches, which is the lower level of this boat model.
How Possible Defects Spread Downstream
When you start reviewing the downstream effects of this, the boundary surface curvature is low quality, and there are many extremely small control-point grids. This is not what you want to see when surfacing.
These dense control point grids also perforate through to the additional boundary surfaces and fills that are created.
Fixing the Curve with Approximation
This is easily fixed by approximating the starting projected curve that was created first. You can increase or decrease the degree of the curve and the number of control points created. Keeping starting and ending derivatives maintains the continuity that was designed into your original sketches, if applicable.
During this point, where you iterate on the new approximated curve you create, you can review the maximum deviation from your original curve and still keep your Curve analysis running to get real-time feedback.
Once you’ve approximated your curve, the results are immediately noticeable. Rolling down through the Feature list shows that the boundary surfaces and fills with these projected curves as guides have significantly fewer control point grids than before, indicating an increase in surface and curve quality.
When to Use Edit Curve Instead
Note that approximation isn’t a magic wand for all your curve edits, especially if you have strict requirements for connecting points inside your curve to other curves or surfaces, and you need stronger control over your deviation from the original curve. In these cases, it may be better to use another feature, like the Edit curve, where you get significantly more control over every control point of your curve.
Surfacing for organic geometry isn’t always an exact science; a lot of it is guess and check, so test out the approximate options within the Projected curve and other curve features and see how it works for you.
Interested in learning more Onshape Tech Tips? You can review the most recent technical blogs here.
Friends Don’t Let Friends Use Old CAD!
Know a colleague who could benefit from our cloud-native, fully-featured collaborative design platform?
Latest Content
- Blog
- News from Onshape @ PTC
- Artificial Intelligence
Onshape Labs: AI in CAD Guided by Designers, Driven by Innovation
07.15.2026 learn more- Blog
- Evaluating Onshape
- Data Management
- Collaboration
- Artificial Intelligence
How the Most Underrated CAD Feature Improves Design Workflows
07.09.2026 learn more- Blog
- Evaluating Onshape
- Collaboration
With Cloud CAD and PDM, Flexible Design for a Summer Coolcation
07.02.2026 learn more