
02:08
TL;DR: Onshape’s Measure tool helps you inspect geometry, measure drawings without adding dimensions, and convert measurements into variables that drive downstream features, making it a powerful, everyday workflow accelerator.
Onshape’s Measure tool does exactly what it says it does – it’s your ruler for CAD. In this Tech Tip, we will explore how and when to use it.
How to Use the Measure Tool
- Part Studios & Assemblies: To use the Measure tool, simply select the geometry you want to inspect. In Part Studios and Assemblies, measurements appear immediately when you select faces, edges, planes, mate connectors, or points. The Measure readout is displayed in the bottom‑right corner; click the Measure icon to expand the full dialog for additional options.
- Measure also works in section views, making it easy to inspect internal geometry without creating construction sketches.
- Drawings: Click the Measure icon in the bottom-right to open the Measure dialog, then select entities in a drawing view.
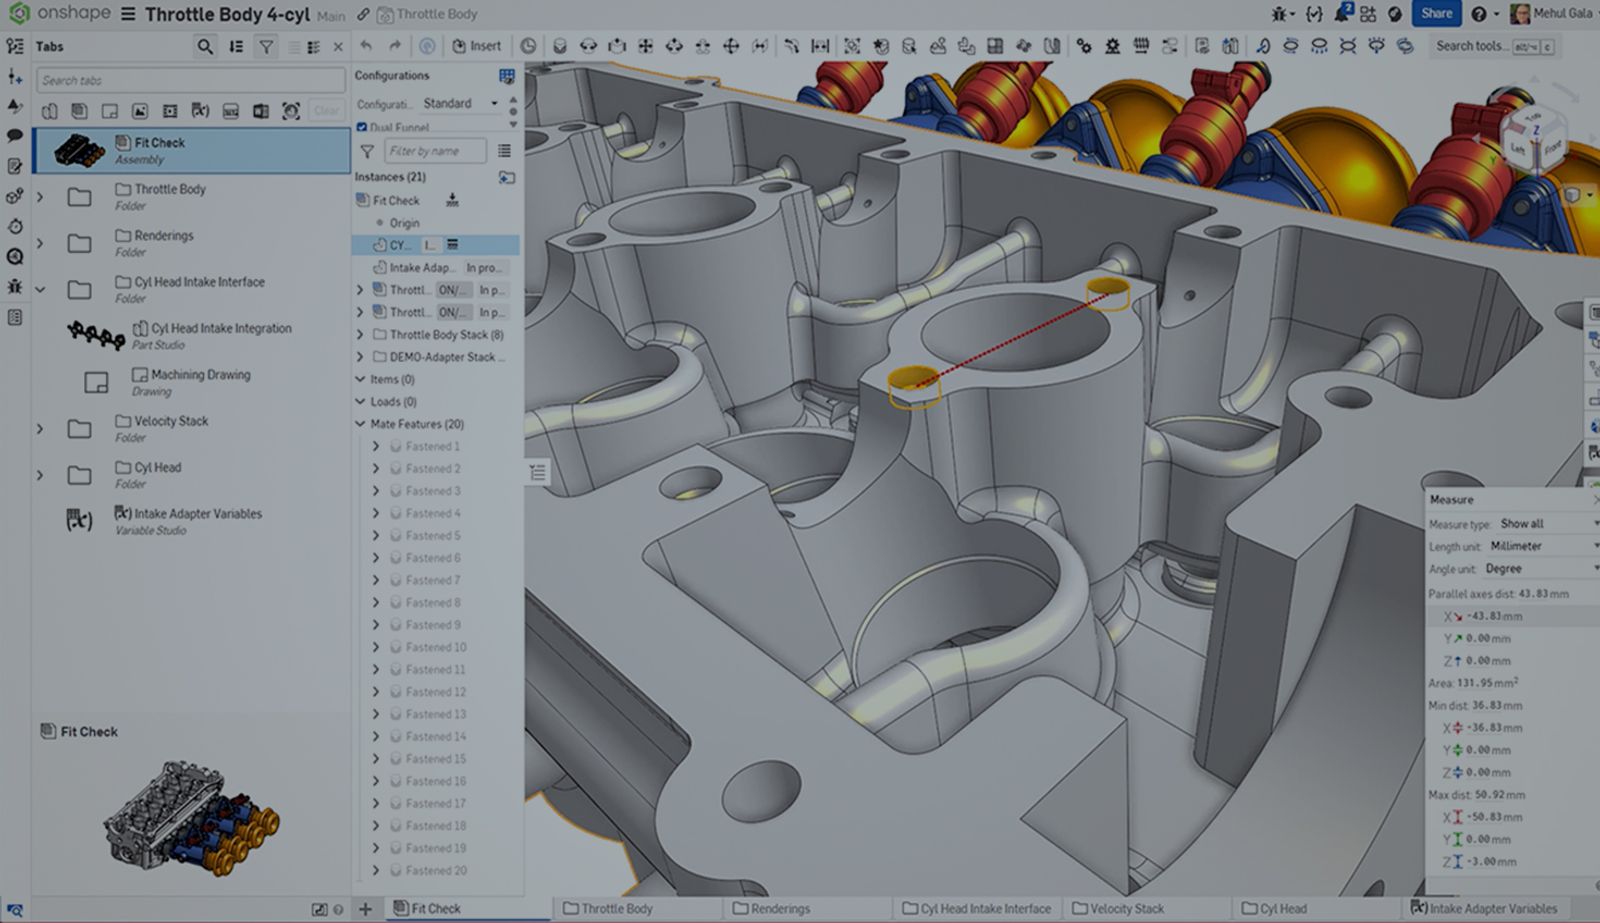
- To measure an angle, select two non‑parallel faces or edges to display the angle between them.
Part Studios & Assemblies: Quick Workflow
- Select one entity to see the most relevant information, for example, length, radius/diameter, surface area, or position.
- Select a second entity to get distance relationships such as center-to-center, maximum-to-maximum, and minimum-to-minimum.
- Use the on-screen visual cues to interpret results fast: ΔX = red, ΔY = green, ΔZ = blue or bold, dotted lines indicate center/max/min distance visuals.
- Click the Measure icon to open the dialog and use Measure type to filter what’s displayed (Position, Min/Max distance, Angle, Surface area, and more).
Drawings: Measure without Adding Dimensions
In Drawings, the Measure dialog lets you measure points, lines, arcs, and circles on projected views without placing a permanent dimension annotation.
You can also:
- Choose units from the dropdown (the drawing’s default units are labeled “Drawing”)
- Turn on Show dual units if you want a second unit shown alongside the first
- Use it even with view-only access
Power Move: Turn a Measurement into a Variable (Part Studios)
If you want a measurement to drive downstream features, click the variable icon next to a measurement to create a measured variable. That variable will update if the referenced geometry changes.
Pro Tips
- Use Measure type filters to reduce noise when you only care about a single result (e.g., Min distance for clearance checks).
- In Drawings, Measure is ideal for reviewers and vendors: get the number you need without modifying the drawing.
Friends Don’t Let Friends Use Old CAD!
Know a colleague who could benefit from our cloud-native, fully-featured collaborative design platform?
Latest Content
- Blog
- Evaluating Onshape
- Arena PLM Connection
The Cloud-Native CAD-PDM-PLM Workflow That Finds Problems Before They Cost You
06.11.2026 learn more- Blog
- News from Onshape @ PTC
- Artificial Intelligence
- Robotics
How Multi-Agent Orchestration Between Onshape and NVIDIA Improves CAD-to-Simulation Workflows
06.01.2026 learn more- Blog
- Evaluating Onshape
- Robotics
- Aviation, Aerospace & Defense
- Collaboration
- Integrations
- Arena PLM Connection
- Data Management
Why the Best Hardware Teams Have Started Talking Like Software Engineers
05.28.2026 learn more