
 Create a Student Account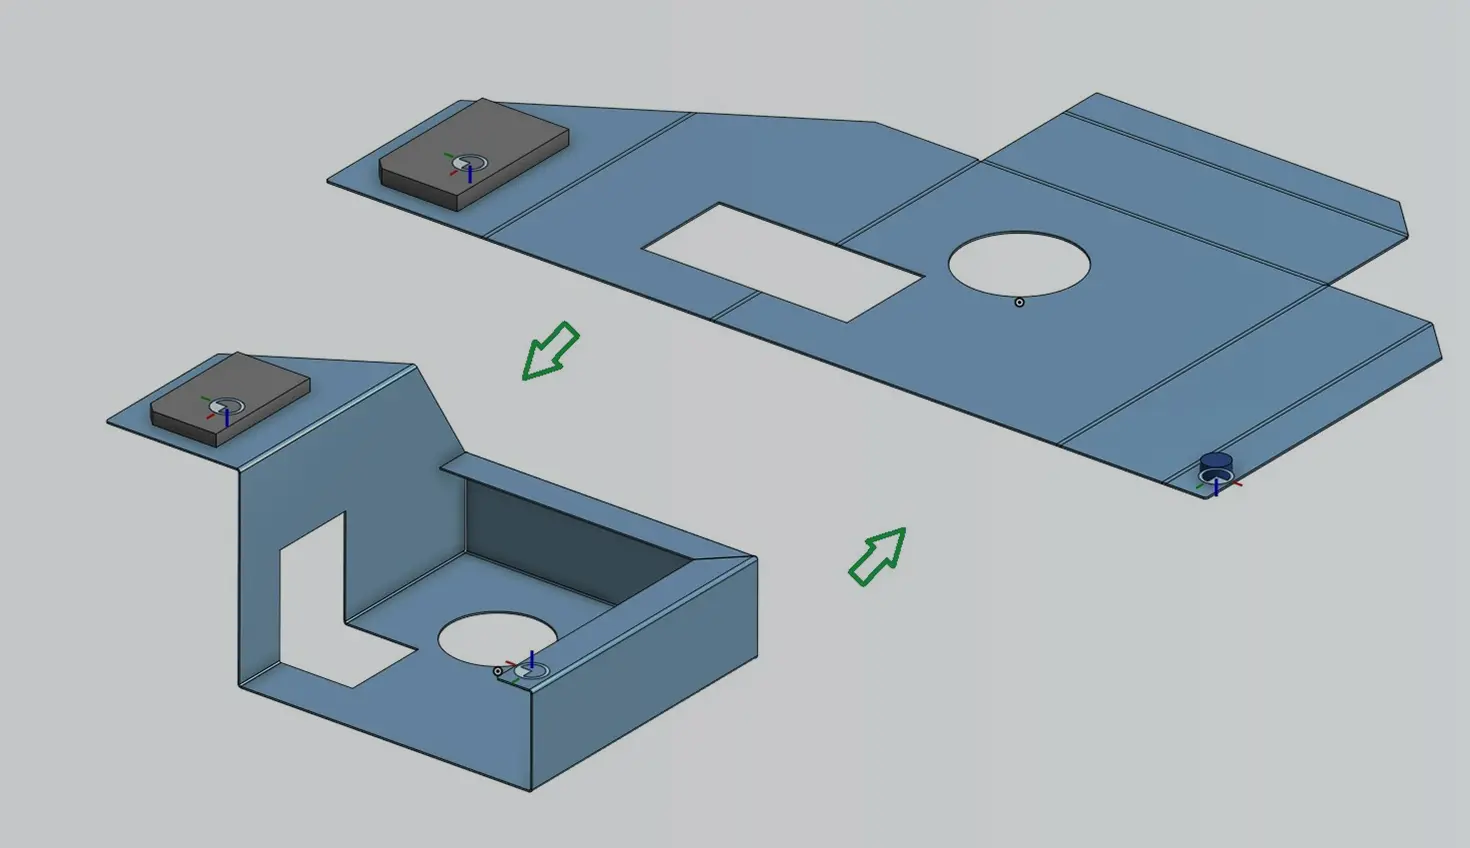
01:14
Ever had a Mate connector go rogue when your part geometry changed? That's where the Attachment option in the Mate connector feature becomes your best friend. It keeps components aligned and moving correctly downstream, whether you're working in a Part Studio or an Assembly.
Let's Start in the Part Studio
Create a Mate connector on a part face, then set the Attachment to that same face using "To selection."
If that face ever moves, your Mate connector moves with it. No orphaned connectors, no manual fixes – it just updates.
A Step Further
Say you’re placing non-sheet metal components in a specific spot relative to a sheet metal part but you still need those components to move correctly when the sheet metal folds or unfolds.
The Attachment option handles this too:
- Use the grey part's geometry to define where the Mate connector sits
- Choose the sheet metal part's face for the Attachment selection
- Set the sheet metal part as the Owner Entity
This gives you precise positioning now, with the flexibility to track the sheet metal's motion later.
Now, bring it into the Assembly.
Insert your parts, then mate them using that explicit Mate connector you just set up. From there, a simple Configuration checkbox lets you flip between the bent and folded states with one click.
That's it. You’ve just leveled up your Mate connector game with the Attachment option. Small feature with lots of control.
This Tech Tip helped you learn how to use the Attachment option in the Mate connector dialog.
Friends Don’t Let Friends Use Old CAD!
Know a colleague who could benefit from our cloud-native, fully-featured collaborative design platform?
Latest Content
- Blog
- News from Onshape @ PTC
- Artificial Intelligence
- Custom Features
From Onshape Labs, the FeatureScript MCP Server: The Fastest Path to AI-Driven Design
08.11.2026 learn more- Blog
- Becoming an Expert
- Data Management
15 Things to Know Before Importing CAD Files into Onshape
08.06.2026 learn more- Blog
- Evaluating Onshape
- Model Based Definition
- PCB Studio
- Rendering
- Simulation
- Integrations
Onshape Features That Keep Your Design Data Connected: August 2026 Highlights
08.05.2026 learn more