
03:55
Summary
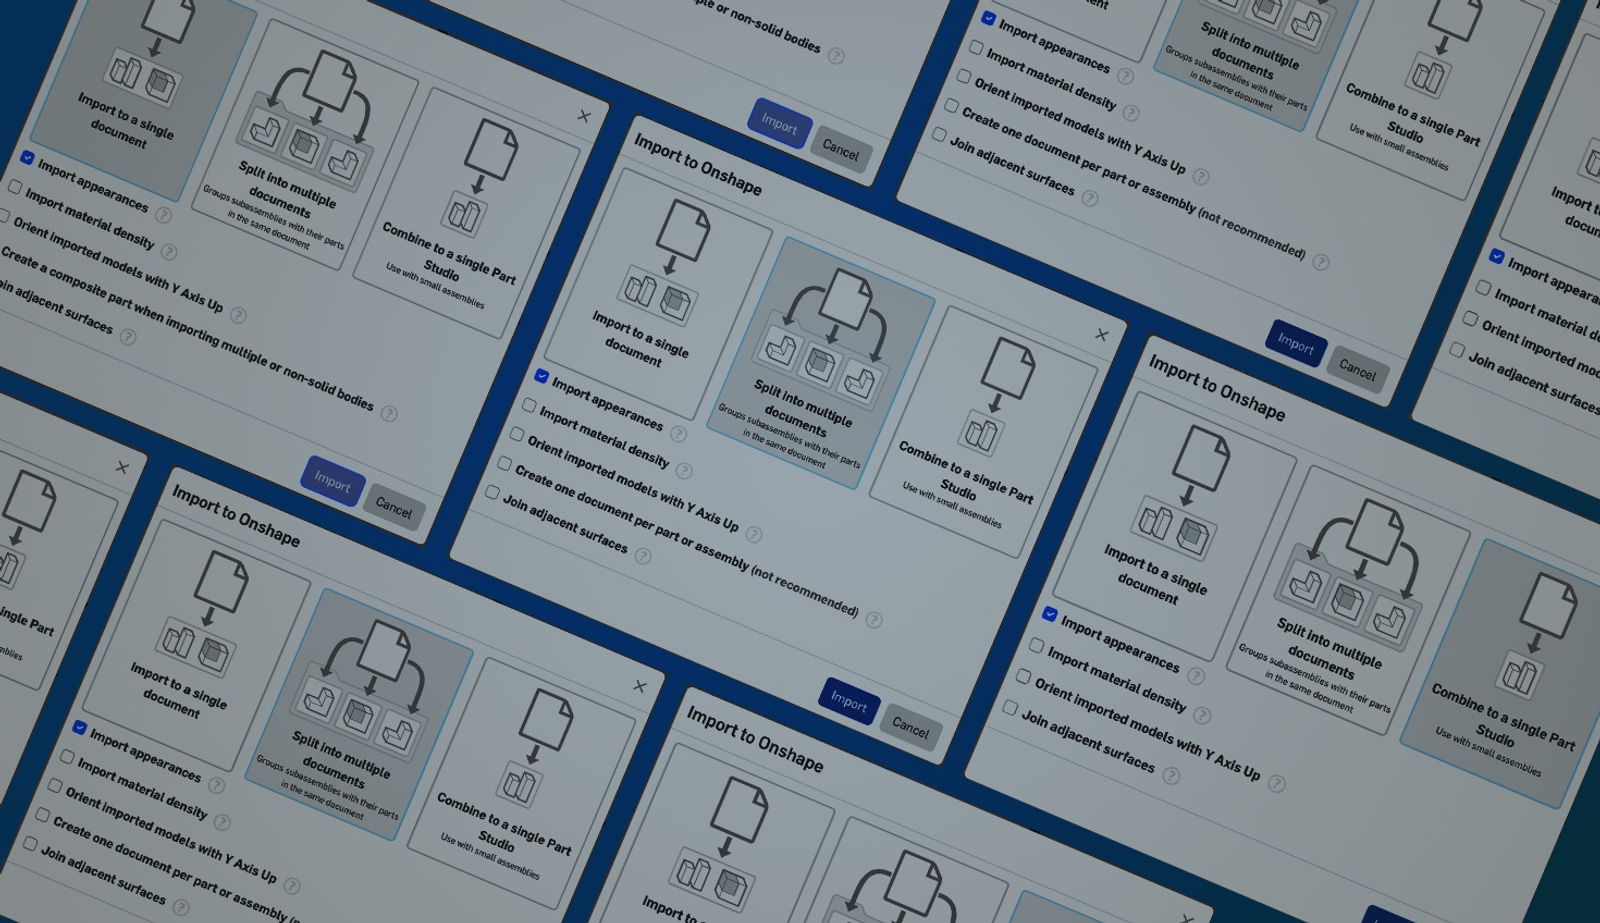
There are three ways to import data into Onshape:
- Import to a single document
- Split into multiple documents
- Combine to a single Part Studio
Each one has a different use case. Option 2 is the best default to follow Onshape best practices.
No matter what products we design in Onshape, we all have one thing in common: At some point, we’ll want to import some data.
Whether it’s a previous design you are migrating from a legacy CAD tool, or purchased parts in CAD-neutral format that you want to use in a design, the challenge is the same: How do I effectively bring this data in?
Since this is such a common task, we wrote a refresher piece just a few weeks back on how to import data.
Once you initiate an import of CAD data by selecting your file(s), you’re presented with three options:
We’ve also written tips about each of these options, and find them documented in the Help as well.
However, in this Tech Tip, I’ll use the information we’ve learned about imports from the links above to show when you might select each of the three import options and why.
Option #1: Import to a Single Document
Use when: Importing small to medium-sized individual assemblies
The first Import option creates a single document containing the top-level assembly, any sub-assemblies, and all part instances. It is the most convenient in many cases, as it results in a single, self-contained document containing all your import data.
A great use case for this selection is smaller sub-assembly structures of your own design that might be instanced several times or reused across multiple projects.
However, remember our 10 Essential Onshape Tips, namely the first tip, which says to “limit the number of tabs to 40 or fewer.” This is why this option is really only best for smaller, individual assemblies, and not complete project imports. For larger imports, use option #2.
Option #2: Split into Multiple Documents
Use when: Importing larger assemblies and/or full project import
The second option in the import dialog imports all data, splitting it across linked documents grouped by subassemblies. In our experience, this is the most common selection a new user of Onshape will want to select when importing a dataset.
In another Tech Tip on structuring Onshape documents, when the number of tabs grows, you should use Move to document to split them out. The beauty of this import option is that it splits the data for you on import, creating multiple documents with fewer tabs in each one.
When importing any larger assemblies, especially when migrating a completed product from a legacy CAD tool, you must use Split into multiple documents. Even if option #1 succeeds in importing, it will likely create a single document that is too large and has too many tabs. This can cause problems down the line as you continue to design and reference it.
Option #3: Combine to a Single Part Studio
Use when: Importing small assemblies that are referenced, library components, and/or purchased parts
The third import option imports all data without creating an assembly. It instead locates all parts correctly as they are assembled, but in a single Part Studio within a document.
This is a great option for assemblies you want to use in your design, but won’t be modifying. For example, the hydraulic jack in the above image, which is a purchase to be installed in the design, and even though the supplier sends the full assembly, we really only need to treat it as a single component (perhaps, also with only one part number).
You can store the document directly in a project-specific location or capture it in a library folder structure if it is for reuse.
However, this option should really only be used with small assemblies. Once again referencing our best practices and the 10 Essential Onshape Tips, the fourth tip states, “Part Studios define between 1 to 10 unique parts.”
Truth be told, yes, you have permissions to have more than just 10 parts in the Part Studio when using this import method (especially if you won’t be creating any native features), but the concept still holds, it’s best for smaller assemblies that are being used “as is.”
For larger assemblies, once again, use option #2.
The Takeaway: Default to Option #2
I hope you found these quick use cases for each import option helpful in explaining the different import paths.
If I were to boil down this Tech Tip to one singular takeaway, I would suggest you always default to the second import option, Split into multiple documents. It is the most likely to follow Onshape data structure best practices. Options #1 and #3 are extremely powerful and can be more convenient, but should be used very deliberately, only when their results align with Onshape best practices.
Friends Don’t Let Friends Use Old CAD!
Know a colleague who could benefit from our cloud-native, fully-featured collaborative design platform?
Latest Content
- Blog
- Becoming an Expert
- Assemblies
Built to Scale: Why Large Assemblies Don’t Slow Down in Onshape
07.16.2026 learn more- Blog
- News from Onshape @ PTC
- Artificial Intelligence
Onshape Labs: AI in CAD Guided by Designers, Driven by Innovation
07.15.2026 learn more- Blog
- Evaluating Onshape
- Data Management
- Collaboration
- Artificial Intelligence
How the Most Underrated CAD Feature Improves Design Workflows
07.09.2026 learn more